Friday, 6 July 2012
brown sugar meringue w verjuice figs & honey-cinnamon yoghurt
These are divine. The outside are perfectly crisp and break with a pop under your fork, yet the inside is a fluffy, sticky, gooey texture almost like a melted marshmallow.
And the flavour! You can certainly taste those perfect burnt, dark toffee sugars.
I first tried brown sugar meringues at a wonderful slow food wine dinner at Mumu Grill in Crows Nest, and although I have yet to venture across the Harbour Bridge to the far northern shores of Sydney, to dine at this restaurant again, the wonderful meal is branded into my food memory, especially the “brown sugar pavlova”.
This is one of my 2012 Food Challenges, to recreate recipes I had experienced at restaurants and boy does this recipe tick all the boxes.
It was a while ago since I ate the Mumu Grill version, but accompanied with the verjuice figs and the sourness of yoghurt, I might even bravely claim that my version is better.
Brown Sugar Meringue w Verjuice Figs & Honey-Cinnamon Yoghurt
Anna’s very own recipe. Serves 6.
Ingredients:
3 egg whites, at room temperature
100g dark brown sugar
50g caster sugar
Pinch of Tahitian vanilla salt
½ cup pomegranate seeds
125ml thick low fat Greek yoghurt
1 tablespoon honey
½ teaspoon cinnamon
18 dried figs
⅓ cup verjuice
⅓ cup caster sugar, extra
Method:
1. Preheat the oven to 120°C.
2. In a mixing bowl, beat the egg whites until soft peaks form.
3. In another bowl, combine the sugars and salt and stir thoroughly.
4. Beat in the sugar mixture in 1 tablespoon batches, making sure each amount is incorporated before adding more.
5. Beat until the meringue is thick and glossy, holding its shape (peaks).
6. Spoon meringue into six small mounds, leaving space for them to spread and using spoon to create peaked tops.
7. Bake in the centre of the oven for 60 minutes, then prop open oven door slightly and leave to cool for one hour before removing. Cool one more hour before serving.
8. Meanwhile, prepare the figs by heating the verjuice and ⅓ cup caster sugar until boiling. Add figs then bring to the boil and cook for another 3 minutes. Remove from heat and allow figs to cool in syrup.
9. Make the yoghurt by mixing with the honey and cinnamon, then return it to the fridge.
10. To prepare the dish, take a meringue then dollop the honey-cinnamon yoghurt around it. Top with figs and pomegranate seeds.
Labels:
anna original,
food challenges,
fruit,
something sweet
Sunday, 1 July 2012
smoked apple & chestnut ravioli w cinnamon apple butter
Back in 2007, a few days after our wedding, Jonas and I visited Rockpool, back in it's original iteration when it was one of Sydney's finest, and ordered their extensive degustation menu with premium matching wines. It still stands as the most expensive meal of my entire life, and with the same money we could have bought an overseas airfare and possibly accommodation. Don’t ask, suffice to say it was expensive.
But the memory was also priceless, as it was our wedding gift to each other and many of the dishes we ate on that evening have remained with us.
One in particular was an apple and chestnut ravioli, a dish served to Jonas in his vegetarian days. It was a confusion of sweet and savoury apple and cinnamon and herbs. A clever combination that was executed perfectly.
This year, as one of my 2012 Food Challenges, I decided I needed to recreate recipes I had experienced at restaurants. This was one of them, but I decided to put my own twist on it by using smoked apples, that I hot smoked myself in my Nipper Kipper smoker.
While it was a somewhat complicated recipe (a lot of steps to go through), I feel really rewarded for my efforts.
It was a very elegant dish and would be a big hit at a swanky dinner party.
Unfortunately for me, every shop I visited was out of wonton wrappers so when I finely found some they were square rather than round. Please go with the round versions, they will be much prettier.
And be sure to top your dishes with fresh herbs. They really cut through the intensity of the rich glaze sauce.
I used butter and chicken stock, but you could easily make this a vegetarian version with veggie stock or a vegan version with olive oil instead of butter and go with non-egg-based pasta.
Any leftover ravioli filling can be set in the fridge and eaten as a vegetarian paté.
Smoked Apple & Chestnut Ravioli w Cinnamon Apple Butter
Anna’s very own recipe. Serves 4.
Ingredients:
Smoked apples
2 green apples
Smoker
Wood chips
Ravioli
32 round egg wonton wrappers (for 16 ravioli)
2 tablespoons chopped sage
1 tablespoon butter
1 teaspoon smoked salt
½ white onion, chopped
1 garlic clove, chopped
1 teaspoon freshly milled black pepper
1½ smoked apple, chopped
100g chestnut purée
Butter for frying
Beaten egg, for sealing wonton wrappers
Butter Sauce
50g butter
1 teaspoon onion powder
½ teaspoon ground cinnamon
¼ cup verjuice
Sprig of lemon thyme, picked over
½ smoked apple, chopped
½ cup chicken consommé
¼ cup boiling water
1 teaspoon sugar
Black pepper
Salt
Fresh sage leaves, small and picked over
Method:
For the smoked apples
1. I peeled mine but left the core in.
2. Then I sprinkled about a tablespoon of dampened apple wood dust over some aluminium foil, placed my rack above it, then placed the two apples in and shut the top.
3. With the mentholated spirits lit, I removed the apples after about 20 minutes. This was probably about 5-10 minutes of heating up and 5-10 minutes of pure smoking.
4. When I removed them, they were warm, still fairly white and the outside was mildly soft but the inside was still hard.
5. I didn’t want to cook them any more than this as the smoke flavour would become overwhelming and somewhat acrid, ruining the balance of the dish.
6. Core each apple and chop into cubes: 1½ apples will go into the ravioli and ½ an apple will go into the sauce.
For the sauce
1. In a pan, heat the butter, onion powder, ground cinnamon, black pepper and salt until butter starts to brown and bubble.
2. Add verjuice and lemon thyme and bring to the boil.
3. Add apple, sugar, chicken consommé and boiling water, then bring to the boil and reduce for 5 minutes.
4. The sauce is done when the apple is soft and the liquid has reduced to a dark brown glaze (about ½ cup).
5. Keep warm while you cook the ravioli.
For the ravioli
1. Using a little butter, sauté onion and garlic until soft. Set aside.
2. Heating a little extra butter, add the sage leaves and heat until almost crispy. Set aside.
3. Using the sage-scented butter, add the chopped apples, smoked salt and pepper and fry until the apple is browned and soft.
4. Put the chestnut purée, cooked apple, onion and sage into the food processor and blend into a purée.
5. Line a tray or plastic container with baking paper, for the ravioli.
6. Lay wonton wrappers out on flat surface and brush with beaten egg (egg wash).
7. Put small dollops of purée on half the wrappers, then top them with the remaining wrappers, being sure the gently press out any air pockets when sealing them.
8. Lay the finished ravioli on the baking tray, with paper baking between layers to prevent sticking. Refrigerate for 5 minutes (to firm) or until ready to cook.
9. Bring a pot of salted water to the boil, then simmer ravioli until it rises to the surface and the pasta is cooked through.
10. Drain onto paper towels then plate, drizzling with sauce and apples, sage and thyme leaves.
Labels:
anna original,
entree/starter,
food challenges,
food memories,
fruit,
pasta/noodles,
vegan,
vegetarian
Sunday, 24 June 2012
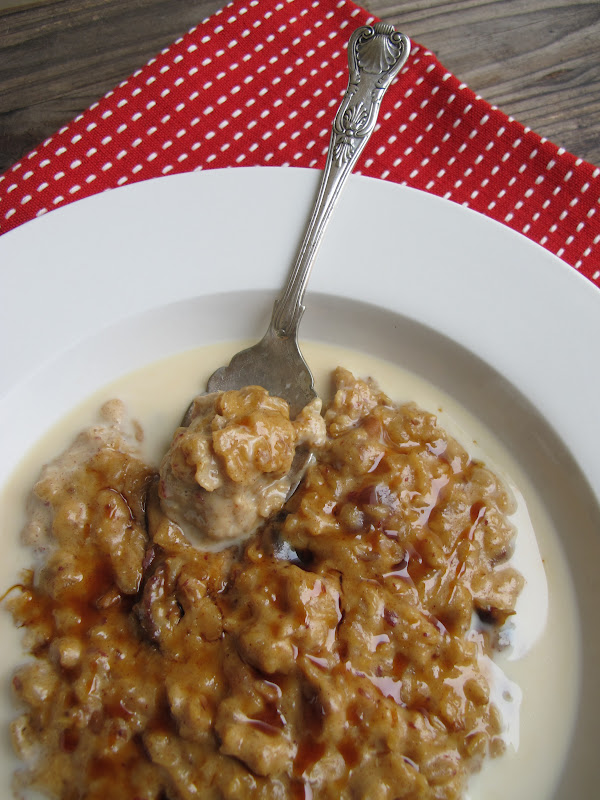
creamy date, oat & quinoa porridge
It’s a wintery Sunday morning, your breath fogging the air above the bed and frost blanketing the window panes. All you want to do is stay in bed, and so you do!
Once you’re up, attired in woolly socks and pajamas that have seen better days, you make your sleepy way into the kitchen for a warm, hearty bowl of porridge.
But why eat plain old oats when you can break your fast on an indulgent combination of cream, chopped dates, luscious date syrup and Tahitian vanilla salt. All brought together with a healthy dose of quinoa flakes.
The result is luxurious and enough to tempt you out of bed, even on the coldest mornings.
Creamy Date, Oat & Quinoa Porridge
Anna’s very own recipe. Serves 3-4.
Ingredients:
1 cup rolled oats
¼ cup quinoa flakes
2 cups milk
½ cup pouring cream
½ cup water
1 teaspoon Tahitian vanilla salt
½ teaspoon ground cinnamon
15 pitted dates, chopped
1 tablespoon date syrup (or brown sugar)
Extra date syrup, to serve (optional)
Extra warmed milk, to serve (optional)
Method:
1. Combine milk, cream, oats, dates, date syrup, cinnamon and salt in a saucepan over a medium heat.
2. Bring just to the boil, then cook, stirring continuously, until mixture is thick and creamy.
3. Drizzle with extra date syrup and top with warm milk to serve.
Saturday, 9 June 2012
baked clarines w garlic
I’m back from the steaming hot cities of Shanghai and Singapore, and happy to be plugged into the chilly Sydney air.
As an Australian, you’d think I’d crave the warm arms of humid tropical locations, but the reality is I find them very hard to handle in business contexts. Dresses clinging to damp skin, feet squelching in high heels, wiping your brow and trying to keep your make up from melting off your face. Not fun, and it’s no doubt worse for men in their suit and ties.
Give me holidays instead: shorts, t-shirts and a glass of cold guava juice. That’s a totally different story. Then I can take it with grace.
The refreshing immersion into Sydney's cold weather calls for hearty fare and a wheel of melted cheese is just the trick. Sit back with a glass of white wine and some salted rosemary cracker shards to dip into the warm, gooey cheese puddle.
A perfect Saturday afternoon homecoming.
Baked Clarines w Garlic
Ingredients:
1 x 500g Clarines
3 cloves garlic, sliced
Ground black pepper
Method:
1. Preheat oven to 180’C.
2. Bring cheese to room temperature.
3. Use a knife to poke holes into the top of the cheese
4. Insert garlic cloves into the top of the cheese and bake in oven for 20 minutes.
5. Garnish with black pepper.
Note: original recipe recommends also adding thyme sprigs and ½ cup Pinot Noir before baking. Sounds amazing too!
Labels:
cheese,
entree/starter,
north/west europe,
vegetarian
Tuesday, 29 May 2012
dibis w'rashi (iraqi date & tahini spread)
Breakfast time. Lunch time. Snack time.
This spread is highly addictive. Sweet and sticky from date molasses, nutty and moreish from the sesame paste.
It takes seconds to mix together and even less time to devour.
The first time I tried something like this was at Efendy, when they mixed grape molasses with tahini for one of the most wonderful sweet and nutty breakfast spreads I’ve ever had the pleasure to taste.
A friend since explained that pekmez, as it’s known in Turkey, is most commonly made with molasses from grape, carob or mulberry.
This version uses date syrup, more popular in Iraq where the date/tahini combinations is known as dibis w’rashi.
After you’ve tried this version, you might want to give the grape, carob or mulberry versions a go too. And it’s not hard to use up the excess molasses either:
- Mix through porridge or natural yoghurt
- Use as a sweetener in black tea or coffee
- Drizzle over ice cream
- Blend with ice cream into a shake
- Stir through rice pilaf with nuts and sultanas
- Substitute for sugar (weight for weight) in a cookie recipe
Dibis w'Rashi (Iraqi date syrup & tahini spread)
Anna’s very own recipe. Serves 4.
Ingredients:
5 tablespoons (100ml) date syrup
1 tablespoon (20ml) tahini
Squeeze of lemon juice (no more than a teaspoon)
Method:
Mix together until well blended.
Saturday, 26 May 2012
sticky korean-style pork spare ribs
Today was freezing.
The sky was cobalt and the sun was blazing, but the air was icy and the wind that whirled the autumn leaves did its job at chilling us to the bone.
I had a lovely morning. I cooed over a new baby boy (Arlo, such a sweet name), bought crimson glass ladybird beads and lunched on the always fabulous fare at bloodwood.
It’s days like this that hearty food is always appreciated. Rich, fatty meats and warm chunky stews.
So what better than these spicy, sticky Korean-style pork ribs?
The meat is marinated in ginger and gochjung, a red pepper sauce, then roasted in the oven until mouth-wateringly soft. Don’t forget the coriander or spring onion garnish, it lifts the flavours and colours perfectly.
Korean-Style Pork Spare Ribs
Anna’s adaptation of a recipe by Brigitte Hafner. Serves 2-3.
1kg pork spare ribs
100g ginger, peeled and chopped
6 cloves garlic, peeled
2 tablespoons white sugar
2 tablespoons peanut or olive oil
50ml light soy sauce
50ml shao hsing rice wine
3 tablespoons gochjung*
1 tablespoon Korean chilli pepper powder
2 teaspoons sesame oil
3 spring onions, finely chopped
Small handful coriander sprigs, washed
Method:
1. Cut the ribs into small sections and arrange in a wide casserole dish.
2. In a mortar and pestle, pound the ginger, garlic and half the sugar to a rough paste.
3. Mix all the remaining ingredients together except the spring onions and coriander and pour over the ribs. Marinate in the fridge for about 2-4 hours.
4. Preheat oven to 180C.
5. Cover the casserole with foil and put in the preheated oven for 50 minutes.
6. Remove foil, turn ribs and cook for a further 50 minutes, basting and turning every so often. They’re cooked when the meat between the ribs is very tender.
7. Serve the sticky ribs and their sauce sprinkled with the spring onions and coriander with steamed rice and Chinese greens.
Note: If you can’t find gochjung, use 2 tablespoons chilli sauce and 1 tablespoon honey.
Labels:
chilli/spicy,
north asia,
pork/bacon/ham
Monday, 7 May 2012
prickly pear & lime curd
from sour to sweet
Australia has a sour history with the prickly pear plant.
The very first settlers, on the First Fleet, brought it with them to establish a cochineal industry (the tiny cochineal grubs that live in the plant are squashed to produce red dye). Since Britain required a lot of red dye for their textile industry (not to mention the Red Coats of their army), they hoped an Australian colony would break the cochineal monopoly held by Spain and Portugal.
Instead, the prickly pear became one of the most invasive weeds ever introduced to Australia.
Last week I wrote about eating the prickly pear cactus paddles, but their fruits are also very popular in Mexico (where it is known as tuna) and southern Italy (where it’s called fico d'India or Indian fig). They are eaten fresh or in drinks, jams, ice creams and salsas.
There are many kinds of fruit as well, ranging from ultra sweet to tart.
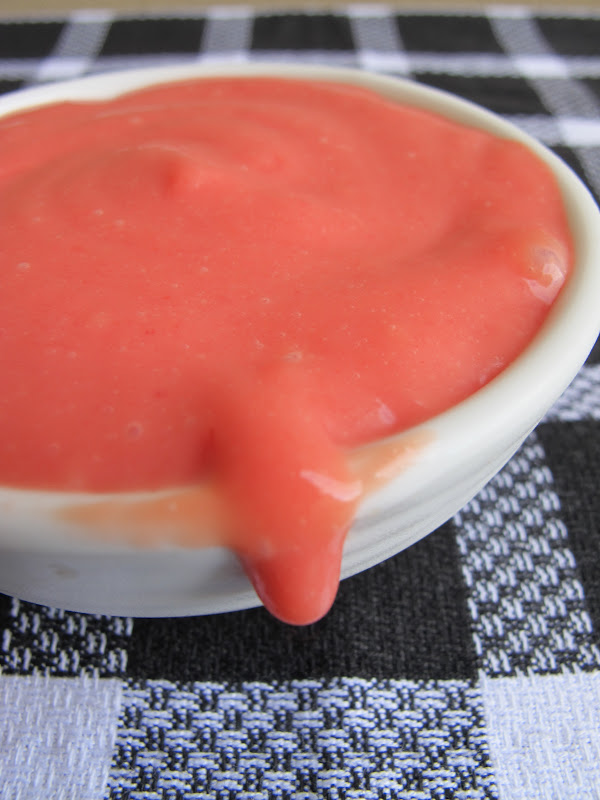
The prickly pears I was given by my colleague had vibrant red flesh, so I went for something sweet that exposed the beautiful crimson juices.
Dolloped upon perfect lime-scented meringues, this curd was a rather delectable treat.
Prickly Pear & Lime Curd
Anna’s very own recipe. Makes approx 250ml (1 cup).
Ingredients:
40ml lime juice (2 tablespoons or 1 lime)
60ml prickly pear juice (¼ cup or 1-2 prickly pears)
30g sugar
3 egg yolks
75g butter, chopped into pieces
Method:
1. To peel the prickly pears, use gloves and cut one end off, stick the top with a fork then with a very sharp knife make a cut lengthwise down the fruit to peel the outer layer off. Cut base off then discard peel.
2. Place the fruit in a food processor and puree. Strain through fine mesh using the back of a spoon to push pulp through and separate seeds.
3. Transfer to a heatproof bowl then add egg yolks, sugar and butter. Whisk to combine.
4. Stir continuously over a saucepan of simmering water until mixture has thickened and coats the back of a wooden spoon (3-5 minutes).
5. Remove from heat then set aside to thicken for an hour or two. Cover and store in refrigerator up to three days.
Note: Can also be kept for a month or two in the freezer and defrosted.
So how did it the prickly pear spread across the countryside?
In the mid-1800s, gardeners foolishly planted the cactus in paddocks and parks all along the east coast, mistakenly believing it would make great stock fodder or hedge plants. It flourished in the arid Australia climate and move from garden to paddock where it exploded across the country.
The impact was devastating and it took Special Acts of Parliament in the 1920s for coordinated and serious action to be undertaken. By that time some 60 million acres (25,000,000 hectares) of Queensland and New South Wales were overtaken and 40,000 km2 (15,000 sq mi) of farming land was rendered completely unproductive, with families unable to move between the plants and forced off their land.
The saviour in this story came in the form of the Cactoblastis cactorum, a dusty brown South American moth that, in a case often cited as one of the world’s most successful biological pest control, almost wiped out the Australian infestation of prickly pear.
But what of the cactus today?
From one of the most invasive weeds ever introduced to the country, it’s now on the supermarket shelves next to exotic pitaya, fragrant feijoa and vibrant rambutans. Curious customers are oblivious to its history as a noxious weed.
This is my contribution to Weekend Herb Blogging, hosted this week by Cinzia from Cindystar.
Labels:
anna original,
fruit,
sauce/dip,
something sweet,
south/central america
Thursday, 26 April 2012
potato & cactus omelette
This is my favourite kind of breakfast.
Once upon a time I craved fluffy hotcakes soaked in maple syrup, but these days I wake up craving eggs and chilli.
Any Mexican-style breakfast is a win for me, but those doused in the tangy heat of salsa verde really gets me out of bed in a hurry.
I love this omelette because it combines the soft vegetal flavours of the cactus with starchy potato and chillies.
Too good. Too easy. Drool*.
Tortilla de Patata y Nopal (Baked Potato & Cactus Omelette)
Anna’s very own recipe. Serves 2.
Ingredients:
2 garlic cloves, crushed
1 cup chopped prepared cactus
1 cup diced, cooked potato
4 eggs, beaten
1 green chilli, finely chopped
¼ cup (60ml) sour cream or natural yoghurt
Salsa verde, to serve
Lime wedges, to serve
Method:
1. Heat olive oil in a pan, add garlic and sauté and until softened.
2. Add cactus and sauté for a minute or so.
3. Add potato and fry until heated through.
4. In a bowl, whisk together sour cream, eggs, green chilli, salt and pepper.
5. Spread the potato and cactus evenly across the frying pan, then pour over the egg mixture.
6. Cook for 3-5 minutes until set, then finish off under the grill if preferred.
7. Serve with generous lashings of salsa verde.
*That “drool” was for you, Fabio.
Wednesday, 18 April 2012
passionfruit slice
This recipe made me swoon.
I had never made passionfruit slice before, but it’s an Aussie favourite. Rightly so, given all the backyard passionfruit vines. Passionfruit will grow out of control if you don’t keep a close eye on it, but I couldn’t care less given the amazing fruits it yields.
My favourite types of passionfruits are panamas. They are much bigger, yield more pulp which is a vibrant golden hue and ultra fragrant, and they also seem to contain less white fibres to battle with when extracting the pulp.
Purple passionfruits are prettier though, and still damn tasty. These are the ones I ate the most growing up, as two different homes I lived in had purple vines in the back yard. In fact at one house the vine was right next to the pool so all you had to do was hop out of the water, rip one off the vine, jam your stubby finger inside and suck out the pulp as you jumped back into the pool. Kids, eh.
These Aussie childhood memories are fitting for the recipe I made after receiving a basket of passionfruits from the Passionfruit Industry of Australia.
Passionfruit slice: a simple biscuit base smothered in a tangy, fudgy topping.
The base is pretty standard in every recipe you'll come across, but I decided to add a little vanilla to enhance the flavours. And for the topping, I doubled the usual passionfruit quantities to ensure you’re hit with the intense flavours you’d expect from any passionfruit dessert.
Jonas thinks it’s one of the best cakes he’s ever eaten. Even better than my Easter egg friands, which he loved.
SK from my office told me it was one of the best cakes she’d eaten in a very long time, and when my colleagues swooped back for seconds it confirmed the ooohhs and aaaaahs were not just politeness.
If Jonas has his way, I’ll be making this recipe again and again and again and again.
And again and again.
Passionfruit Slice
Anna’s version of an Aussie classic. Makes approx 30 squares.
Ingredients:
100g (½ cup) caster sugar
85g (1 cup) desiccated coconut
150g (1 cup) self-raising flour
125g melted butter
¼ teaspoon vanilla bean paste
395g can sweetened condensed milk
250g passionfruit pulp (about 12 passionfruit)*
62ml (¼ cup) fresh lemon juice (1 lemon)
Method:
1. Preheat oven to 180’C / 350’F (or 160’C / 320’F fan forced). Grease a slice tin and line with baking paper.
2. *First prepare the passionfruit by scooping out the pulp of all but one passionfruit. Blitz in a food processor or blender to release the pulp from seeds, then strain through a fine strainer to yield juice. Mix in the pulp and seeds of the last remaining passionfruit (now weigh it to see you’ve got around 200-250g).
3. In a bowl, mix together the sugar, flour, coconut, vanilla bean paste and melted butter to form a dough.
4. Press mixture firmly into the prepared slice tin, to create a “cookie” base.
5. Bake for 10-15 minutes, until lightly golden on edges. Allow to cool.
6. In another bowl, mix together the passionfruit pulp, vanilla essence, lemon juice and condensed milk, as well as the additional passionfruit pulp.
7. Pour over cooled base then bake for another 10-15 minutes, or until just firm.
8. Bring to room temperature, then cover and refrigerate until completely set.
9. Cut into squares for serving. Store in an airtight container in the fridge.
Sunday, 15 April 2012
daikon braised in mirin & miso
My husband once had a crush on Alicia Silverstone. During his military service he spent long periods guarding supply stations with his comrades, watching Clueless over and over again. It’s an odd movie choice for a bunch of soldiers, but then again I suppose pretty girls in short skirts tick all the right boxes for bored, lonely boys.
What I hadn’t realised about Alicia Silverstone is that she’s a vegan and has written a cookbook called The Kind Diet. OK, so she “co-wrote” it with macrobiotic nutritionist Jessica Porter, but without Silverstone’s celebrity backing, utter dedication to veganism and regular recipe tweeting, I might never have discovered this amazing dish.
Boiled chucks of radish doesn’t sound like the most appetising meal, but it truly is fantastic.
The slabs of daikon soften, but they keep a toothsome texture and complex flavour that’s almost meaty. I defy omnivores not to raise their eyebrows in surprise at how wonderfully hearty such a simple vegetarian dish can be.
In order to meet one of my 2012 Food Challenges (cook with daikon), I adapted this recipe quite drastically, deciding to turn the braising liquid into a much richer concoction adding miso soup, rice vinegar and sesame.
Daikon braised in Miso & Mirin
Anna’s adaptation of a recipe from The Kind Life by Alicia Silverstone. Serves 4 as side.
Ingredients:
1 large daikon radish
20g red miso paste
60ml (¼ cup) mirin
40ml (2 tablespoons) light soy sauce
20ml (1 tablespoon) rice vinegar
20ml (1 tablespoon) white sugar
3cm x 5m piece dried kombu
5ml (1 teaspoon) sesame oil
1 tablespoon, toasted sesame seeds
Method:
1. Slice the daikon into 2cm-thick rounds
2. Place them in a large saucepan, or lidded pan, in a single layer
3. Add water almost to cover the daikon
4. Add the miso paste, soy sauce, mirin, rice vinegar, sugar and kombu
5. Bring the liquid to a boil over high heat, then reduce to very low, cover pan and simmer daikon for 30 minutes or until almost all liquid has been absorbed
6. Sprinkle braised daikon with sesame oil and sesame seeds
Labels:
food challenges,
north asia,
side dish,
vegan,
vegetarian
Sunday, 8 April 2012
chocolate “easter egg” friands
HAPPY EASTER!
Easter is a time to eat lots of chocolate. For non-religious folk like me, it’s a holiday for relaxing around the house and catching up with friends.
Our Grandpa Hipster pal, Fabio, recently moved into an apartment with his girlfriend. One might say it was love at first sight as their eyes met across the party, and within minutes of introduction they were already in a passionate embrace.
So now that they’re living together, I invited Jonas and myself over for Easter Sunday lunch. Fabio relented to my bossy imposition, but he neglected to tell me that their apartment doesn’t have a kitchen.
IT DOESN’T HAVE A KITCHEN. How is that even possible?
After going into convulsive shock, I pulled myself together and set about baking these little chocolate friands to share with the happy couple.
Part housewarming gift, part Easter gift, part pity-the-fools-that-don’t-have-a-kitchen gift.
Apart from being made with intense dark chocolate (70% cocoa), I hid a little Easter egg in the centre before baking. In this case I used two types of “cream filled” eggs, mint and strawberry, which worked as decent substitutes to the caramel eggs I would have preferred but failed to find.
Chocolate “Easter Egg” Friands
Based on a recipe by Jeremy and Jane Strode. Makes 12 friands.
Ingredients:
175g butter
200g dark chocolate, chopped
6 egg whites
125g almond meal
250g icing sugar, sifted
30g cocoa, sifted
80g wholemeal flour
12 filled mini Easter eggs
Method:
1. Preheat oven to 190C. Grease 12 friand moulds.
2. Melt butter and chocolate.
3. Lightly whisk egg whites.
4. Add melted chocolate and butter and stir.
5. Add almond meal and icing sugar and combine.
6. Add flour and cocoa and mix well.
7. Spoon half the mixture into moulds, add an chocolate Easter egg then top with remaining mixture.
8. Bake for 25 minutes or until cooked through.
9. Rest for five minutes before turning onto a cooling rack.
Labels:
cake/pie/tart,
chocolate,
festive food,
something sweet
Sunday, 1 April 2012
quince crumble tartlets
This morning I awoke to the new time. An extra hour to sleep in, but one less hour of sunshine.
It’s Autumn, my favourite time of year.
While most of my readers in the northern hemisphere are anticipating the warm weather that’s on its way, I’m getting equally excited about autumn.
The leaves turning beautiful shades of amber, ochre and crimson. The chill in the air that gives you the excuse to wear ribbed tights and wool scarves. The wonderful harvest fruits and vegetables that inspire a change of cooking in the kitchen.
Quinces are one of those harvest foods. Their pretty yellow skins and fragrant aromas reminding you that cool weather is on the way. Beautiful.
And another cold weather treat is warm desserts. I adore warm desserts.
Jonas is happy with a scoop of ice cream, but my favourite desserts are always warm.
This is the perfect autumn warm dessert using aromatic roasted quinces, prepared as individual fluted tartlets with crunchy crumble tops.
Eat warm, with lashings of vanilla custard.
Quince Crumble Tartlets
Anna's very own recipe. Makes 8 tartlets.
Ingredients:
1 batch of shortcrust pastry (or use frozen)
Quince
3 quinces
1 cup sugar
2 cinnamon (or cassia) quills
1 vanilla bean, split
Custard
1 cup cream
1 cup buttermilk
1 vanilla bean, split
3 eggs
½ cup brown sugar
Crumble
½ cup ground almonds
½ cup wholemeal flour, sifted
65g cold salted butter
1 teaspoon ground cinnamon
¼ cup Demerara sugar
Method:
Bake quinces
1. Preheat oven to 180’C.
2. Peel and core quinces, reserving scraps. Cut each quince into eight pieces..
3. Scatter quince scraps along the base of a baking dish, place segments on top.
4. Nestle cinnamon quills and vanilla between pieces, then scatter with sugar.
5. Top with 1 cup water, then bake in oven until soft (about 1 hour). Allow to cool.
6. Slice quince into thin pieces so you can layer them into tarts when ready.
Prepare tart shells
7. Ensure oven is still at 180’C. Grease and line 8 tart cases.
8. Roll out pastry and place into tart cases. Prick with fork, line with paper then fill with baking weights.
9. Bake in oven for 10 minutes, then remove baking paper and weights and bake another 7 minutes.
Make custard
10. Bring the vanilla bean and cream almost to the boil over a medium heat.
11. Meanwhile, whisk eggs and sugar in a bowl.
12. Remove vanilla from cream and pour over egg mixture in a steady stream, whisking constantly to prevent eggs from scrambling.
13. Return the remaining custard to a sauce pan and over a medium heat, stir until it has thickened.
Make crumble
14. Chop butter into small cubes.
15. Combine all the ingredients in a bowl then rub the butter pieces into the flour with your finger tips until the mixture resembles crumbs.
Assemble
16. Line quince slices in the base of the pastry shells, then gently pour custard over quince slices until it reaches the top of the pastry case.
17. Top with crumble mixture, then bake in over for 40 minutes or until crumble is browned.
18. Cool slightly. Serve with warm custard.
Labels:
anna original,
cake/pie/tart,
fruit,
something sweet
Monday, 12 March 2012
achacha thirst quencher
I’m off to Singapore this afternoon for a week of networking, pitching and purveying sites.
I’ve never been to Singapore before. I’ve been through Singapore, but never stepped off the plane to take a look around.
Everyone keeps telling me it’s hot. Hot and steamy and sweaty. Not the most conducive weather for maintaining a polished, corporate look.
In anticipation of the heat, here’s a lovely little thirst quencher I prepared using the skins of the unusual achacha fruit.
Achachas (achachairú) are tropical fruit from the Bolivian Amazon, and they are delicious.
The bright orange skins are so pretty, but when you puncture them with your fingers and peel back the thick skins you’ll find soft, white flesh that tastes like a creamy, tropical combination of custard apples, lemon, pineapple and banana.
They taste amazing.
After you devour a bag of achacha fruit, don’t throw the skins away! You can infuse them with water and sugar to make a refreshing summer juice.
Chicha de Achachairú
Recipe from www.achacha.com.au Makes 1 litre.
Ingredients:
6-8 skins
1 litre water
1 cup caster sugar
1 cup water (extra)
Method:
1. Wash achacha skins. Blend with 1 litre water.
2. Leave for at least 24 hours (or longer) in the fridge.
3. Make sugar syrup by bringing sugar and the extra 1 cup water to a simmer for 5 minutes. Cool.
4. Strain skins through a mesh strainer. Discard skins and add sugar syrup to remaining juice.
5. Chill and drink.
Labels:
drink,
fruit,
something sweet,
south/central america
Subscribe to:
Posts (Atom)