This is an amazing granola recipe. The chocolate intensity comes from using pure Dutch-processed cocoa rather than cocoa mixed with sugar and other ingredients.
In fact, the recipe is quite healthy with only small amounts of oil, sugar and honey in comparison the amount of nuts and grains involved.
The flavour is a wonderful mix of chocolate and honey, with your cereal milk turning into a beautiful chocolatey drink at the end. I adored the results.
The recipe was one of the four granolas I managed to create this year, as part of my 2011 Food Challenges.
Chocolate, Cashew & Honey Granola
Anna’s very own recipe. Makes around 8 x ¾ cup serves.
Ingredients:
3 cups rolled oats
2 cups halved raw cashews
½ cup raw sunflower seeds
½ cup linseeds
¼ cup dedicated coconut flakes
¼ cup chia seeds
½ cup Dutch processed cocoa
⅓ cup honey
¼ cup raw sugar
⅓ cup canola oil
Pinch of salt
Method:
1. Preheat oven to 120’C.
2. Combine oats, cashews, coconut flakes, sunflower seeds, linseeds, chia seeds, Dutch processed cocoa, honey, sugar, salt and canola oil until fully combined and all the grains are well coated. You want the granola to clump together, so if it’s too dry or too wet adjust with a little extra oil or oats.
3. Cook in oven for around 1 hour, stirring granola every 10 minutes until it’s crunchy. Take care when stirring not to break clumps up too much.
4. Remove from heat and leave to cool. Store in an airtight container.
Showing posts with label nuts/seeds. Show all posts
Monday, 12 December 2011
chocolate, cashew & honey granola
Monday, 16 May 2011
pear, almond & chocolate tart
Autumn means pears, and I love pears.
Juicy, sweet and versatile, pears are such a wonderful fruit to have around the house.
Recently I was given a box of luscious Red Sensation and Packham pears as part of a pear promotion: Rediscover the Pear. They were just wonderful.
I was thinking about the great chocolate and almond tarts my colleagues and I buy from Central Baking Depot and I decided the sturdy Packham pears would be perfect to help me recreate the tarts at home.
I used Carême Pastry frozen dark chocolate shortcrust for this Jamie Oliver recipe, which turned out to be mighty fine and certainly on par with the tarts I was dreaming about.
Recipe by Jamie Oliver. Serves 6.
Ingredients:
125g almond meal (ground almonds)
2 large free-range or organic eggs
125g butter, softened
95g caster sugar
185g dark chocolate, melted
3 pears, peeled, cored and quartered
Method:
1. Preheat the oven to 190°C/375°F/gas 5.
2. Roll out the pastry until ½cm thick and use it to line a 24cm tart tin.
3. Leave in the freezer to rest for at least 20 minutes, or longer if you can.
4. Bake the pastry blind for around 10 minutes in the preheated oven, then remove, set aside, and reduce the oven temperature to 170°C/325°F/gas 3.
5. Mix your almonds, eggs, butter and sugar together and stir in the melted chocolate while it’s still warm.
6. Pour the mixture evenly into the pastry case and then press the pears into the chocolate and almond mixture.
7. Bake the tart for 45 minutes until the pastry is golden brown and the chocolate and almond mixture is firm.
I served my tart with the most exquisite accompaniment of all time, David Lebovitz’s Pear Caramel Ice Cream form The Perfect Scoop.
Labels:
cake/pie/tart,
chocolate,
fruit,
nuts/seeds,
something sweet
Saturday, 4 December 2010
pecan maple granola
This homemade granola and vanilla poached pears were part of a truly inspired breakfast, eaten with wonderful people in a beautiful location.
We made this for Lynn and Chris when we visited their beautiful property in Robertson, in the Southern Highlands of New South Wales (NSW being a state of Australia, for the uninitiated).
The weekend was so relaxing. Despite the cold and rain we rugged up in gumboots and drizabones and traipsed through the muddy fields, splashing through the puddles and catching yabbies from the gushing creek. In the evening it was good food, great conversation, red wine, a book or sudoku and a cosy chair by the fire. Bliss.
In return for kindly hosting us for the weekend (with sisters Stinky and Shamu and their partners M.E. and Tombolina), everyone was tasked with a meal to make and we draw the brunch card on Sunday morning. Jonas and I made cheese and chive scrambled eggs, smoky bacon and sumac fried tomatoes. Next on the menu were guava and sparkling rosé breakfast cocktails and these pots of pecan maple granola with poached pears and maple mascarpone.
The Guava & Sparkling Rosé Breakfast Cocktail is a very simple thing to make. Just top off a nice glass of sparkling rosé with fresh, pink luscious guava juice. Done.
While the poached pears and maple mascarpone were lovely, the granola was the real star.
The pecans roasted into the perfect texture, the maple gave a rich caramelised sweetness and the overall combination was elegant and delicious. A perfect breakfast on a perfect weekend.
It was so good that M.E. and I managed to sneak quite a bit of granola before we served it.
This was the first time I’ve made granola and I was surprised at just how easy it is to prepare and how much tastier homemade granola can be.
This Americana version, using pecans and maple syrup, really hit the spot for me and I’ll be making it again for sure, but I’ve been inspired to try out more granola concepts. Other flavour combinations I’ve been considering are peanut & honey; apricot, pistachio & pine nut; chocolate & orange; pumpkin & cinnamon; cherry & almond; coconut & banana; and fig & hazelnut.
Mmmmm. Granola.
Maple Pecan Granola
Anna’s version of Andrea’s recipe. Serves 6.
Ingredients:
2 cups whole rolled oats
1 cup pecan pieces
¼ cup pumpkin seeds
¼ cup packed dark brown sugar
¾ cup maple syrup
2 tablespoons canola oil
Pinch of salt
Pinch of cinnamon
Method:
1. Preheat oven to 110°C.
2. In a large mixing bowl, stir together the oats, pecan pieces, pumpkin seeds, salt, cinnamon and brown sugar, breaking up the sugar lumps.
3. Add the oil and maple syrup and stir until everything is well coated.
4. Spread on a baking sheet covered in baking paper.
5. Bake for up to 1 hour (or until golden brown), stirring every 10 minutes.
6. Cool completely, break into chunks and store for up to a week in an airtight container.
Note: Great with thick vanilla, honey or cinnamon yoghurt; sweetened mascarpone; poached fruit or simple milk.
Vanilla Poached Pears & Maple Mascarpone
Anna’s very own recipe. Serves 6.
Ingredients:
2 cups water
1 cup sugar
1 vanilla pod
6 pears, peeled, cored & quartered
2 tablespoons maple syrup
250g mascarpone
Method:
1. Combine water and sugar in a saucepan.
2. Halve vanilla pod, scrape out seeds and add both seeds and pod to saucepan.
3. Turn heat to medium and stir, dissolving sugar.
4. Once sugar is dissolved, add pears and simmer until soft (around 10 minutes).
5. Cool pears in syrup. Refrigerate until needed, but bring to room temperature before serving.
6. Combine the maple syrup and mascarpone. Serve strained pears with mascarpone (and granola).
Labels:
breakfast/brunch,
fruit,
north america,
nuts/seeds,
something sweet,
vegan
Wednesday, 3 March 2010
sage, apple & gorgonzola risotto
Ten years ago, in a room decorated with images of Winnie the Pooh (don’t ask!) my husband and I shared our very first kiss. Three years ago on this same day, we were married.
Love isn’t easy. There are a lot of things we have to suffer through.
He puts up with my insatiable curiosity, my requests for him to fetch me things and my tendency to tell complicated, exaggerated stories. Repeatedly.
I have to put up with his forgetfulness regarding domestic responsibilities, his fondness for all things XBOX and the fact that he’s a vegetarian. (Sorry veggo friends, but it’s tough to love a veggo).
But one thing we both share is a love of food and wine, and for Valentine’s Day we cooked this vegetarian risotto from a Jamie Oliver cookbook that my little sister, Stinky, gave us for our wedding gift.
Jonas has a bit of a man-crush on Jamie Oliver, and frankly I think he could do a lot worse.
In fact, for the record my Dad also has a man-crush on Jamie.
So when Stinky, who had spent some time waitressing at Fifteen when she lived in London, gave us this cookbook for our wedding gift, both Jonas and Dad were giddy as school girls when they opened it up and saw Jamie's own words scrawled across the pages.
It’s a nice full circle, to get a special little token from family, on a subject we both adore and from a chef we both admire for his imagination and yet simplicity.
So who was better placed to “cook” our Valentine’s Day dinner than Jamie?
As Jamie described in his book, this risotto is almost like a Waldorf Salad. The apple is fresh and sweet against the strong cheese and the walnuts provide perfect roasted crunchy texture. And while Jamie uses marjoram in his recipe, I switch to fragrant, sweet sage to combat the spiciness of the gorgonzola.
Sage, Apple & Gorgonzola Risotto
Anna’s adaptation of Jamie Oliver’s recipe. Serves 8.
Ingredients:
1 knob of butter, for frying
2 tablespoons olive oil, for frying
1 large onion, finely chopped
2 cloves of garlic, finely chopped
400g/14oz risotto rice
2 wineglasses of dry white wine
700ml/1¼ pints hot vegetable or chicken stock
100g/3½oz butter
1–2 small handfuls of freshly grated Parmesan cheese, plus a block for grating
200g/7oz gorgonzola cheese, diced
2 crunchy eating apples, cored, halved, and finely chopped, tossed in lemon juice
a small bunch of fresh sage, leaves picked and chopped
sea salt and freshly ground black pepper
a handful of walnuts
extra virgin olive oil
Method:
1. Heat the stock.
2. In a separate pan heat the olive oil and butter, add the onions and garlic, and fry very slowly for about 15 minutes without colouring.
3. When the onions have softened, add the rice and turn up the heat. The rice will now begin to lightly fry, so keep stirring it. After a minute it will look slightly translucent.
4. Add the wine and keep stirring — it will smell fantastic. Any harsh alcohol flavours will evaporate and leave the rice with a tasty essence.
5. Once the wine has cooked into the rice, add your first ladle of hot stock and a good pinch of salt.
6. Turn down the heat to a simmer so the rice doesn’t cook too quickly on the outside. Keep adding ladlefuls of stock, stirring and almost massaging the creamy starch out of the rice, allowing each ladleful to be absorbed before adding the next. This will take around 15 minutes.
7. Taste the rice — is it cooked? Carry on adding stock until the rice is soft but with a slight bite. Don’t forget to check the seasoning carefully. If you run out of stock before the rice is cooked, add some boiling water.
8. Turn off the heat, beat in your butter, Parmesan, gorgonzola, chopped apple and sage. Check the seasoning and add salt and pepper if needed.
9. Put a lid on the pan and leave the risotto to rest for a minute so the cheese can really ooze into it.
10. While you’re waiting, gently heat the walnuts in a pan. Then either take the risotto to the table and let everyone help themselves, or divide it between individual serving plates. Put a block of Parmesan on the table for grating over. Sprinkle with the walnuts and drizzle with a little extra virgin olive oil before tucking in.
Note: Jamie used marjoram instead of sage.
Labels:
cheese,
fruit,
jamie oliver,
mediterranean,
musings,
nuts/seeds,
rice,
vegetarian
Saturday, 21 November 2009
braciole napoletana
This is one of the best dinners you can eat. At least that's my opinion!
Thin slices of veal are rolled around a stuffing of parsley, raisins, pine nuts and parmesan, then browned before being finished in a rich tomato & red wine sauce.
It could be a summer or winter meal, the flavour easily adjusted with summery lifts like lemon zest or wintery warmth from chilli or irony spinach.
I discovered braciole years ago and yet I only recently made it for the first time as one of my 2009 Food Challenges. It's definitely a keeper and could be a weekly staple dinner. In fact it could be the creative parent's sneaky way for getting kids to eat their vegetables (not that I have kids yet, but I did note bracioles multiple applications).
It’s very easy to make but looks complicated so that guests are impressed, plus it tastes amazing.
Braciole comes highly recommended from me.
Braciole Napoletana
Recipe by Armando Percuoco from delicious Magazine, May 2008. Serves 6.
Ingredients:
6 x 150g veal escalopes
¼ cup olive oil, for frying
Stuffing
80g (½ cup) toasted pine nuts, roughly chopped
½ cup raisins, roughly chopped
4 garlic cloves, finely chopped
25g (1/3 cup) freshly grated parmesan
2 bunches flat-leaf parsley, leaves roughly chopped
Sauce
60ml (¼ cup) olive oil
1 large onion, roughly chopped
375ml (1½ cups) dry red wine
4 vine-ripened tomatoes (600g), seeds removed + chopped
2 tablespoons toasted pine nut, to serve
1 tablespoon raisins, to serve
Method:
1. Halve veal escalopes lengthways. Pound with meat mallet, between plastic wrap, until 3-4mm thick.
2. To make the stuffing, combine the pine nuts, raisins, garlic, parmesan and parsley (reserve a little parsley for garnish). Season with salt and pepper and mix well.
3. On the shorter end of each veal escalope, place 2 tablespoons of filling then roll to enclose and secure with toothpicks.
4. Heat the olive in a large, deep frying pan over medium high heat.
5. In two batches, brown the braciole all over, turning, for 2 – 3 minutes. Remove to plate.
6. To make the sauce, add the additional olive oil to the same pan and cook the onion on medium heat, stirring, for 2 – 3 minutes until soft and slightly golden.
7. Increase heat to medium-high, add red wine and cook for 6 – 8 minute until the alcohol has evaporated.
8. Reduce the heat to medium, add the tomatoes and simmer, occasionally stirring, for 25 minutes or until soft and reduced to a thick sauce.
9. Return the veal to the pan and heat through for around 5 minutes.
10. Place 2 braciole on each serving plate, top with sauce and garnish with pine nuts, raisins and parsley.
Note: I added chopped baby spinach to the stuffing for an extra nutrient boost.
This parsley-rich stuffing is my contribution to Weekend Herb Blogging, hosted by Winnie from Healthy Green Kitchen.
Tuesday, 13 October 2009
lemonade & wattleseed scones
I have wanted to cook with wattleseed for many years now, but this year I formalised it when I made it one of my 2009 Food Challenges.
Wattleseed is a native Australian product with a delicious coffee-chocolate-hazelnut flavour. Around the world there are so many species of Acacia but only about 120 species (all native to Australia) provide seeds which have delicious culinary value.
The Australian Aborigines have eaten wattleseed for around 6,000 years but it’s the recent interest in native produce that has seen wattleseed truly take off in Australia.
If you have a choice, it’s best to buy wattleseeds whole then dry roast and grind them yourself. This way the flavour remains strong.
Wattleseed can be added to coffee, shakes, whipped cream, ice cream, cookies, pancakes, chocolate sauce and muffins. It’s also useful in a savoury context, being added to beer, bread, sauces and marinades.
Lemonade & Wattleseed Scones
Recipe by Maggie Beer. Makes 8.
Ingredients:
1 cup lemonade
1 cup cream
3 cups of self-raising flour
3 teaspoons ground wattleseed
1 tablespoon sugar
Milk, for brushing
Method:
1. Preheat oven to very hot 220C.
2. Sift flour, sugar and wattleseed.
3. Add lemonade and cream.
4. Mix to form soft dough with pastry cutter or finger tips, then place mixture on floured surface. This is a soft wet mix.
5. Bring together to a 2cm thickness and cut with a floured cutter.
6. Place close together on tray, brush with milk and bake for 10 - 15 minutes.
These wonderful little scones are my contribution to the High Tea Treats themed Monthly Mingle, hosted by Aparna from My Diverse Kitchen.
References:
http://www.cherikoff.net/cherikoff/index.php?id=130
http://en.wikipedia.org/wiki/Wattleseed
Friday, 2 October 2009
falooda - sweet vermicelli shake
This lurid pink oddity is Falooda, a dessert-drink popular in India, Pakistan, Bangladesh, Sri Lanka, Myanmar and most of the Middle East.
The falooda drink is an adaptation of an ancient Persian dessert made from noodles frozen with pistachio, rose water and lime juice, thought to be one of the world’s earliest frozen desserts (400 BCE).
Falooda drinks are unusual in composition because they contain basil seeds and wheat vermicelli noodles doused in cold milk and a variety of other flavourings.
My version is based on an Indian-style falooda with scoops of ice cream and jelly, topped off by the sweetest, most toxic-food-colour-red rose syrup that will give you a sugar headache for 3 days!
You can ditch the rose syrup and go for mango or fig falooda instead, but I think that’s wimping out. What’s the pleasure without the pain?
Making falooda was one of my 2009 Food Challenges: I have wanted to make this dessert-drink at home ever since I tried it at a local Indian restaurant. It's got few steps to it, but it's very easy to prepare.
If you like rose-flavoured sweets, you can’t beat this recipe.
One every few months can’t hurt, right?
Falooda (sweet vermicelli shake)
Recipe by Anna Fedeles. Makes 2.
Ingredients:
250ml milk
½ cup strawberry or raspberry jelly
½ cup dried wheat (or arrowroot) vermicelli noodles
2 scoops ice cream
2 tablespoons rose syrup
1 tablespoon basil seeds
Method:
1. Soak basil seeds in water. They will appear like tiny frogs eggs. Drain.
2. Boil vermicelli according to manufacturers instructions. Drain, rinse and chill.
3. In glasses, layer vermicelli, jelly, basil seeds, milk and rose syrup.
4. Top with ice cream a drizzle of syrup and a drop of basil seeds.
5. Serve with a thick straw and long-stemmed spoon.
This falooda is my contribution to Presto Pasta Nights, hosted by the event founder, Ruth from Once Upon A Feast.
Saturday, 5 September 2009
apple, walnut & blue cheese flaugnarde
This breakfast is a perfect treat for weekend brunch. It’s rich yet light. The apples are refreshing, the sage pungent and the walnuts add delicious texture. As I said, it’s perfect.
I can happily sing the praises of this recipe without arrogance since I pinched it from London Foodie in NY.
Our London Foodie (also Anna!) has her recipe listed under clafoutis, which was the name I was calling it too until I discovered that a clafoutis contains only cherries and that using any other fruit makes the dish a flaugnarde. You learn something every day!
So I made the flaugnarde for Jonas one weekend and it reignited my cooking passion.
I’ve been very uninspired lately. It’s almost as if by indulging myself with all the marvellous flavours and ingredients of the world I have become over-stimulated. Flavour-fatigue?
My lack of response to amazing recipes and food is quite interesting and I’m starting to understand how very rich people become blasé about their unlimited stockpiles of money. The excitement wears off after a while.
But this flaugnarde recipe piqued my interest again.
I got back into the kitchen, recently making David Lebovtiz’s chocolate ice cream, Maggie Beer’s vincotto & chocolate pavlova and Nigella Lawson’s broccoli & stilton soup. All excellent and all cleverly making use of leftovers from other recipes.
Now that the joy of cooking and eating is returning, I need to reinvigorate the blogging part. I have more than 100 back-logged recipes to post but zero energy to write them up. Some of you may have noticed my blog stuck on a palm heart recipe for the past 2 weeks? Perhaps my laziness means I don’t have any readers left!
Well, I’m endeavouring to do better again. Can’t promise anything because that’s likely to jinx me, but let’s hope this show is back on the road!
Now back to the flaugnarde, you could make it for brunch or even lunch with a nice glass of pinot gris and a lightly dressed baby spinach or mâche salad.
Apple, Walnut & Blue Cheese Flaugnarde
Recipe by London Foodie in NY. Serves 4.
Ingredients:
Batter
3 eggs
250ml (1 cup) buttermilk or whole milk
75g butter, melted
85g (2/3 cup) plain flour
1 tablespoon sugar
½ teaspoon salt
50g crumbled blue cheese
Butter, for greasing
30g chopped walnuts
Filling
1 large tart apple, cored and thinly sliced
1 tablespoon sugar
Pinch of salt
1 tablespoon chopped sage
1 tablespoon butter
Method:
1. Heat the oven to 200’C/400F/Gas 6. Grease a 9 inch square or round baking tin using extra butter and place in the heated oven with any leftover butter.
2. Mix together the eggs, buttermilk (or milk), melted butter, flour, sugar, salt and blue cheese until well combined.
3. Melt the butter in a frying pan over a medium-high heat until it begins to turn brown.
4. Add the apples, sugar, salt and sage then toss in the pan about 2-3 minutes, until the apples begin to soften slightly.
5. Remove the hot pan from the oven, quickly pour in just less than half the batter, scatter over the apples evenly then top with the remaining batter.
6. Scatter over the walnuts and bake in the oven for 25 minutes or until the edges have pulled away from the side of the pan and it’s golden all over.
7. Serve warm with a salad.
I've already written a post on sage and all it's benefits, so forgive me for not repeating it all again here. If you want to see a whole list of sage recipes, go visit that old post which includes my own rendition of Jamie Oliver's Scallops w Lentils, Pancetta & Sage.
I didn’t realise that Chris from Mele Cotte was our WHB host when I picked this apple recipe (mele cotte is Italian for baked apples).
It’s been a while since I visited Mele Cotte and lots has changed. For instance, Chris has a great job cooking up a storm but I can’t quite tell if it’s a hotel or a school or what! Visiting her blog was like catching up with an old friend and realising so much has changed and you’re totally out of the loop. Better stay in touch more often!
From the M&M archies:
2008 - Vietnamese lemongrass beef noodles
2007 - trahanas (Greek feta & pasta soup)
2006 - tangelo caprioska
Saturday, 4 July 2009
peanut butter pie & roasted banana ice cream
Today is the Fourth of July.
In the wee hours of the morning, after 26hrs of travelling, Jonas and I will have arrived in Daytona Beach (Florida), ready to celebrate the day in the humidity and heat with my aunt, cousin and 90 year old grandfather.
Jonas is over the moon because it’s the first time he will visit mainland USA and we’re spending the day at the Daytona NASCAR . . . on Independence Day.
In preparation for this momentous day, I preblogged this WHB post with an American flavour.
What’s more American than peanut butter? And combining it with chocolate?
Genius! A salty-bittersweet symphony.
And add to this combination some banana? Even better!
Thus you have Maggie Beer’s peanut butter pie with David Lebovitz’s roasted banana ice cream. Delicious!
The ice cream has the most delectable flavour of sweet, caramelised banana but it's best eaten on the day of making as it can get a little icy if left too long in the freezer.
The pie is divine, but it's very rich and fudgy. The filling would be overwhelming but paired with the ganache topping it takes on a wonderful cheesecake salty-sweet-sourness.
Don't be tempted to use smooth peanut butter, the crunchy texture is necessary.
Peanut Butter Pie
Recipe by Maggie Beer in Delicious Magazine March 2009. Serves 16.
Ingredients:
Base
180g digestive biscuits
90g unsalted butter, melted
3 teaspoons caster sugar
Filling
1 cup (250ml) pouring cream
1/3 cup (75g) caster sugar
320g cream cheese, room temperature
375g crunchy, salt-free peanut butter
Topping
150ml thickened cream
150g 70% cocoa chocolate, chopped
20g unsalted butter
Method:
1. Preheat oven to 180’C (160’C for fan forced)
2. Process biscuits in a food processor until crumbled.
3. Add melted butter and sugar then pulse to combine. Press crumbs into the base of a 22cm spring form baking tin.
4. Bake base for 10 minutes then set aside to cool.
5. For the filling, place the cream and sugar in a saucepan and simmer on low for 3-4 minutes, stirring until the sugar dissolves.
6. Chop the cream cheese then blend with peanut butter, in a food processor, until combined.
7. Add the warm cream mixture, pulse to combine and then spoon filling onto the cooled cookie base. Set aside to cool.
8. To make the topping, combine the chopped chocolate and butter in a heatproof bowl.
9. Bring the cream almost to the boil over high heat then pour over chocolate and butter.
10. Leave for 3 minutes without touching then gentle swirl the bowl to combine the cream, butter and chocolate.
11. Pour the combined topping over the filling then chill in the fridge, uncovered, for 4 hours until set.
12. Serve small slices with ice cream because it’s very, very rich!
Roasted Banana Ice Cream
Recipe from The Perfect Scoop by David Lebovitz. Makes 750ml.
Ingredients:3 medium-sized ripe bananas, peeled
1/3 cup (70g), packed brown sugar
1 tablespoon butter, cut into small pieces
1½ cups (375ml) whole milk
2 tablespoons caster sugar
½ teaspoon vanilla extract
1½ teaspoons freshly-squeezed lemon juice
¼ teaspoon coarse salt
Method:
1. Preheat the oven to 200’C.
2. Slice the bananas into 2cm pieces and toss them with the brown sugar and butter in a 2 litre baking dish.
3. Bake for 40 minutes, stirring just once during baking, until the bananas are browned and cooked through.
4. Scrape the bananas and the thick syrup into a blender or food processor.
5. Add the milk, granulated sugar, vanilla, lemon juice and salt, and purée until smooth.
6. Chill the mixture thoroughly in the refrigerator, then freeze it in your ice cream machine according to the manufacturer's instructions.
Note: If the chilled mixture is too thick to pour into your machine, whisking will thin it out.
Banana would be an all-too-simple choice of ingredients for WHB, so I’m going to focus on peanuts.
Did you know they aren’t actually nuts but legumes?
After pollination, the fruit changes into a legume
Yet another wonderful food gift from the abundant Americas, it’s amazing to think what our meals would like without this vast continent. The Americas gave the world pecan, avocado, cashew, passionfruit, turkey, pineapple, chocolate, pumpkin, quinoa, guava, papaya, strawberries, vanilla, allspice, potato, tomato, chilli and maple syrup.
Despite having come from South America, the peanut’s journey into the USA came from Africa through Portugal and Brazil.
Apparently our domesticated peanuts have two sets of chromosomes from two different species, leading scientists to believe domestication occurred in Argentina or Bolivia.
The oldest peanuts found by archaeologists are some 7,600 years old, making them a pretty old fashioned snack!
China leads world production of peanuts, followed by India and then Nigeria. The next largest producers of the top ten are the United States, Indonesia, Myanmar, Argentina, Vietnam, Sudan and Chad.
Peanuts are a rich source of protein, niacin (good for the brain) antioxidants, resveratrol (anti-aging), vitamin B3, vitamin E, magnesium, folate, dietary fibre and monounsaturated fats.
Interestingly, peanut allergies are exacerbated by roasting peanuts. The roasting process increases peanut allergens Ara h1 and Ara h2 and inhibits the necessary digestive enzymes. In other countries like India and China, where peanuts are not roasted before processing, allergies are very rare.
Studies are also showing that exposing children to peanuts much later in life decreases the chances of developing peanut allergies
Whatever the cause, peanut allergies are extremely dangerous and can cause immediate anaphylactic shock just by eating food processed by machines that touched peanuts or by breathing peanut dust.
So that's it from me. Head on over to our WHB host, the lovely Laurie from Mediterranean Cooking in Alaska and Happy 4th of July!
Other peanut recipes:
African Peanut Soup Kalyn's Kitchen
Candied Peanuts David Lebovitz
Carrot & Peanut Muffins Chocolate & Zucchini
Chipotle-Maple Peanut Brittle Culinary in the Country
Chocolate Peanut Butter Cake Smitten Kitchen
Chinese Fried Noodles w Spicy Peanut Sauce Morsels & Musings
Groundnut Chutney Mahanandi
Homemade Peanut Butter Cups Baking Bites
Honey-Roasted Peanut Butter Joy The Baker
Lime & Peanut Coleslaw 101 Cookbooks
Peanut Butter & Banana Milkshake Morsels & Musings
Peanut Butter Marshmallow Crispy Brownies The Cooking Photographer
Toasted Peanut Bread 101 Cookbooks
Virginia Peanut Soup CookThink
References:
http://en.wikipedia.org/wiki/Peanut
http://en.wikipedia.org/wiki/Peanut_butter
Wednesday, 3 June 2009
roast pork fillet w cider & pistachios
This is another of my Autumn inspired dishes and it’s been perfect during the torrential rain Sydney has been experiencing lately.
But I imagine this dish would be equally good as summer afternoon roast if you sat outside and let the warm weather touch your skin.
The colours are so pretty and the flavours are quite elegant. I’m a big fan of this quick and easy roast.
Roast Pork Fillet w Cider & Pistachios
Anna’s recipe inspired by Stephanie Alexander. Serves 2.
Ingredients:
350g pork fillet
¼ cup shelled pistachio nuts, chopped
1 red onion, sliced
2 garlic cloves, sliced
3 sprigs lemon thyme
½ cup apple cider
Fleur de Sel, to taste
Freshly milled pepper, to taste
Olive oil
Method:
1. Preheat oven to 180'C.
2. Trim the pork fillet of sinews and fat. Rub with olive oil, lemon thyme and pepper. Refrigerate for 30 minutes.
3. Heat some olive oil in a large frying pan. Saute the onions and garlic until oftened then transfer to a baking dish.
4. Heat a little more olive oil on high before browning the pork for 4 minutes then turn and brown the other side for 3 minutes.
5. Remove pork to the baking pan and sit on onions.
6. Deglaze the frying with apple cider. Simmer for 5 minutes until reduced a little.
7. Pour over pork then sprinkle pork with pistachio nuts and fleur de sel.
8. Bake in the oven for 20 minutes or until cooked through but still pink and tender.
9. Transfer juices to frying pan and reduce a little further.
10. Serve pork in slices, drizzled with pan juices and accompanied by a salad of bitter greens or roasted brussels sprouts and baked potatoes.
This dish relies heavily upon the fragrant flavours of lemon thyme, which is my theme ingredient for Weekend Herb Blogging.
Lemon thyme (Thymus citriodorus) is a cross between common thyme and the more aromatic thymus pulegioides. This hybrid produces a gorgeous citrus scented herb with medium green foliage and small lilac flowers.
Native to Europe, Asia, northern Africa it is used in the cuisines of most countries in these regions as well as the Caribbean
Thyme was used by the Ancient Egyptians for embalming, the Ancient Greeks in their temples, by Romans to purify their rooms and by Medieval Europeans to ward away nightmares. Hmm?
Thyme symbolises courage and is also known as a good source of iron.
This is my entry for Weekend Herb Blogging, hosted by WHB's very own manager Haalo from Cook (almost) Anything At Least Once.
Other lemon thyme recipes:
Dried Strawberries & Lemon Thyme Shortbread - Cupcake Muffin
Lemon Thyme Bars - Not Eating Out in New York
Lemon Thyme Chicken Nuggets - Butter & Sugar
Lemon Thyme Crème Brûlée - Chocolate & Zucchini
Lemon Thyme Cupcakes - Fresh Approach Cooking
Lemon Thyme Curd - Tartelette
Lemon Thyme Gimlet - Slashfood
Lemon Thyme Green Beans - Sugar & Spice
Lemon Thyme Sorbet - Andrea Meyers
Lemon Thyme Tea Bread - Cafe Lynnylu
Mushroom & Lemon Thyme Soup - Nami Nami
Noodles w Creamy Chicken & Lemon Thyme - A la Galadrielle...
Pan Seared Scallops w Lemon Thyme Drizzle - That's Not What the Recipe Says
Pork w Lemon Thyme Sauce - Bear Necessities
Ricotta Gnocchi w Lemon Thyme Butter Sauce - Technicolor Kitchen
Vodka-Thyme Lemonade - Appetite for China
Zucchini Carpaccio w Avocado & Lemon Thyme - The Wednesday Chef
References:
http://www.backyardgardener.com/plantname/pda_1be1.html
http://en.wikipedia.org/wiki/Thyme
http://www.villageherb.com.au/herb_info.htm
Wednesday, 27 May 2009
persimmon & bourbon bread
I’ve been very inspired by Autumn this year. It seems to have captured my imagination.
Chestnuts, brussel sprouts and pears have all featured on my menu lately.
Last weekend I cooked up a feast, preparing roast pork loin w cider and pistachios, pickled sausages, quince jam and this delectable persimmon bread.
Persimmons have baffled me because I never knew what to do with them. They always seemed tasteless with a clammy texture, but I realised I just wasn’t using them correctly.
Fuyu persimmons, squat and round, should be eaten fairly firm. You peel the skin and either eat whole or in slices. Paired with a top quality vanilla yoghurt they are simply divine.
Hayicha persimmons are the ones you want to cook with. They are more elongated that Fuyu and when ripe the interior becomes a jelly mush that's perfect for purée, jam and cakes.
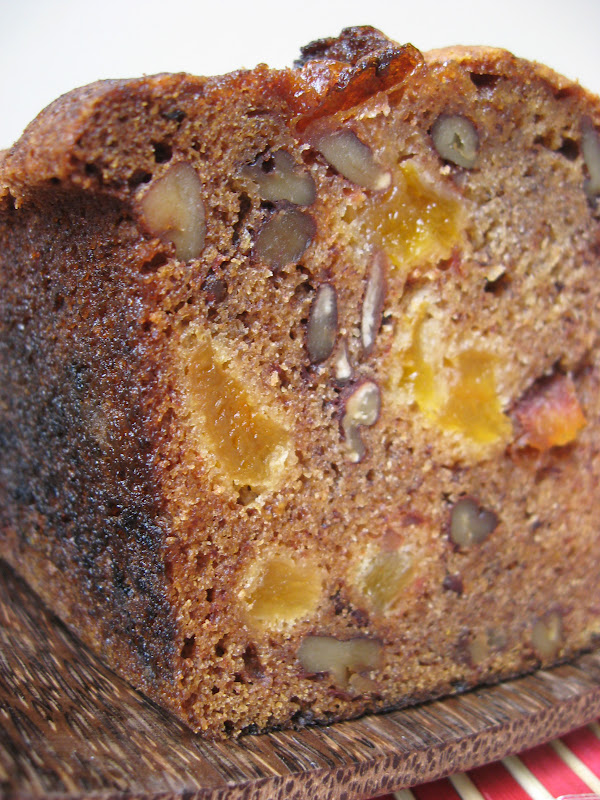
Persimmon & Bourbon Bread (w Pecans & Apricots)
Anna’s adaptation of David Lebovitz’s version of James Beard’s recipe. Makes one 9-inch loaf.
Ingredients:1¾ cups sifted flour
1¼ cups sugar
1 teaspoon baking soda
¾ teaspoons salt
½ teaspoon ground nutmeg
1 cup persimmon purée (approx. 2 overly ripe Hachiya persimmons)
½ cup melted unsalted butter
2 large eggs, lightly beaten
1/3 cup bourbon
1 cup pecans, toasted and chopped
1 cup diced dried apricots
Method:
1. Preheat oven to 180’C/350’F degrees.
2. Grease a 9 inch loaf pan. Line the bottom with a piece of baking paper or dust with flour and tap out excess.
3. Sift the first 5 dry ingredients in a large mixing bowl.
4. Make a well in the centre then stir in the butter, eggs, bourbon, persimmon puree then the pecans and apricots.
5. Bake for 1 hour or until toothpick inserted into the centre comes out clean.
Storage: David says it will keep for about a week at room temperature, if well-wrapped, and can be frozen too. But mine didn't last that long!
Note: I have a fan forced oven and my bread took about 1 hr and 20 minutes until it was cooked. That really surprised me because usually everything cooks much faster in my oven.
I also used Wild Turkey Honey liqueur as my bourbon.
Persimmons are from the genus Diospyros in the Ebenaceae family along with ebony wood.
They were known to the ancient Greeks as Diospyros, which translates to "the food of the gods". In English they were called Date-Plum, a direct translation from the Persian word “khormaloo”, but these days we call them persimmons, derived from putchamin, pasiminan, or pessamin, (meaning "dry fruit") from Powhatan, a Native American language of the eastern United States.
The Japanese Diospyros kaki is the most widely cultivated species, explaining why the two most known persimmons both have Japanese names.
There are two main types of persimmon: astringent and non-astringent.
Hachiya is the most common astringent persimmon with high levels of soluble tannins which makes the immature fruit bitter. It needs to be fully ripe before consumption.
The fuyu variety is the most common non-astringent persimmon, which can be eaten when firm and not overly ripe.
There is also a little-known third variety, sold only in farmers markets in Japan and prized for its brown flesh.
You can eat persimmons fresh, dried or cooked. To quicken the ripening process, simply store persimmons with apples or bananas and the ethylene emitted from these fruit will speed along the persimmon.
In Asia, sun-dried persimmons are prized and the Japanese version, brought to the US West Coast by Japanese migrants and known as hoshigaki, are growing popular.
The world’s top ten producers, in order of most to least, are China, Korea, Japan, Brazil, Italy, Israel, New Zealand, Iran, Australia and Mexico.
Fresh persimmons are supposedly good for constipation and haemorrhoids, although too many can cause diarrhoea. But no problem, because cooked persimmons are supposedly good for treatig diarrhoea!
Wikipedia explains the “contradictory effect of the raw and cooked fruit is due to its osmotic effect in the raw fruit sugar (causing diarrhea), and the high tannin content of the cooked fruit helping with diarrhea”.
But persimmons do have a dark side. One of the tannins contained in raw persimmons can coagulate in the stomach and form an obstructive mass or bezoar. In fact, 85% of phytobezoars (those of plant origin) are caused by persimmons and more than 90% of persimmon bezoars have to be surgically removed! Gross! There are known epidemics in persimmon growing regions where people consume a lot and it's recommended never to eat persimmons on an empty stomach or, strangely, with crab meat.
This is my contribution to Weekend Herb Blogging, hosted by Susan from The Well-Seasoned Cook. Be sure to see what spring/autumn fare is being cooked up around the world.
Other persimmon recipes:Persimmon Blondies - Vanilla Garlic
Persimmon Chutney - Ambrosia & Nectar
Persimmon Cookies - Pinch My Salt
Persimmon Flan - Christine Cooks
Persimmon Madeleines - Cook & Eat
Persimmon Muffins - From Our (Brazilian) Home to Yours
Persimmon Pavlova Cupcakes - Cupcake Bake Shop
Persimmon Pickles - Rookie Cookery
Persimmon Pomegranate Fruit Salad - Simply Recipes
Persimmon Rice Pudding - Christine Cooks
Persimmon Smoothie w Mint & Lime - Lucullian Delights
Persimmon Spice Cake - What's for Lunch, Honey?
Persimmon Tart - The Kitchn
Persimmon Vinegar - Rookie Cookery
Persimmon, Parsley & Olive Salad - Herbivoracious
Poached Persimmons - White on Rice Couple
Sujeonggwa (Korean persimmon punch) - The Kitchn
Morsels from the Archives:
2006 - Rosewater Cupcakes
2007 - Kingfish Sashimi w Lime / Salmon Sashimi w Ginger Soy
2008 - Grilled Eggplant w Tahini-Yoghurt Dressing
References:
http://www.abc.net.au/gardening/stories/s1952490.htm
http://en.wikipedia.org/wiki/Persimmon
http://www.persimmonsaustralia.com.au/index.html
Persimmon Muffins - From Our (Brazilian) Home to Yours
Persimmon Pavlova Cupcakes - Cupcake Bake Shop
Persimmon Pickles - Rookie Cookery
Persimmon Pomegranate Fruit Salad - Simply Recipes
Persimmon Rice Pudding - Christine Cooks
Persimmon Smoothie w Mint & Lime - Lucullian Delights
Persimmon Spice Cake - What's for Lunch, Honey?
Persimmon Tart - The Kitchn
Persimmon Vinegar - Rookie Cookery
Persimmon, Parsley & Olive Salad - Herbivoracious
Poached Persimmons - White on Rice Couple
Sujeonggwa (Korean persimmon punch) - The Kitchn
Morsels from the Archives:
2006 - Rosewater Cupcakes
2007 - Kingfish Sashimi w Lime / Salmon Sashimi w Ginger Soy
2008 - Grilled Eggplant w Tahini-Yoghurt Dressing
References:
http://www.abc.net.au/gardening/stories/s1952490.htm
http://en.wikipedia.org/wiki/Persimmon
http://www.persimmonsaustralia.com.au/index.html
Labels:
bread,
cake/pie/tart,
fruit,
north america,
nuts/seeds,
weekend herb blogging
Subscribe to:
Posts (Atom)