Friday, 11 November 2011

aceitunas rellenas fritas


stuffed, fried olives

First off I just want to say that I am quite a bit auspicious when it comes to numbers. I am particularly fond of 1s, 3s and 7s and 11:11 is a very special time of day when I close my eyes and make a wish!

Today is the 11th Day of the 11th month of the 11th year of our century. That's pretty special in my books, so I plan to make the biggest wish ever at the 11th second of the 11th minute of this day.

~ ~ ~
But let's move onto the food!

I recently wrote a guest blog post for a blog celebrating Olives and Olive Oil from Spain. Although I will include my recipe here, you should definitely visit this site of you want to read my story and learn about all the olive varieties Spain has to offer. There are hundreds!

The recipe I cooked for them was stuffed, fried olives!

My favourite thing about tapas is that you can drink all night and never get drunk. The constant grazing lines your stomach and allows you to enjoy a myriad of delicacies and drinks without regretting anything the next day. It’s a wonderful invention!

This particular tapa is great in cooler weather, but it’s good enough to eat any time of year. Just take your preferred variety of stuffed olives (anchovies, cheese, tomatoes, capsicum) cover in this cheesy, spicy batter and fry until crispy.

There’s a dash of beer in the batter, but that’s just a convenient excuse to finish off a cold one while you cook. The chef’s privilege!

Serves these snacks with a crisp white wine, an ice cold beer or a tangy cider, all Spanish of course!


Aceitunas Rellenas Fritas (Stuffed Green Olives)

Anna’s very own recipe. Serves 4 as tapa / appetiser.

Ingredients:
200g large green olives from Spain (I prefer stuffed varieties without pips)
1½ cups panko (Japanese bread crumbs)
1 tablespoon (20ml) beer
1 tablespoon (20ml) chilli sauce
4 tablespoons (about 50g) grated manchego cheese
2 eggs, beaten
Salt and pepper, to taste
Olive oil from Spain, for deep frying

Method:

1) Mix together the manchego cheese, chilli sauce, eggs and beer. Add salt and pepper.

2) Add 1 cup panko crumbs to the liquid and mix roughly into a paste.

3) Wipe the olives with kitchen paper so their surface is dry, then coat them with the batter paste, forming balls. Set aside to rest.

4) Heat the olive oil until a sprinkle of panko browns in a few seconds.

5) Roll the olive balls in the remaining panko to create a crispy exterior then drop into oil and fry until golden brown.

6) Dust with a smattering of salt and serve hot.

Enjoy!

Friday, 4 November 2011

wholemeal blueberry bundt cake


Wow.

Am I allowed to say that about my own cake?

I don’t care.

Wow.

One of my oldest pals, Kath (who I met at school when I was just 11 but whom I became close friends with after we finished school aged 18), just had a baby. Little Scott came into this world earlier than expected but completely healthy and complication free.

Before his arrival our other high school comrade, Suzy, hosted a baby shower where we devoured sweet and savoury treats and gossiped about babies, childbirth and our distant youth. As part of my tribute upon the Altar of Baby, I baked this wow-inducing cake.

A few weeks beforehand, the friendly boys that run www.cookandkitchen.com.au, offered me my pick of their gourmet online food shop. I greedily snapped up some interesting items like Bitton Milk & Coconut Jam, Australian native dehydrated quandongs and bush tomatoes, smoked almonds, rye flour and this amazing Kialla organic stoneground wholemeal flour.


This flour is made by stone-milling the whole wheat grain sourced from Australian growers with certified organic crops. The final flour is highly nutritious because it contains the bran, germ and endosperm of the wheat. It’s a truly beautiful flour that gives an earthy, richness to your baked recipes.

And the best thing? It's only $5.95 per kilo, which is amazing when you consider the quality.

Having made a very successful apple bundt cake only recently, I decided to stick to a theme that works and developed a recipe using frozen blueberries and the wholemeal flour given to me by www.cookandkitchen.com.au. It was a masterpiece of rich healthy flavours, crunchy exterior, moist crumbled interior, bursts of fresh berry and all topped off with a pretty, pink sour cream glaze.

Although everyone was quite full by the time we brought the cake out, those that did take a slice were just as happy as I was.

If you decide to make it, I hope you’re happy with it too.


Wholemeal Blueberry Bundt Cake

Anna’s very own recipe. Serves 10-12.

Ingredients:
2 eggs
2 cups of sugar
1 cup of canola oil
2 teaspoons vanilla extract
2 tablespoons (40ml) pouring cream or milk
Juice and zest of 1 lemon
3 cups wholemeal flour (I used Kialla Organic & Stoneground)
1 teaspoon baking soda
1½ teaspoon bicarbonate soda
½ teaspoon cinnamon
½ teaspoon salt flakes
3 cups frozen blueberries, thawed and strained (but juices reserved)

Method:

1. Preheat oven to 180’C. Grease a bundt cake tin.

2. In a big mixing bowl, beat eggs.

3. Add sugar, oil, vanilla, lemon juice and zest.

4. Beat in pouring cream (or milk if using).

5. In another bowl combine flour, baking soda, bicarbonate soda, cinnamon, salt and flour.

6. Start adding the flour mixture to the wet ingredients in batches until a sticky mixture is formed.

7. Carefully add blueberries to cake mixture without over mixing and bleeding blueberries throughout batter. To do this, they have to be fairly well drained (or fresh).

8. Pour into bundt cake tin and cook for 45 – 70 minutes (mine took 60 minutes but every oven is different).

9. When the cake is completely cool, drizzle with blueberry & sour cream glaze.

Note: you can easily use fresh blueberries in this recipe without any changes, but just note changes to glaze recipe below.


Blueberry & Sour Cream Glaze

Anna's very own recipe. Makes a lot!

Ingredients:
¼ cup blueberries, thawed & juices reserved
Reserved juices from thawing blueberries from cake
100g sour cream
2 cups icing sugar

Method:

1. Combine blueberries and their juices in a blender and purée.

2. Strain mixture through a fine sieve or muslin to ensure blueberry skins are removed (discard pulp or use in another recipe). You should have about ¼ cup juices.

3. Put icing sugar in a bowl then beat in the sour cream and half the juice. Check for consistency - it should drizzle in a slow stream from the spoon (ie not too firm and not too runny). Adjust with more juice as needed.

4. Taste to ensure a sweet-sour flavour and a buzz of blueberry.

5. Refrigerate to stiffen slightly before pouring over cake.

Note: if you used fresh blueberries for cake and/or glaze you won’t have the excess liquids to make the glaze, therefore just add a tablespoon of water to the blender.


Kialla organic stoneground wholemeal flour supplied by the friendly folks at the gourmet online food shop www.cookandkitchen.com.au

Tuesday, 11 October 2011

sorrel & goats cheese egg bake


This recipe is basically a savoury custard flavoured with sorrel, an interesting leafy vegetable often found as a wild weed.

As a child my mother taught me to identify sorrel in the wild and I used to eat it when playing in fields or out on walks. I love the sour flavour.


These days, I suppose I’m more risk adverse and less likely to start chomping on random weeds in case I identified it incorrectly or someone has sprayed them with pesticides.

If you have sorrel growing as a weed in your garden, I encourage you not to kill it but to harvest it. It’s great in a salad, makes a wonderful soup (hot or chilled) and pairs perfectly with goats cheese in this wonderful breakfast dish.


Sorrel & Goats Cheese Egg Bake

Anna’s very own recipe. Serves 4.

Ingredients:
8 eggs, beaten
500g sorrel, roughly chopped
3 garlic cloves, grated
Juice & zest of 1 lemon
125g sour cream
100g soft goats cheese, crumbed
⅓ cup parmesan
Salt and pepper, freshly milled to taste

Method:
1. Preheat oven to 180’C. Grease 4 x 250ml (1 cup) ramekins.
2. Pick over sorrel and remove any tough stems from the larger leaves.
3. In a food processor, blend eggs, garlic, lemon juice and zest.
4. Add sour cream and blend again. Season to taste.
5. Add sorrel and pulse until it’s chopped through, but not completely pureed into oblivion.
6. Pour into grease ramekins, dot with crumbled goats cheese.
7. Sprinkle with parmesan.
8. Bake in oven for 30 minutes or until completely set on top and risen. Eat hot.


This sorrel recipe is my contribution to Weekend Herb Blogging, this week hosted by Cinzia from Cindystar. I don’t participate in WHB all that often anymore, but every time I do it seems to be Cinzia’s turn to host!

Sunday, 9 October 2011

salmon sashimi w chilli sesame oil

 
食べるラー油がけ サーモンの刺身

Recently we were visited by two wonderful friends from Tokyo, VB Samurai and Green Ninja.

VB Samurai terrorised pubs across Sydney in his quest for the [im]perfect beer, while Green Ninja is a known enemy of electricity, preferring to undertake her clandestine activities in darkness.

Yes kids, there's a story in there. A big one.

Anyway . . . we had an awesome time hanging out, catching up and sharing our favourite places around Sydney. We also visited the Sydney Fish Markets and hosted a BBQ at our house with a group of friends, gorging on oysters, sashimi and even kangaroo skewers.

I served my finger lime oysters, as well as three types of sashimi: Snapper Sashimi w Soy & White Truffle, Tuna Tartare w Green Chillies, Crispy Shallots & Guacamole and this lovely salmon sashimi drizzled in la yu, a chilli & sesame oil which VB Samurai and Green Ninja brought us from Japan.

It seems la yu became incredibly popular last year in Japan, and after tasting it I understand why.

Chips of crispy fried onion and garlic floating in rich sesame oil and a hint of chilli. What’s not to love?


It’s used on rice, udon, salad dressings, fish – you name it! I can imagine happy uni students hunkering down with a bowl of ramen tossed in la yu as a quick fix dinner.

So why not drizzle this awesome sauce over sashimi? White fish isn’t a good option, since the flesh is too mild in flavour, but the richness of salmon was a perfect match.


Salmon Sashimi with La Yu

Anna’s recipe inspired by VB Samurai and Green Ninja.

Ingredients:
450g sashimi grade salmon, thinly sliced
1 tablespoon good quality la yu

Method:
Assemble fools!

Saturday, 24 September 2011

baba ganoush

baba ghanoush - baba ghanouj - baba ghannoug

This was the first time I’ve made baba ganoush. Jonas had made it once before, which is strange because Jonas hates eggplant.

Nonetheless it was my first time in the driver’s seat and I was determined to make the best version I could.

Recently, I’d been at my friend Suzy’s house and – while she redesigned my blog with pretty new banner, favicon and business cards – I stuffed my face with delicious, intensely smoky baba ganoush from her local grocer.

The memory was vivid in my mouth and so I reached out to the man I knew would have the best baba ganoush recipe on the interweb: Fouad from The Food Blog.

On top of delivering the most delicious baba ganoush you ever will find, Fouad’s recipe is presented as a whimsical poem and is full of tips at each step, like not overpowering your eggplant with lemon and garlic, or only mixing with a fork to ensure the right textural consistency.

His advice is sage. His baba ganoush is divine.

This is how I turned his poem into my own recipe.


Baba Ganoush

Anna’s recipe based on Fouad’s poem. Serves 8 as a dip.

Ingredients:
3 eggplants (aubergines)
3 tablespoons tahini
2 tablespoons lemon juice
1 tablespoon olive oil
2 cloves garlic
1 teaspoon salt

Method:

1. Pierce eggplants with a fork or knife all over (to prevent explosions).

2. Blacken over fire – best to use charcoal (the ONLY way according to Fouad) but gas or BBQ flames are a good alternative. This can take around 15 minutes or so. You want the whole eggplant to be completely black (smokiness) and limp (cooked flesh).

3. Put the hot eggplants in a bowl and cover with plastic wrap, or seal in a plastic bag. The steam from the hot eggplants keeps cooking them and helps the skin loosen from the flesh.

4. When completely cool, peel off the skin but don’t fuss over tiny specks of charred skin.

5. Drain the flesh very well (maybe leave over a strainer for an hour or so).

6. Add to the eggplant the tahini, lemon juice, garlic and salt and crush with a fork.

7. When well mixed, drizzle in olive oil and whip through.

8. Taste to ensure right ratio of tahini, lemon, garlic and salt.

9. Serve drizzled with olive oil and, if you want a little colour, a sprinkle of sumac.

Eat with abandon!


Wednesday, 14 September 2011

grilled avocado w melted cheese & hot sauce


Snacks are wonderful. Even better when they’re quick and easy to make.

This is my lazy fall back dinner. It’s made from four ingredients and couldn’t be easier to throw together.

Assemble, grill, eat.

After a long day at work, when all you want to do is crash on the sofa and watch TV, this is the kind of comfort food I turn to: quick and delicious.


Grilled Avocado w Melted Cheese & Hot Sauce

Anna's very own recipe. Serves 1 as a snack.

Ingredients:
1 avocado
1 tablespoon chipotle sauce (Tabasco or Louisiana)
1 tablespoon lime juice
¼ cup parmesan cheese
Salt and pepper

Method:

1. Slice the avocado in half and remove the stone. Prick all over with a fork, or cut criss-cross patterns with a knife. This allows the sauce to penetrate the flesh.

2. Pour the sauce over each half, then top with lime juice and salt and pepper.

3. In the cavity where the stone has been, put a fourth of the cheese on each avocado half. Place under the hot grill for 2 minutes.

4. Top with remaining cheese and grill (broil for Americans!) for another 2 minutes until completely melted and avocado warmed through.

Eat hot with a wedge of lime and chipotle sauce on the side!


Avocadoes are wonderful fruits, which is why I've chosen them as my theme ingredient for WHB in 2007 (cold avocado soup from the Ivory Coast), 2008 (avocado shake from Vietnam) and 2009 (prawn salad from Mexico).

The word avocado comes from the Aztec (Nahuatl) word ahuacatl, via Spanish aguacate and means “testicle”. Perhaps because of its appearance, the Aztecs believed avocadoes were an aphrodisiac and called it "the fertility fruit". Apparently during avocado harvesting, virgins were kept indoors to prevent any promiscuity taking place.

This reputation stuck with the avocado for such a long time and many people in South America wouldn’t eat it because they wanted to appear wholesome. Companies had to undertake serious PR campaigns to dispel the myths and get the fruit out to the public.

The Nahuatl word ahuacatl makes up other words like ahuacamolli, meaning "avocado soup/sauce” which the Spanish transformed into guacamole.

Propagation by seed takes around 5 years to produce fruit and the quality is never as good as the parent tree. Commercial plantations therefore graft new seedlings.

Avocadoes mature on the tree but ripen once harvested. The fruit is high monounsaturated fat contents and contains 60% more potassium than bananas, vitamin Bs, vitamin E, vitamin K and folate.

It is also interesting to note that avocado foliage, skin and pits are said to poison animals such as birds, cats, dogs, cattle, goats, rabbits and fish.

Good for us, bad for Fido.

This WHB is hosted by Graziana from Erbe in Cucina (Cooking with Herbs).


Saturday, 10 September 2011

earl grey & rhubarb jam


This is one of the best jams I’ve made in a while.

The sweet-sour flavour of the rhubarb goes so well with the aromatic bergamot in Earl Grey. The jam is a perfect balance of rhubarb flavour and the hint of Earl Grey at the end.

I am so happy with the results and long to devour it heaped upon warm scones and clouds of clotted cream. With a cup of Earl Grey, of course!

Earl Grey & Rhubarb Jam

Anna's very own recipe. Makes 2 x 250ml jars.

Ingredients:
2 tablespoons Earl Grey tea leaves
1 cup water
350g rhubarb
350g sugar
15g Jamsetta (optional)
1 lime, juiced

Method:

1. Chop the rhubarb into small pieces.

2. Boil the water and pour it over the tea leaves. Leave to steep for about 15 minutes.

3. Strain the tea into a large saucepan and bring to boil.

4. Add the rhubarb and lime juice, cover and stew until the rhubarb has softened (no more than 5 minutes).

5. Add sugar and jamsetta, stirring until dissolved.

6. Bring to the boil and allow jam to bubble away for 5-10 minutes until it reaches setting point.

7. Pour into sterilised jars and seal.

Note: to check setting stage, drop a small amount of jam onto a chilled saucer for 30 seconds, run finger through the mixture and if it wrinkles or remains separated it has reached its setting poin.


Monday, 5 September 2011

ono coconut cake w coconut frosting


This is a luscious, coconut-ty dessert. In fact, you can't get a whiter, more coconut-rich cake than this Hawaiian recipe.

The first time I saw this on the Saveur website I swooned, and when I made it for my work colleagues they swooned too (special shout out to Kylie, who ate the leftover icing with a spoon).

It's not very healthy, but the best things never are.


Ono Coconut Cake w Coconut Frosting

Recipe from Honolulu's Moiliili Community Center via Saveur Issue #56. Serves 12.

Ingredients:

Cake
3 cups plain flour
2 tablespoons plain flour, for dusting
1½ cups sugar
1 tablespoon baking powder
400ml unsweetened coconut milk
8 egg whites
½ teaspoon salt

Frosting
100g butter
½ teaspoons salt
5 cups powdered sugar
165ml (11 tablespoons) coconut cream
15ml (1 tablespoon) coconut rum
5ml (1 teaspoon) vanilla extract
1 cup shredded unsweetened coconut

Method:
1. For the cake: Preheat oven to 350°F / 180°C.

2. Grease 2 round 9" cake pans with butter. Dust each pan with 1 tbsp. of the flour, tapping out excess; set aside.

3. Sift together the remaining 3 cups flour, sugar, and baking powder into a large bowl.

4. Add coconut milk, stirring until batter is smooth, then set aside.

5. Put egg whites and salt into a mixing bowl and beat with an electric mixer on medium-high speed until stiff peaks form, about 5 minutes.

6. Fold whites into batter.

7. Divide batter between prepared pans and bake until toothpick inserted in centre comes out clean, about 25 minutes.

8. Set aside on a rack to cool, then remove from pans.

9. For frosting, beat butter until smooth. Add powdered sugar, salt, coconut cream, vanilla extract and mix until smooth. Add more coconut cream as needed for smoother frosting.

10. Cut cakes to ensure flat surfaces. Place first round on a cake plate, spread one-third of the frosting on top, and sprinkle with ¼ cup of the coconut. Set the remaining cake round on top, then ice cake with the remaining frosting. Sprinkle top and sides with remaining ¾ cup coconut.

Sunday, 28 August 2011

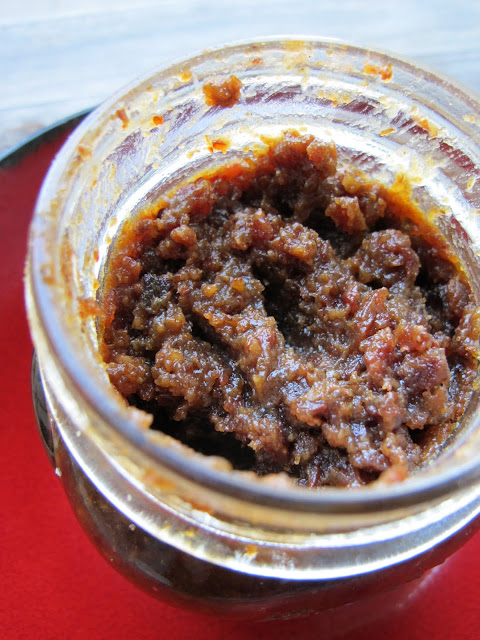
bacon jam


Bacon and jam. Mmmm.

How can bacon slow cooked in maple syrup and sugar be wrong?
That’s right, it can’t.

The first time I saw this recipe, I was in awe.

I emailed Lorraine, (aka Not Quite Nigella) and started asking a bunch of questions. Her answers only intrigued me further.

When I finally got around to making it, I kicked myself for not dabbling sooner.

Not only is it extremely delicious, but it’s incredibly versatile too.

Need to pimp some veggies? Throw in a tablespoon of bacon jam for depth of flavour.

Too tired to cook? Improve a toasted cheese sandwich with a little bacon jam.

After a salty-sweet treat? Melt some chocolate with bacon jam for brilliant little bacon chocolate snacks.

The options are endless, unfortunately the bacon jam supplies are not.

I cooked my bacon jam  in my NewWave 5 in 1 MultiCooker so that I didn't have to watch the liquid levels over the hours of cooking.


Bacon Jam

A recipe by Not Quite Nigella. Makes a 250ml jar.

Ingredients:
500g smoked bacon (or use regular bacon and liquid smoke)
4 cloves garlic, chopped
1 medium brown onion, sliced
3 tablespoons brown sugar
Tabasco sauce (according to taste)
1 cup coffee
¼ cup apple cider vinegar
¼ cup maple syrup
Black pepper to taste
Extra water


Method:

1. In a non stick pan, fry the bacon in batches until lightly browned and beginning to crisp.

2. Using a pair of scissors cut into 1 inch pieces.

3. Fry the onion and garlic in the rendered bacon fat on medium heat until translucent.

4. Transfer the bacon, onion and garlic into a slow cooker or a heavy based cast iron pot and add the rest of the ingredients except for the water.

5. Stove-top method (Lorraine’s method – 30 mins quicker, but involves stirring and checking)
• Simmer for 2 hours adding ¼ of a cup of water every 25-30 minutes or so and stirring (liquid levels should reduce so you have some juices but not too much).
5. Slow cooker method (Anna’s method – two pots and extra 30min, but less action required)
• Simmer for 2 hours, or longer if you like.
• Return to stove top and simmer to reduce liquid, around 30 minutes.

6. When ready, cool for about 15-20 minutes and then place in a food processor.

7. Pulse for 2-3 seconds so that you leave some texture to the “jam” or of course you could keep whizzing and make it a smoother and more paste like.

Note: it needs to be stored in the refrigerator, but note the texture changes (hardens) when it’s cold.


This post has been featured on the wonderful:

Wednesday, 24 August 2011

eating & drinking sydney - the guide!


Eating & Drinking Sydney
In stores 1st September 2011
RRP $29.95

FIVE COPIES TO GIVE AWAY!
Scroll down for details

This is a momentous milestone for me. I am now a published writer!

Although I’ve been published online before, there’s something very fulfilling about a tactile, physical book that has your name scrawled across the cover.

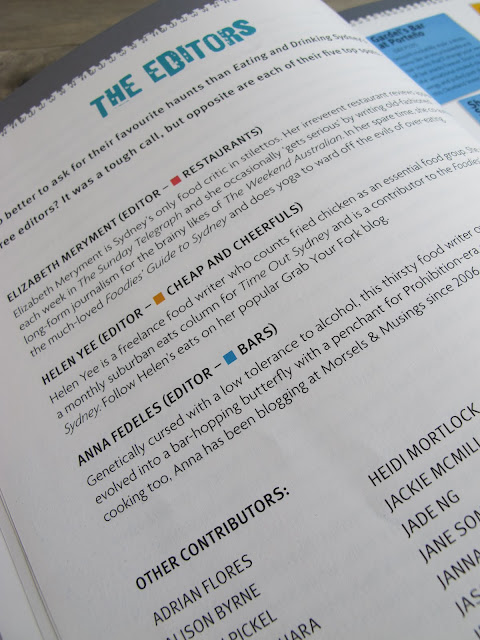
This is Hardie Grant’s new guide to Sydney’s restaurant and bar scene, and I was cast in the role of Chief Contributor, Bars.

The goal of the guide was to capture a cross-section of venues in each of Sydney’s distinct locales and to demonstrate the unique reasons that making any given venue worth a visit. I’m pretty proud with what we achieved.


What does a chief contributor do?

My job was to compile a list of the 200 bars to be reviewed as well as some top 10 and top 5 lists and a few break out boxes on topics like NSW wines and cider. It was tough selecting only 200 bars for inclusion, especially when we had to cover off such a huge geography across Sydney. Some very worthy venues just couldn’t fit in.

Although I wrote many of the bar reviews too, there was an army of other writers out there, drinking and boozing away to give my poor liver some time to recover .

Besides bars, the guide covers restaurants and a cheap eats too. Professional journalist Lizzie Meryment, food critic at The Sunday Telegraph and The Weekend Australian, managed the 330-strong restaurant section and suburban dining expert Helen Yee, blogger of the much celebrated Grab Your Fork, came up with 170 cheap-eats.

Guiding us throughout the creation of this guide was the talented and incredibly supportive Clare Brundle. She was the project manager and editor, flying solo without a sub-editor and doing a marvellous job at getting the content ship-shape and off the publisher. We'd have nothing without her!

Being part of this project was a wonderful experience and I’m so pleased with the final product: this shiny, ultra-professional guide book.

The true test is whether I’d buy it myself and, yes folks, I would!


What were my favourite cocktails?

Having quaffed my way through a myriad of Sydney bars, apart from borderline alcohol dependence, I’ve built myself a list of favourite cocktails. My all time favourite is a well prepared Charlie Chaplin, made from sloe gin, but of the unique inventions I came across, these are the ones that resonate in my memory and draw me back for seconds, thirds and tenths.

NUMBER TEN
The Winery
Rosé Sangria
Rosé wine, Martini Bianco, lemon, strawberries

NUMBER NINE
Bloodwood
Grandfather Gus
Chivas Regal 12yr, Disaronno Amaretto and a slice of dried fig

NUMBER EIGHT
Madame Fling Flong
Madame Coco
Creme de Cacao, Frangelico and Baileys blended with milk. Poured gently into a chocolate sauce coated glass & topped with a light dusting of chocolate powder

NUMBER SEVEN
Eau de Vie
Smoky Rob Roy
10yr Talisker and 16yr Lagavulin Scotch whiskies, sweet vermouth, Olivia #5 cigar infused Zacapa 23 rum, Laphroaig quartercask rinse, orange bitters and a bourbon infused cherry

NUMBER SIX
Lotus
Celestial
Plymouth gin, lime juice, elderflower cordial, apple juice, kaffir lime leaf

NUMBER FIVE
Ms G’s
Yuzu Slushie
Limoncello, Russian Standard Vodka, shochu, yuzu juice, yuzu curd and Regans’ orange bitters

NUMBER FOUR
The Loft
Baghdad Iced Tea
Cucumber infused vodka shaken with fresh apple, mint, apple liqueur and rose syrup served tall, topped with chilled jasmine tea

NUMBER THREE
Tokonoma
Saru Caprioska
Monkey Shoulder Whisky muddled with pineapple, lemon and house-made vanilla & ginger sugar


NUMBER TWO
Gardel’s Bar at Porteño
Banana Old Fashioned
Banana infused Jack Daniels shaken with smoked maple syrup and served on hand-hewn rock ice

NUMBER ONE
Stitch
Grandma’s Addiction
Clement Creole shrub liqueur shaken with Mandarine Napoleon, Tiki spice syrup, balanced out with fresh lime juice & orange bitters.


Do you want to WIN a copy?

Then tell me, what’s your favourite cocktail?

GIVEAWAY:
For Morsels & Musings readers, Hardie Grant is giving away five copies of the Eating & Drinking Sydney!

HOW TO ENTER:

Tell me, what’s your favourite cocktail or drink?

Leave your answer
1) As a comment on this post (AND email morselsandmusings AT yahoo DOT com DOT au so I can get in touch with you if you win)
2) As a comment on the Morsels & Musing’s Facebook page

Entries close Friday 16th September when five lucky winners will be picked and a guide mailed their way courtesy of publishers Hardie Grant!

Eating & Drinking Sydney
In stores 1st September 2011
RRP $29.95


An iPhone app is on it's way too!

Sunday, 21 August 2011

singapore's chilli crab


For my 2011 Food Challenges I committed to learning how to make Singapore’s famous Chilli Crab. And what better way to learn, than to take a class at the Sydney Fish Market’s beautiful, luxurious cooking school: Sydney Seafood School.

The venue is superb. First you gather in a small auditorium, where students watch the dish being prepared by the teacher, complete with cameras broadcasting the detailed elements onto large display screens.


Next you shuffle into the cooking area, complete with stainless steel cooking stations, where the staff move from group to group offering advice and suggestions. Each station is also equipped with expensive hand soap to remove fishy odours and bottles of sparkling mineral water to sip upon. Cooking done in style!

Last, and most exciting, is the dining room where you sit down to eat your creation with a bottle of wine and bottles of mineral water.

It’s a truly wonderful cooking school and I highly recommend it. It’s even a decent place to go on your own, if you can’t find anyone else to join you. I’ve been twice now and made friends each time.

Tourists should take note, Sydney’s fish market is the third largest in the world for volume and is second only to Tokyo’s in terms of variety sold. That’s a whole lot of seafood.


So, what did I learn about buying and preparing crabs?

1. The lustre or shine of a shell, scale or skin indicates the level of freshness. If the seafood is dull, it’s not very fresh.

2. For crustaceans, look at the under carriage, at the legs and head joints, which should be clean. If they are oxidising they aren’t as fresh.

3. Hard shells are best. If a shell is soft it indicates the crustacean has been caught during its moulting period and this means the flesh has absorbed more water. It will be less flavoursome and more mushy.

4. When you buy shellfish, transport it in a cool bag and store it in a bowl covered in plastic wrap in the fridge. Don’t leave it wrapped in the plastic and paper from the shop.

5. To clean, just wipe with a wet cloth. Never wash crab (or seafood other than bivalves) under water as you wash away the oils and flavour and allow the meat to absorb water.

6. To prepare crab, lift the flap under its body, slide your thumb in as far as you can then lift the top shell away, exposing the gills so you can remove them.

7. Use a large, sharp knife and cut with short, hard chops. Sawing motions will only tear the delicate flesh from the shell.


Monday, 15 August 2011

stinging nettle & ricotta gnudi


Gnudi are so-called, because they are the filling of a raviolo, without the pasta encasing it. They are, in effect, “nude”.

This recipe is simple and quite elegant. Small ricotta dumplings, flavoured with vitamin-rich nettles, floating in simple chicken broth: it’s absolutely delicious and soul-satisfying.

Using high quality ingredients in this recipe is critical because there’s not much done to each element to disguise inferior quality. Excellent chicken stock, parmesan and ricotta will make all the difference.

You must wear gloves when handling the nettles because getting stung is a nasty experience. Be sure to wash them thoroughly from any grit or potential pesticides.

Blanch them in boiling water for 30 seconds, then drain them and refresh under cold water. Wash them again to remove any remaining dirt.

You can use your hands at this point because once they’re blanched, although the barbs still look nasty, they’re soft and sting-free. I promise.


Gnudi all'Ortica con Brodo
(Nettle & Ricotta Dumplings in Broth)


Anna’s very own recipe. Serves 4 as a starter.

Ingredients:

200g blanched stinging nettles
200g ricotta
1 egg
3 garlic cloves, crushed
2 garlic cloves, grated finely
1 tablespoon wholemeal flour, for binding
1 litre vegetable stock
Zest and juice of a lemon
1 tablespoon fresh parsley, finely chopped
100g parmesan, finely grated
Piece of parmesan rind
Olive oil, for cooking
Salt and pepper, to taste

Method:

1. After blanching nettles in boiling water for 30 seconds, make sure to squeeze firmly them to remove excess moisture.

2. Heat a little olive oil in a frying pan, add crushed garlic cloves and nettles, salt and pepper and sauté until garlic has softened.

3. In a food processor, blend garlic and nettle mixture with ricotta and egg.

4. Remove and mix in half the parmesan to form a dough (reserve remainder for serving). If it’s too sticky, add a little of the wholemeal flour to bind.

5. Take a teaspoon of mixture and roll into small balls. Set on tray and refrigerate until ready to cook.

6. In one saucepan, bring a lot of salted water to the boil (for cooking gnudi).

7. Meanwhile in another saucepan, bring the chicken stock, parmesan rind and lemon zest to the boil. Reduce to simmer.

8. To cook the gnudi, gently drop them into the boiling water. Cook until they rise to the surface (between 1-3 minutes). Remove with slotted spoon and rest on tray, keeping warm.

9. When gnudi are ready, taste broth for seasoning then discard parmesan rind.

10. Add lemon juice to taste, then ladle into bowls. Add warm gnudi and sprinkle with parsley and parmesan before serving.

Note: If you can’t find nettles, use spinach instead.


This is my contribution to Weekend Herb Blogging, this week hosted by Chris from Mele Cotte.
Related Posts with Thumbnails