Showing posts with label rice. Show all posts

Wednesday, 3 March 2010

sage, apple & gorgonzola risotto


Ten years ago, in a room decorated with images of Winnie the Pooh (don’t ask!) my husband and I shared our very first kiss. Three years ago on this same day, we were married.

Love isn’t easy. There are a lot of things we have to suffer through.

He puts up with my insatiable curiosity, my requests for him to fetch me things and my tendency to tell complicated, exaggerated stories. Repeatedly.

I have to put up with his forgetfulness regarding domestic responsibilities, his fondness for all things XBOX and the fact that he’s a vegetarian. (Sorry veggo friends, but it’s tough to love a veggo).

But one thing we both share is a love of food and wine, and for Valentine’s Day we cooked this vegetarian risotto from a Jamie Oliver cookbook that my little sister, Stinky, gave us for our wedding gift.


Jonas has a bit of a man-crush on Jamie Oliver, and frankly I think he could do a lot worse.
In fact, for the record my Dad also has a man-crush on Jamie.

So when Stinky, who had spent some time waitressing at Fifteen when she lived in London, gave us this cookbook for our wedding gift, both Jonas and Dad were giddy as school girls when they opened it up and saw Jamie's own words scrawled across the pages.


It’s a nice full circle, to get a special little token from family, on a subject we both adore and from a chef we both admire for his imagination and yet simplicity.

So who was better placed to “cook” our Valentine’s Day dinner than Jamie?

As Jamie described in his book, this risotto is almost like a Waldorf Salad. The apple is fresh and sweet against the strong cheese and the walnuts provide perfect roasted crunchy texture. And while Jamie uses marjoram in his recipe, I switch to fragrant, sweet sage to combat the spiciness of the gorgonzola.


Sage, Apple & Gorgonzola Risotto

Anna’s adaptation of
Jamie Oliver’s recipe. Serves 8.

Ingredients:

1 knob of butter, for frying
2 tablespoons olive oil, for frying
1 large onion, finely chopped
2 cloves of garlic, finely chopped
400g/14oz risotto rice
2 wineglasses of dry white wine
700ml/1¼ pints hot vegetable or chicken stock
100g/3½oz butter
1–2 small handfuls of freshly grated Parmesan cheese, plus a block for grating
200g/7oz gorgonzola cheese, diced
2 crunchy eating apples, cored, halved, and finely chopped, tossed in lemon juice
a small bunch of fresh sage, leaves picked and chopped
sea salt and freshly ground black pepper
a handful of walnuts
extra virgin olive oil

Method:

1. Heat the stock.

2. In a separate pan heat the olive oil and butter, add the onions and garlic, and fry very slowly for about 15 minutes without colouring.

3. When the onions have softened, add the rice and turn up the heat. The rice will now begin to lightly fry, so keep stirring it. After a minute it will look slightly translucent.

4. Add the wine and keep stirring — it will smell fantastic. Any harsh alcohol flavours will evaporate and leave the rice with a tasty essence.

5. Once the wine has cooked into the rice, add your first ladle of hot stock and a good pinch of salt.

6. Turn down the heat to a simmer so the rice doesn’t cook too quickly on the outside. Keep adding ladlefuls of stock, stirring and almost massaging the creamy starch out of the rice, allowing each ladleful to be absorbed before adding the next. This will take around 15 minutes.

7. Taste the rice — is it cooked? Carry on adding stock until the rice is soft but with a slight bite. Don’t forget to check the seasoning carefully. If you run out of stock before the rice is cooked, add some boiling water.

8. Turn off the heat, beat in your butter, Parmesan, gorgonzola, chopped apple and sage. Check the seasoning and add salt and pepper if needed.

9. Put a lid on the pan and leave the risotto to rest for a minute so the cheese can really ooze into it.

10. While you’re waiting, gently heat the walnuts in a pan. Then either take the risotto to the table and let everyone help themselves, or divide it between individual serving plates. Put a block of Parmesan on the table for grating over. Sprinkle with the walnuts and drizzle with a little extra virgin olive oil before tucking in.

Note:
Jamie used marjoram instead of sage.


Monday, 22 December 2008

arroz congrí: cuban tomato & black bean rice


This Cuban rice recipe was great.

Jonas made it (because rice is my kryptonite) and we served it as a side at a BBQ and stretched out to make ten portions that we ate on the day and over the next few days.

It even made it’s own salad with some cubed avocado and a sprinkling of lime juice and fresh coriander, plus it's really good served with Creole-Spiced Chicken.

This is the last of my 2008 food challenges covering Caribbean cuisine and realistically it’s probably the last food challenge of the year as I don’t think I’ll be to complete anymore in time.


Arroz Congrí (Cuban Tomato & Black Bean Rice)

Based on a recipe by Nancy Sanchez. Serves 6-8 as a buffet dish.

Ingredients:
5 cups long grain rice
880g canned black beans
1 litre vegetable stock
1 cup tomato passata
2 small onions, chopped finely
3 garlic cloves, crushed
Vegetable oil, for frying
Salt and pepper, to taste
Method:
1. Fry the onion and garlic in the vegetable oil till transparent.
2. Add tomato passata. Stir to combine
3. Add vegetable stock, beans and rice. Season.
4. Cook, covered, for twenty minutes or until the rice and beans are ready and the liquid has absorbed.

Tags:

Wednesday, 17 December 2008

risotto cakes w calamari, parsley & capers


First I want to plug this book, Homecooked Feasts: Favourite Celebratory Recipes from Australian Kitchens.

Why? Because celebrity chef Maggie Beer and delicious magazine food editor Valli Little selected no less than five of my recipes to be included!!! I knew one of my recipes had made it in, but I had no idea that all five would be printed!!! I’m proud as punch.

Flicking through the pages, Morsels & Musings readers might recognise Caldo Tlalpeño, Roast Pork w Apples & Prunes, Emu Steaks w Pepperberry & Rosella Sauce, Erebos & Nyx (blackberry cocktail) and Vanilla & Rosewater Cupcakes.

It’s the first time one of my recipes has been published. I’m so pleased.

Now that all my chest puffing and hooting has ended, we can move onto the 2008 food challenge of the day: Risotto Cakes w Calamari & Parsley-Caper Dressing.

I used squid ink risotto because I wanted to contrast the black of the risotto with the beautiful red of the tomatoes, the white of the calamari and the green from the dressing. It worked wonderfully!

The flavours are simply sublime. Sweet calamari, tangy capers and crispy risotto. Delish!


Risotto Cakes w Calamari & Parsley-Caper Dressing
Anna’s very own recipe. Serves 2.


Ingredients:
200g risotto, chilled (I used squid ink risotto)
200g calamari
3 tablespoons finely chopped parsley
3 tablespoons finely chopped capers
100ml lemon juice
6 cherry tomatoes
Olive oil, for frying and drizzling
Flour, for dusting
Salt and pepper, to taste

Method:

1. Take the risotto and shape into two patties. Dust with seasoned flour and chill.

2. Slice the calamari into strips and score gently with a knife. Dust lightly in seasoned flour.

3. Heat olive oil a pan. Gently add the risotto cakes to one fry until crispy, about 5 minutes on each side.

4. Meanwhile, in another pan, fry the calamari in olive oil for about 2 minutes per pieces or until slightly browned and tender.

5. Remove calamari from pan and while risotto cakes are still frying, add cherry tomatoes to calamari pan and heat until soft and just bursting.

6. When risotto cakes are ready, remove from pan and place on warm plates. Top with 3 cherries each and some calamari strips.

7. In a bowl, combine lemon juice, parsley, capers and a little olive oil. Drizzle around the plate and serve while ingredients are still hot.


Tags:

Tuesday, 9 December 2008

squid ink risotto


My first experience with a squid ink risotto was age 15 when my mother ordered it at restaurant in Venice. Her mouth and teeth turned a terrible black and I just knew I had to taste it. Of course it was delicious and so I have ordered squid ink dishes in good restaurants ever since.

Ordering it at a restaurant is one thing, but cooking with squid ink has always daunted me. That’s why I made it one of my 2008 food challenges.

I had always dreamt of making squid ink risotto cakes topped with bright red tomatoes and white calamari (the colour contrast excites me) so I needed to start with the basics: squid ink risotto.


This recipe comes from Philippe Mouchel, a French chef with a restaurant in Melbourne. I liked this recipe because it stuck to the tenets of risotto making, which is really well explained by Giorgio Locatelli in his book Made in Italy.

The stages are as follows:
soffritto – the base of butter and ingredients such as onions, garlic and leeks
tostatura – toasting the rice in the soffritto to ensure even cooking
mantecatura – once the rice has been cooked through gradual absorption, the last stage is to beat in butter and cheese

The risotto should not be a stiff mass but be soft and ripple like waves (all’onda).

Although Mouchel recommended Arborio, I switched to the elegant Carnaroli because I learnt it’s best for simple risotto recipes without many ingredients, which suits this squid ink risotto.

I was proud of my results because the risotto was smooth and silky, and yet the rice grains were still delicately al dente.

It was a triumph!

When I added the squid ink, the risotto turned a terrible grey with tiny white rice grains popping through the muck. I panicked and thought it was going to turn out to be a disaster, but as the heat melted through the ink it somehow intensified and turned a beautiful black.

It really was a delicious recipe, which I would definitely cook again. I imagine it would be a stunning conversation starter at a dinner party.


Risotto al Nero di Seppia (Squid Ink Risotto)

Based on a recipe by
Philippe Mouchel. Serves 4. 

Ingredients:

1 tablespoon (20ml) squid ink
3 shallots, finely chopped
2 cloves of garlic, crushed
1 bay leaf
250g Carnaroli rice
250ml white wine
800ml chicken stock
Olive oil, for cooking
Salt and pepper, for seasoning
70g butter
1 tablespoon finely chopped shallot, extra
125ml white wine vinegar
Grilled octopus, garnish
Baby basil leaves, garnish

Method:


1. In a large saucepan sweat the shallots and garlic in olive oil over a low heat until shallots become transparent.

2. Add rice and continue to cook stirring until rice is transparent.

3. Add wine deglazing pan and reduce.

4. Heat stock to boiling point and then add enough to just cover the rice and stir.

5. At this point also add the bay leaf. Continuing to stir over a medium heat gradually add the stock ladle by ladle so rice is absorbing the liquid.

6. The rice should take about 18 minutes to cook and at the 14 minute mark add squid ink.

7. In the meantime, make the acid butter by combining the extra shallot and vinegar over a medium heat then reduce by half. Stir the butter into the hot vinegar.

8. Once the rice reaches a soft texture (the rice should be soft but still holding its shape) take off heat and beat in acid butter. Season with salt and pepper if necessary.

9. Serve risotto on flat warm plates or bowls, garnished with grilled octopus or calamari and fresh baby basil leaves.


Tags:

Saturday, 11 October 2008

burkina faso's fish stew

 
I won’t leave the confused guessing: Burkina Faso, commonly shortened to Burkina, is a landlocked nation in West Africa, surrounded by Mali, Niger, Benin, Togo, Ghana and Côte d'Ivoire. Until 1984 it was known as the Republic of Upper Volta.

The 13 million people of Burkina Faso are called Burkinabé and their capital is Ouagadougou. Around 50% are Muslim, 30% Christian and the remaining 20% are traditional Animists of varying types.

Archaeological evidence suggests the area was settled around 12,000 – 5,000 BCE by hunter-gatherers and by 3,600 – 2,600 BC farms had developed. During the 1500s, Burkina Faso was an important economic area for the powerful Songhai Empire.

Today 40% of the population are the Mossi, who arrived as migrant warriors in early times. The other 60% is made up of more than 60 ethnic groups, including the Bobo, Mande, Fulani, Lobi, Malinke, Senufo and Gurunsi. With so many different people and languages, the country’s official language is French, a remnant of their colonial past.

So why am I talking about Burkina Faso?

As part of my 2008 Food Challenges I’d set myself, I decided to learn more about African food (both west and east) and so this is my second foray into west African cuisine.

I actually quite enjoyed this dish because it contained okra, my Weekend Herb Blogging ingredient this week, an event founded by Kalyn's Kitchen. I have never actually cooked with okra until now, having been slightly terrified by it’s ooze. I found the flavour moreish and would certainly recommend it for stews.


Maan Nezim Nzedo (Burkina Faso Fish & Vegetable Stew)

Based on an internet recipe. Serves 2-3.

Ingredients:

500g freshwater fish steaks (eg bream, perch)
225g okra, halved lengthways if large
500ml passata (tomato sauce)
300ml fish stock
250g cooked rice
1 onion, thinly sliced
3 carrots, cut into 5mm slices
1 small cabbage, shredded
300g French beans
1 teaspoon chilli flakes
2 teaspoons coarse salt
Vegetable oil for cooking

Method:

1. Heat some oil in a saucepan then fry fish steaks until almost cooked. Remove and keep warm.

2. In the same saucepan, heat some more oil then fry onion and carrot until onion is soft.

3. Add passata and stock. Season then bring to a boil.

4. Add okra, beans and cabbage then cover, reduce heat to simmer and cook for around 5-10 minutes.

5. Add the rice and simmer for a further 3 minutes.

6. Serve immediately, placing the warm fish steaks on top of the rice.

Variation:
cut the fish into small chunks and add to stew with rice to heat through.


Okra (Abelmoschus esculentus) is in the same family as cotton, cocoa and hibiscus and is grown in tropical and warm temperate climates.

The edible green fruit is a capsule containing many seeds and is harvested when immature to be eaten as a vegetable. Inexperienced gardeners often leave okra pods on the trees too long when they actually should be harvested when only 3-5 days old.

Okra leaves are also edible and can be eaten raw in salads. The seeds can be used for cooking oil and in a roasted, ground form can substitute coffee.

It is believed that okra originated in Ethiopia and its journey beyond was via the Red Sea through the Arabian Peninsula. One of the earliest written records is from the Egyptian travels of a Spanish Moor in 1216 who saw locals eating pods with meal.

Okra is eaten in stews throughout Egypt, Greece, Iran, Iraq, Jordan, Lebanon, Turkey and Yemen and other parts of the eastern Mediterranean. In India it is commonly added to curries and in the Caribbean it’s popular in fish soups.

It first made it to the Americas in the mid 1600s via slave traders in Brazil and by 1748 it was growing happily in Philadelphia. Being hugely popular in the Southern US, especially around Louisiana, it is believed the French colonists introduced it as a common ingredient to the US.

Okra is crucial to thickening the American gumbo, which incidentally is a word originating from various Bantu languages’ words for okra “kingombo”. This version is the basis for the Portuguese, Spanish, Dutch and French words for okra too.

In English it’s also known as lady’s finger, but the name okra came from Igbo, a language spoken in Nigeria.

Okra can be served raw, pickled, sautéed, stir fried, boiled, steamed, stewed, casseroled, baked and fried and breaded for deep frying. Be wary that okra emits a sticky, gelatinous substance that many use to thicken food. If you’re not expecting it, you may find it unpleasant.

Okra is pretty nutritious with high levels of fibre, vitamin C, folate, potassium and magnesium.

Store okra in the fridge in a paper bag or in a perforated plastic bag to allow it to breathe. If you want to freeze it, blanch it for a few minutes and then you can keep it in the freezer for around 12 months. Once cooked it lasts in the fridge for around 3-4 days.

Buy firm, colourful pods and avoid rubbery pods with dry or dull skin. Smaller pods are often better too, since large ones can be woody.

So that's my contribution to Weekend Herb Blogging, with this week's host being Susan from The Well Seasoned Cook. Check out her round-up in a few days.


References:
http://en.wikipedia.org/wiki/Burkina_Faso
http://en.wikipedia.org/wiki/Okra
http://www.formulaforlife.com.au/asp/vegetables.asp?cmd=show&vegetableid=32&letter=O
http://southernfood.about.com/library/weekly/aa081401a.htm
http://plantanswers.tamu.edu/publications/vegetabletravelers/okra.html


Tags:

Thursday, 2 October 2008

three recipes w kaffir lime


Wowee peoples, I have no less than three recipes for you this Weekend Herb Blogging.

Last week I focused on the native Australian finger lime (the long limes pictured above with the key lime and a [frozen] kaffir lime). This week it’s all about the kaffir lime tree and some of the recent Indonesian food I’ve been cooking.

A while ago, I blogged about a Balinese-style feast that I made and these are some of the recipes.
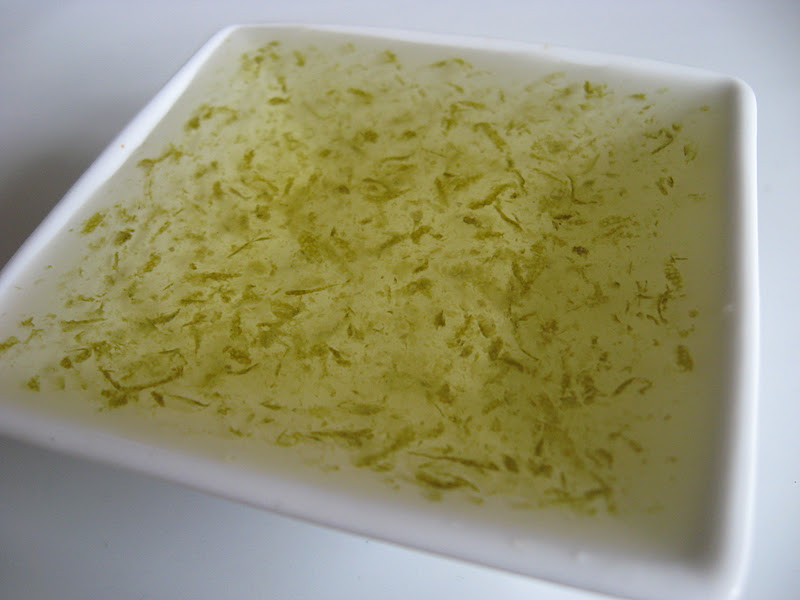
First up is a simple kaffir syrup. It’s light, refreshing and perfect with chilled soda water and ice. It would make a great addition to cocktails and is perfect drizzled over fresh mango cheeks and other tropical fruits as well.


Kaffir Lime Syrup

Anna’s recipe. Makes 1 cup.

Ingredients:
1 cup water
1 cup sugar
Zest of 1 kaffir lime

Method:
1. Combine all ingredients together and heat on the stove until the liquid starts to bubble.
2. Simmer for 3 minutes until syrup thickens then remove from heat and pour into a jar.
3. Heat will seal the jar, which can be kept in the cupboard until needed. Keep in the fridge after opening.

The next dish is a beautiful and incredibly rich rice, coloured by turmeric and flavoured with bay leaves, fresh ginger and kaffir. The rice is cooked using coconut milk instead of water and is simply delicious.


Nasi Kuning (fragrant turmeric rice)

Anna’s recipe. Serves 4.
 
Ingredients:
400ml coconut milk
1 cup long grain rice
1 teaspoon turmeric powder
2 kaffir leaves
2 bay leaves
½ teaspoon freshly grated ginger
Pinch of salt
Fried shallots, for garnish
Method:
1. Combine turmeric powder, salt, bay leaves, kaffir leaves, fresh ginger and coconut milk.
2. Add rice then bring mixture to a boil.
3. Reduce heat and cook, covered, for around 12 minutes.
4. Remove from heat, keeping cover on, and allow to sit for 15 minutes.
5. Check that rice is soft and all liquid is absorbed. Remove bay leaves and kaffir leaves.
6. Pack rice into a greased bowl and turn out onto a serving platter. Serve hot, garnished with fried shallots.

I first tried this recipe at the Casa Luna Cooking School in Bali. It is so flavoursome and the kaffir lime really shines against the other ingredients. In her cookbook, Janet de Neefe describes this dish as a fusion of Balinese and Mediterranean flavours and that’s accurate. Be sure to check out the link to Janet’s cookbook as she has so many other recipes included and descriptions on each.


Sambal Tuwung (roasted eggplant salad)

Recipe from Fragrant Rice by Janet de Neefe. Serves 4.

Ingredients:
2 small black eggplants
2 long red chillies
3 small red chillies
2 kaffir lime leaves, finely shredded
2 medium tomatoes
5 cloves garlic, peeled
2 small kaffir limes
1-2 teaspoons kecap manis
2 teaspoons grated palm sugar
Oil, for baking and frying
Lime wedges, for garnish
Fried shallots, for garnish

Method:
1. Preheat the oven to 180’C.
2. Slice the eggplant in half, lengthwise.
3. Combine eggplant and garlic in a roasting pan. Drizzle with oil and roast until soft (about 30 minutes). Set aside to cool.
4. Halve the tomatoes and chop the chilli into small pieces.
5. Heat oil in a wok and fry chillies, garlic and shrimp paste until lightly brown.
6. Add the tomatoes and fry until they are softened. Strain and set aside.
7. Using a mortar and pestle, grind the chilli, tomatoes, garlic and palm sugar gently into a coarse pulp. Add some oil if it’s too dry.
8. Skin the eggplant and, using your hands, pull the soft flesh into strips.
9. Using your hands again, mix the eggplant with the pulp, kecap manis, kaffir leaves and crushed limes.
10. Serve garnished with lime wedges and fried shallots.


Kaffir limes (Citrus hystrix) are native to Malaysia and Indonesia but are known grown worldwide and are a popular backyard plant. In fact Jonas and I have one in a large pot on our balcony and it seems to be doing very well.

The fruits are around the same size as Tahitian or Key limes, but their skin is a little darker and has bumps and grooves all over it. The fruit contains a lot of seeds and the juice is extremely sour, seeming unpalatable from older fruit.

The kaffir tree has beautiful, elegant branches with long, sharp thorns. Leaves have hourglass shapes that seem like two leaves stuck together end-to-end. The leaves are edible and are used, dried or fresh, to flavour many dishes. They can even be kept in the freezer to maintain freshness.

Kaffir leaves and zest are used to flavour curry paste, tom yum soup, barbecued fish, roasted chicken, prawn salads, herbal vinegars and tea.

Unfortunately the word kaffir has taken on some terrible connotations in South Africa, where the word was used as a derogatory name for black Africans the way nigger was applied to African Americans in the US. The lime is pronounced quite differently than the insult, but the spelling is the same.

The origin of this racism, however, came from the Portuguese misunderstanding of Arabic and using the word kafur meaning “non believer” as a word for African tribesmen. Basically, it’s got nothing to do with the poor lime!!!

In South East Asia, where they are commonly included in cooking, the kaffir has many names:
Cambodia: krauch soeuch
China: fatt-fung-kam (Cantonese), thai-ko-kam (Hokkien/Minnan)
Malaysia: limau purut
Myanmar: shauk-nu, shauk-waing
Indonesia: jeruk purut, jeruk limo, jeruk sambal
Philippines: swangi
Sri Lanka: kahpiri dehi, odu dehi, kudala-dehi
Thailand: makrud, som makrud
Laos: makgeehoot

So this is my contribution to Weekend Herb Blogging, this week hosted by UK-based-Brazilian Valentina from Trem Bom. Be sure to check out the other herby entries from around the world.

References:
http://en.wikipedia.org/wiki/Kaffir_lime
http://www.luxury-thailand-travel.com/images/Kaffir-Limes-1.JPG

http://herb-stuff.com/wp-content/uploads/2011/06/Growing-Kaffir-Lime-Trees.jpg
http://www.herbsarespecial.com.au/free-herb-information/kaffir-lime.html
http://www.agric.nsw.gov.au/Hort/Fmrs/Asian_veg/kaffir.htm
http://www.burkesbackyard.com.au/1999/archives/25/in_the_garden/herbs,_fruit_and_vegetables/limes

Sunday, 20 January 2008

rice w palm hearts

I recently found a can of palm hearts in the grocery store across the street from my apartment. These delicious shoots are ridiculously expensive and, despite the fact that they’re canned, have the most exquisite, completely moreish flavour.

This vegetarian side dish tasted wonderfully rich and the palm hearts brought on a sweet, saltiness reminiscent of scallops. In fact I was shocked just how much this dish tasted of scallop mornay.

It was very good.

I found a recipe on a Costa Rican recipe website but soon discovered that many of the instructions did not make sense and that the measurements were totally incorrect.

Below is my own recipe based vaguely on the original.

After making the dish I thought it was funny to note that I chose a Costa Rican recipe since Costa Rica seems to be one of the largest global producers of palm hearts (I think Brazil is the largest).

Arroz con Palmitos (Rice w Palm Hearts)
Anna’s very own recipe. Serves 6 as side dish.
Ingredients:

400g can palm hearts, cut in small pieces
1½ cups cooked white rice
½ cup crème fraîche
5 garlic cloves, crushed & fried until soft
½ onion, very finely chopped & fried until soft
150g butter
4 tablespoons flour
½ cup white wine
1 cup cream
½ cup milk
2 egg yolks
¼ cup chopped parsley
½ cup shredded mozzarella
1 teaspoon salt
½ teaspoon ground white pepper
Method:
1. Preheat oven to 180’C.
2. Melt the butter in a pan, add the flour and whisk briskly until completely combined. Continue whisking for 5 minutes as the sauce foams and cooks.
3. Remove from the heat and leave for 5 minutes.
4. Meanwhile combine the egg yolks with the wine.
5. Add the egg mixture to the cooled sauce and whisk quickly. It will form sticky dough.
6. Add the cream and mix until it becomes a thick sauce.
7. Add the milk in batches to thin out the sauce to desired consistency.
8. Add salt, garlic and onion and combine well.
9. In a bowl, mix the crème fraîche and white pepper with the rice and spread out evenly in the base of a baking dish.
10. Cover with hearts of palm, dispersing evenly.
11. Pour over creamy sauce.
12. Sprinkle with parlsey and then shredded cheese.
13. Bake in oven for 15-20 minutes or until heated through, cheese has melted and edges are starting to brown.

Palm hearts are the edible core and bud of a variety of palm trees: Cocos nucifera (coconut palm), Euterpe edulis (juçara palm), Euterpe oleracea (açaí palm), and Bactris gasipaes (pejibaye or peach palm).

When harvested from the wild, the process kills the trees and this makes the palm hearts a very expensive food product. In fact palm hearts are used most commonly in salads and one of the most famous is the millionaire's salad.

It’s interesting to note that during the Depression it was known as swamp cabbage in Florida because only the poor were desperate enough to undertake the difficult task of chopping down the trees with axes and hand saws.

Commercially bred varieties, such as the Bactris gasipaes, have multiple shoots leading to a significant harvest that doesn’t kill the plant. Harvesting is still complicated so costs are still very high for the product.

Brazil, Costa Rica, Ecuador and Hawaii are all mass palm heart producers whereas France is the world’s largest importer.

They are eaten widely throughout tropical climates and have many names: palmito (Spanish), kalada (Indonesian), nyur (Malaysian), ubod (Filipino), pol bada (Sri Lankan), kaoteran (Thai).

From a 3m tree a 60cm, 1kg segment of trunk is sent to the factory where it is peeled down to the 100g core. The most tender sections are near the root and have a stronger flavour due to the concentration of nutrients within the tree.

They are high in fibre, low in calories and contain no cholesterol and very little fat.

I have never tried fresh palm hearts but apparently there is no comparison. Canned varieties taste very similar to artichokes and asparagus, which you could substitute in recipes.

Weekend Herb Blogging is being hosted by Rinku from Cooking in Westchester. Tune in for the recap over the next few days.

References:
http://en.wikipedia.org/wiki/Heart_of_palm
http://www.foodsubs.com/Stalk
http://www.asiafood.org/glossary_1.cfm?alpha=P&wordid=3401&startno=1&endno=25
http://www.demasapalm.com/eng/hearts_of_palm.html
http://www.soupsong.com/fheartso.html
http://www.gourmetsleuth.com/equivalents_substitutions.asp?index=R&tid=719

Tags:

Wednesday, 21 March 2007

mango & sticky rice

A great Thai restaurant that I eat at regularly serves sticky rice, coconut milk and mango for $2.5 in little takeaway containers.

I love this refreshing and mild dessert after a spicy, tangy meal of fish sauce, lime juice and lots and lots of chilli. It really takes the edge off the chilli afterburn.

Khao Neuw Mamuang – Mango & Sticky Rice
Based on a recipe from the back of a rice packet. Serves 2-3.
Ingredients:

1 mango
1 cup sticky rice
2 tablespoons palm sugar
250ml coconut milk
pinch of salt
Method:
1. Soak rice in warm water for 10-20 minutes. Drain.
2. In a saucepan, cover rice with 400ml water and put on the lid.
3. Bring to boil then stir. Simmer 15 minutes.
4. Remove from heat and, leaving cover on, allow to stand 5-10 minutes.
5. Heat coconut milk with sugar and salt, stirring constantly and taking care not to allow milk to boil or it could curdle.
6. Combine most of coconut milk with rice, reserving some coconut milk for serving. Allow the hot rice to absorb some of the coconut milk then serve, drizzling rice with remaining coconut milk.
7. Cut cheeks from mango and slice. Serve with rice.


Tags:

Sunday, 12 November 2006

recipes from my hunter valley weekend

Recently Shelley, Vicky, Shamu (also known as Joanne) and Em organised a girly weekend in the Hunter Valley as a sort of “bridal weekend”. Since only Vicky lives in Sydney, this was a chance for us to talk about the wedding planning and all the fun, girly things that come along with it.

What could be better than 3 days in wine country with your friends!

We had a busy schedule ahead of us, visiting wineries, cheese shops, olive festivals, top restaurants, picnics in the vineyards and even taking a cooking class. It’s a hard life really.

The Hunter Valley is about a two hour drive from Sydney and is famous for it’s semillon. I’m not a big fan of semillon (I find it too mild and almost sour), but I adore botrytis semillon! The Hunter is also known for production of verdelho, chardonnay, chambourcin, shiraz and cabernet sauvignon.

Apart from wines, the Hunter has a vibrant cheese industry with gorgeous products from various cheese shops such as the Smelly Cheese Shop, Binnorie Dairy and the Hunter Valley Cheese Company.

The Smelly Cheese Shop stocked all the local cheese products as well as imported products. They had plenty gourmet treats and a huge cheese room for leisurely perusal.

Binnorie Dairy made their own, mostly goat’s milk based, cheeses such as labna, fetta and even a gorgeous creamy concoction of gorgonzola and marscapone.

The Hunter Valley Cheese Company had a range of everything such as local parmesan, ash brie, edam and haloumi. They even had an amazing blue vein cheese that had been marinated in port and then sealed into a large ceramic pot. It was beautiful, both in taste and appearance, but pricey at AUD$43.05 per pot!After a visit to each of these cheese shops the five of us had bought enough preserves, breads and cheeses for a picnic in the vineyard next to our hotel room. With a few bottles of the Bimbadgen Sparkling Semillion it was all pure bliss!!! Only problem was picking the burrs off the rug later on.

We stayed at the Hunter Resort, right next door to the Blue Tongue Brewery who make a delicious alcoholic ginger beer. The accommodation included breakfast and a delightful discovery each morning was a sheet of fresh honeycomb for guests to break off and suck out the wonderful honey. It was gorgeous!

By the end of the weekend we had eaten at a wonderful restaurant and certainly visited a lot of wineries! I think my favourite winery was Misty Glen Cottage where I bought the 05 semillon (one that finally tasted good!), the 05 chardonnay and the 04 cabernet sauvignon. I was really surprised by these wines and couldn’t say no.

Misty Glen was also the site of our cooking lesson, led by Barry Meiklejohn who is the chef at Club Azzurri in Highfields. He was a strange man: kind-hearted, very absent-minded and yet knowledgeable about food and flavours. He turned out to be very inventive with simple ingredients.

Barry also managed the impossible: he converted me to a gnocchi lover.

For as long as I can remember, I have disliked gnocchi. I thought it was the world’s worst excuse for pasta and that the little balls of gluggy gloop couldn’t be improved regardless of the sauce you drenched them in.

Now I am a changed woman.

Barry cooked two gnocchi dishes and I loved both of them. The first was homemade gnocchi and it was wonderful. The second used baby gnocchi and I was even happier to find a commercial variety that I enjoyed.

As a huge gnocchi lover, Jonas has a lot to thank Barry Meiklejohn for.

On the cooking menu at Misty Glen Cottage was:

Homemade gnocchi with caponata
The fresh vegetables break down slightly providing flavour, texture and zing to this salsa. The gnocchi are pure perfection.

Baby gnocchi & king prawns with curried butter
Pan-fried king prawns can be served on their own or you can easily add cooked baby gnocchi to the pan to soak up the flavoured butter.

Lemon risotto cake
A sweet risotto is mixed with pinenuts and eggs to make a sticky torte.


Gnocchi
Recipe by Barry Meiklejohn. Serves 4.
Ingredients:

1.5kg potatoes, washed and unpeeled
4 egg yolks
250g plain flour
Method:
1. Roast potatoes until tender then peel.
2. When cool enough to handle, grate them on a coarse grater.
3. Knead the potato, flour and egg yolks until well mixed.
4. To make the gnocchi, take about 1 tablespoon of dough and roll into ball, then flatten with fork.
5. Poach in well salted boiling water until they rise to the surface of the water. Leave for 1 minute longer then drain and immediately toss with sauce to prevent sticking.

Caponata Sauce
Recipe by Barry Meiklejohn. Serves 4.
Ingredients:
1 small eggplant, semi peeled
1 onion sliced
3 oven roasted tomatoes, skinned
2 garlic cloves, crushed
3 fillets anchovies
1 tablespoon capers
2 tablespoons olives, pitted and chopped
Chopped parsley and rosemary
Olive oil
Salt and pepper
Method:
1. In a large pan, heat olive oil and lightly fry the onion, garlic and eggplant.
2. Add remaining ingredients and fry until tomatoes and anchovies break down to form a sauce.
3. Can be served as pasta sauce, bruschetta topping or as a salsa with fish or meat.

Baby Gnocchi & King Prawns with Curry Butter
Recipe by Barry Meiklejohn. Serves 4.
Ingredients:

Butter
125g salted butter
2 teaspoons seafood curry powder
6 cloves of garlic, chopped roughly
1 teaspoon ginger, chopped roughly
Chopped parsley
1 teaspoon salt
Chilli to taste
Remainder
16 king prawns
Store bought baby gnocchi (2 packs)
Baby spinach
Method:
1. To make butter, put everything in the food processor and combine well. Wrap in plastic and return to fridge.
2. Boil water for pasta.
3. With scissors, snip down the back of the prawn shell. Remove the intestine and slit the prawn to make a cavity. Fill with flavoured butter and pan fry.
4. Meanwhile, while grilling prawns add gnocchi to boiling water and cook until they are floating. Check for softness and remove when ready.
5. Add cooked gnocchi to prawn pan and stir to absorb butter. Stir in parlsey and serve hot.
Variation: You could omit the curry powder and use your own combination of spices.

Lemon Risotto Cake
Recipe by Barry Meiklejohn. Serves 8.
Ingredients:

2½ cups milk
150g Arborio rice
4 tablespoons pinenuts, toasted
4 lemons, zested and juiced
5 eggs, separated
½ cup sugar
Pinch of salt
Method:
1. Preheat oven to 180’C-200’C. Grease a non-stick cake tin and line with baking paper. 2. Bring milk to the boil, add salt and rice and simmer for 10 minutes. Stir occasionally for a further 10 minutes. Transfer to a bowl and cool.
3. Stir in the pine nuts, lemon juice, lemon zest, sugar and egg yolks.
4. Beat the egg whites until frothy then fold them into the mixture.
5. Pour into cake tin and bake for 30 minutes. Cool a little and serve warm with cream and stewed fruits.
Variation: I thought this cake could do with a little more flavour. It was big on lemon but the rice makes it a little glutinous. Perhaps adding some cinnamon or fresh vanilla would be a nice touch. Or some honey. I would also toast the pine nuts and so I added that to the recipe above.

So, with a spotlight on potatoes, this gnocchi fest is my contribution to Weekend Herb Blogging. And why not throw in a cake for good measure.

Weekend Herb Blogging is being hosted by Meeta at What’s For Lunch Honey? Be sure to check out her recap.

Tags:

Saturday, 26 August 2006

calamares rellenos

In my house we have a parsley war.

Jonas likes the curly variety while I lean heavily towards the flat-leaf.

When we decided to start a little herb garden we had to compromise and buy one of each. We planted them in one big pot and eagerly watched them growing, secretly hoping that our own favourite would outgrow the other.

The curly took off and burst with vibrant colour and height. The flat was wimpy, limp and sickly. I was very nervous. Then suddenly the roles reversed and the flat snapped the attention, gained colour and left the curly for dead. In the end the curly was shaded out of existence and flat-leaf parsley rules supreme in our home!

But it’s not nice to gloat.

For this week’s Weekend Herb Blogging, hosted by Kalyn’s Kitchen, I am using my glorious flat-leaf parsley in one of the most delicious recipes I have discovered: stuffed calamari!

I really love calamari and for about 5 years I have always wanted to attempt stuffed calamari in the Spanish style. It worked out perfectly and I was so pleased.

I got the recipe from a book called "Spanish" by Pepita Aris (Hermes House), but I admit I did tinker with it a bit. Below is my own version.

Calamares Rellenos
Based on a recipe by Pepita Aris. Serves 4.
Ingredients
2 large calamari tubes
100g squid tentacles or calamari pieces, chopped finely
50g diced ham
½ cup long grain rice
1 small onion
2 garlic cloves
2 chopped tablespoons parsley (flat leaf)
250ml (1 cup) dry white wine
1 bay leaf
Olive oil
Parsley (flat leaf) for garnish
Tomato Sauce
625ml (2 ½ cups) passata
125ml (½ cup) dry white wine
1 dried chilli, chopped finely
4 garlic cloves, crushed
1 onion, chopped finely
Olive oil
Method:
1. To make the tomato sauce, heat olive oil in a saucepan. Cook onion, chilli and garlic over a gentle heat until soft. Add passata and wine then cook for 10 -15 minutes. Season with salt and pepper.
2. Make sure the calamari tubes are clean.
3. In a frying pan heat about 4 tablespoons of olive oil. Add garlic and onion and cook until soft. Add ham and squid pieces and fry for around 5 minutes.
4. Remove from heat and stir in rice and parsley. Season well.
5. Using small skewers or strong toothpicks, seal one end of each calamari tube.
6. Divide the rice mixture and fill each tube. Stitch the ends shut with toothpicks or skewers.
7. Blot the calamari with kitchen paper to dry. Dust lightly with flour then fry in a little olive oil until coloured on all sides.
8. Transfer calamari with spoons to casserole dish lined with some of the tomato sauce. Arrange calamari then top with tomato sauce.
9. Add bay leaf and wine to casserole pot. Cover and simmer for around 30-60 minutes or until rice is cooked through. Make sure to turn calamari if they are not completely submerged in the tomato sauce.
10. Serve sliced into rings and garnished with parsley.
Variation: At step 4, some people add raisins, toasted pine nuts and ½ beaten egg. This adds an additional flavour and the egg binds the ingredients together.

Serve with a chilled rosé!

Parsley (Petroselinum - Umbelliferae) is a biennial herb that comes in two main forms: curly and flat varieties (flat leaf is also known as continental or Italian parsley). The curly variety is used as a garnish and is bitter, while the flat leaf is known to have a stronger flavour due to increased levels of essential oil (apiol).

Apiol is an interesting by-product of parsley, and was used as an effective abortion drug as far back as 370BC when Hippocrates, the father of modern Western medicine, recorded its use. It continued to be used in the West until fairly recently and is still used in the Middle East today.

There is also another type (turnip-rooted or Hamburg parsley) which is grown for its roots. This variety has only been developed in the last two centuries and is akin to salsify and burdock.

It is claimed that parsley is native to the Mediterranean and that it has been cultivated for over 2,000 years: first as a medical herb and then as food.

In Ancient Greece it was sacred and given to victorious athletes or placed on tombs. As it was connected to funerals it was considered bad luck to transplant parsley and due to the symbolism of death it was never given to the elderly.
Using it as a food garnish first came about in Ancient Rome and in Europe it was finally introduced as a food herb during the Middle Ages. It was said that Charlemagne grew parsley on his estates.

The etymology of the English word “parsley” comes from the Greek word “petroselinum” or rock celery. In the Middle Ages this morphed into petrocilium which became petersylinge, persele, persely and finally parsley.

The variety crispum, or curly leaf, was the first cultivated and was recorded by Pliny (23-79 AD). This variety is more commonly used in the UK even though the flat-leaf variety was introduced there first. It is said that the English preferred curly-leaf for its milder flavour and also because flat-leaf parsley looks very similar to an extremely poisonous weed called Fools Parsley (Anthriscus cynapium).

It is believed that parsley is fatal to small birds and fowls, but it is adored by rabbits and sheep who will ravage a parsley bush given half a chance.

Parsley has been famous throughout history as a breath-freshener and now we know this is due to its high levels of chlorophyll (a green photosynthetic pigment found in most plants).

Parsley tea is seen by both Chinese and German herbologists as an aid against high blood pressure and Cherokee Indians believe it strengthens the bladder.

Some of parsley’s volatile oils, such as myristicin, are known to “inhibit tumour formation” in the lungs, although tests thus far have only been conducted on animals. A flavonoid in parsley, luteolin, is an anti-oxidant that has particular benefits for the blood.

Parsley is also a source of vitamin C, beta-carotene (immune system vitamin A converter) and folic acid (cardiovascular vitamin B).

On the negative side, parsley is high in oxalic acid which is a cause of kidney and gallstones as well as prevents the absorption of calcium.

Parsley is best grown in deep pots because it has long taproots. It needs at least 5 hours of sunlight a day and can be harvested as soon as the plant is 15cm tall (6 inches). Leaves can be refrigerated for fresh use or can be frozen (although use without thawing). If fresh parsley is wilted, sprinkle it lightly with some water before putting in the refrigerator.

Be sure to check out Kalyn’s recap and see all the other wonderful recipes whipped up this week!

References:
http://www.botanical.com/botanical/mgmh/p/parsle09.html
http://en.wikipedia.org/wiki/Parsley
http://www.gardenguides.com/herbs/parsley.htm
http://www.whfoods.com/genpage.php?tname=foodspice&dbid=100
Parsley sketch courtesy of Wikipedia


Monday, 26 June 2006

fiesta mexicana

Hola amigos! This weekend was a Mexican fiesta (partly Tex Mex) at my house.

I’m not sure whether I’m stretching the Weekend Herb Blogging theme by including pulses and grains as my “herb, vegetable, flower or plant” but since I tried out some really interesting recipes this weekend I’m going to attempt to pass chick peas, kidney beans and rice off as my "greens". If no one buys that, there’s plenty of tomatoes, onions, citrus and coriander in the recipes too.

This week's WHB recap is hosted by Virginie of Absolutely Green in France.

My Mexican inspired feast was shared with my friend, Em, who came up to Sydney from her southern coast home. I cooked chile con carne, horchata (ground rice drink) and torta del garbanzo (chickpea cake).

I have always thought of chile con carne as comfort food, even though I haven’t eaten it in some time since the “con carne” part isn’t really conducive to my vegetarian lover’s diet.

I really miss chile con carne, although Jonas makes a good vegetarian version which we named chilli sin carne. Mexican Robot laughs hysterically at this and wonders what’s in it without the meat! To answer that intriguing question, Jonas uses a soy sausage sliced into thin rounds – otherwise the recipe is pretty much the same as the carnivorous one.

Still, nothing beats the food of your childhood.

I remember Dad would make chile con carne all year round, a wonderful warm and filling meal that seemed to take forever to my young eyes. I used to watch him making it, smell the frying beef and the stewing tomatoes and grow increasingly hungry with anticipation. The time it took to simmer always seemed like hours and when making it for the very first time this weekend I was shocked at how fast it actually took.

The traditional recipe probably calls for stewing beef so that the chunks will flake apart after the long simmer, but I used my father’s own mince based recipe, devised from the Tex Mex he grew up on in California (the US state not Baja).

I made some slight alterations to my father’s recipe. I substituted a teaspoon of sugar for the sweet, smoky flavour of a chipotle; I added more lemon juice and a garlic clove and I garnished my food with sour cream and coriander (cilantro), which is a herb my father cannot stomach ever since, as a teen, I made him a Thai style tomato and coriander salsa that was so overloaded with coriander he swore off the stuff forever. Sorry Dad!

Chile con Carne
Paul's recipe. Serves 5-6 people if served with rice.
Ingredients
500g minced beef
500g can crushed tomatoes
750g can kidney beans
Packet of Mexican style power (eg Old El Paso chilli, taco or burrito powder)
1 onion, chopped finely
1 clove garlic, crushed
1 chipotle chilli (from a can in adobo), chopped
1 teaspoon tomato paste
1 teaspoon oregano
Juice of ½ lemon
½ teaspoon cumin
Pinch of cayenne pepper
Jalapeños, chopped (to taste)
Sour cream and coriander to garnish
Method:
1. In a large pot, fry the garlic, chipotle and onions until soft.
2. Add the mince and cooked until browned.
3. Add the Mexican powder and stir through.
4. Add all the remaining ingredients except the lemon juice (including the juices from the bean can) and let it simmer for 15 minutes, stirring occasionally.
5. Add the lemon juice and simmer for 5 more minutes.
6. Garnish with some sour cream and coriander. Serve with rice, flour tortillas or corn chips.

~~~

Next recipe off the rank was a tasty beverage called horchata. It’s a creamy Mexican drink flavoured with cinnamon, almond and lime and is completely dairy free.

I had never made it before, and unfortunately the texture of my first attempt was not quite right. Having tried a good version at a Mexican Christmas party thrown by Bicky and Robot, I knew mine was much too gritty. I’m not sure how to combat this either, since I used a food processor and a blender and couldn’t seem to turn the rice into a fine enough paste. Nonetheless it tasted delicious and fresh so I know I’m almost there.

Em, who arrived at my home with an upset tummy, vouched for the drink’s famed ability to cure indigestion and even Jonas, who didn’t like it when he tried it at breakfast this on Sunday morning, said he could feel it doing good things for his body.

This recipe came from a cookbook called 'Mexican' by Jane Milton (published by Hermes House).


Horchata
From Jane Milton’s ‘Mexican’. Makes approximately 1.25 litres.
Ingredients:
2¼ cups long-grain rice
3 cups water
1¼ cups blanched whole almonds
2 teaspoons cinnamon
Finely grated zest of 1 lime
¼ cup sugar
Method:
1. In a sieve, rinse the rice thoroughly under cold water. Drain and place in a bowl. Top with the water, cover and leave to soak overnight.
2. Drain the rice, reserving the soaking liquid.
3. In a food processor or blender, grind the rice as finely as possible.
4. Add the almonds and as finely as possible again.
5. Add the cinnamon, lime zest and sugar. Also add 2½ cups of the reserved soaking liquid. Blend until sugar is dissolved.
6. Serve garnished with cinnamon or lime zest and some ice cubes.

~~~

And finally, dinner ended with a strange and extremely easy to make dessert that happens to be gluten free. Torta del garbanzo is a very moist cake made out of chickpeas and flavoured by orange and cinnamon (although I used cinnamon’s stronger cousin cassia).

I got this recipe from Jane Milton’s ‘Mexican’ book as well, although I halved the ingredients to make a smaller cake and unfortunately forgot to halve the orange juice too. Even though the mixture was like water when I poured it into the baking tin, it still turned into an excellent cake with a crunchy top and a syrupy base flavoured with orange. I am giving you my amended version below.

Torta del Garbanzo
Based on a recipe from Jane Milton’s ‘Mexican’. Serves 6.
Ingredients:
300g can chickpeas/garbanzo
2 eggs, beaten
½ cup sugar
½ teaspoon baking powder (bicarb soda)
1 heaped teaspoon cassia (or cinnamon)
Zest and juice of 1 orange
Method:
1. Preheat the oven to 180’C (or 350’F). Grease and line a baking loaf pan.
2. Drain the chickpeas thoroughly, and then rub them with your fingers to remove the papery skins. Puree in a food processor.
3. In a bowl, mix the chickpeas, sugar, eggs, baking powder, cinnamon, orange juice and rind.
4. Pour into baking loaf pan and bake for 1hr and 20 minutes or until a skewer inserted into the centre comes out clean.
5. Remove from oven and let stand for 10 minutes before cooling on a wire rack. Allow cake to cool completely before serving.
6. Sprinkle with cinnamon sugar and or serve in thin slices with fresh pineapple and yoghurt.

Related Posts with Thumbnails