Showing posts with label something sweet. Show all posts

Saturday, 26 January 2013

pavlova, an australian favourite

Happy Australia Day!

Today is our national holiday, a time where most Australians throw a BBQ or catch up with friends and family in the summer warmth.

Since it’s Australia Day, the dessert that ends the festivities should be a pavlova, something named after a Russian ballerina but yet typically Australian.

Or is it?

While it’s true that Australia has very successfully exported pavlova around the world (and taken all the glory), what many of us don’t know is that culinary historians have proven the pavlova was actually invented in New Zealand!

The proof seems to be out there in the form of published recipes and articles, of which New Zealand has many earlier cases than Australia (NZ 1926 v AU 1929).

Knowing this I feel a little cheated, a slight loss of cultural identity, but imagine how the poor Kiwis feel about the fact that Aussies stole their tasty dessert and are unashamedly passing it off as our own!

It's not the first time we've done that, and no doubt it won't be the last.


Regardless of whoever invented it, these days both countries use it as a symbol of cultural identity and since it’s a pavlova there’s plenty to share with everyone.

On the topic of sharing, while I say this recipe serves 10 people (and it does), I have to confess me and three friends managed to polish off the entire thing in 30 minutes.

Prepare yourself for gluttony at its finest.


Pavlova

Anna’s very own recipe. Serves 10.

Ingredients:
5 eggwhites, at room temperature
330g (1½ cups) caster sugar
1 tablespoon cornflour
1 teaspoon white wine vinegar
1 vanilla bean, scraped seeds only (or 1 tsp vanilla extract)
300ml thickened cream, whipped
2 passionfruit, pulped
2 bananas, sliced and doused in lemon juice to prevent discolouring
1 punnet strawberries, halved
½ punnet blueberries

Method

1. Preheat the oven to 150’C.

2. In the bowl of an electric mixer, beat the egg whites on a high speed until fluffy, about a minute.

3. Reduce speed to slow then gradually add caster sugar until the mixture is thick and glossy with a hard peak.

4. Next beat in the cornflour, vinegar and vanilla.

5. Line a baking tray with baking paper and pour the meringue on. Stack high to get a marshmallow interior and thin for a crusty pavlova. Create a concave/nest in the centre to catch all the cream and fruit.

6. Bake the pavlova for 50 minutes until quite firm, then turn the oven off but leave the pavlova in it to cool completely.

7. Spread the cream over the meringue then decorate with fruit. Serve excess fruit on side platter to be passed separately for those who want extra.

Note: The mixing bowl should be clean with no grease in it, the egg whites at room temperature and there should be absolutely no yolk in the white.

Monday, 14 January 2013

strawberry curd tart


This summer, strawberries have been particularly delicious and thankfully cheap. I have been eating them by the punnet, at least one per week or more if I can get to the store regularly.

I have been adding them to smoothies and slushies, macerating them with lemon and sugar, mixing them into flapjacks in the morning and snacking on them just as they are.

I can’t get over how sweet they are this season. Even the stock standard producers are giving us succulent little beauties that remind me of my mother’s garden.

My mum grew a large patch in our sunny front yard, but it seemed like the skinks always got to them first. Worst of all they were very wasteful skinks because they'd gum a berry then move onto the next one without finishing it. When I’d head outside to pick a few they’d all be squashed and mushed, but still attached to the plant as if it was some hilarious skink practical joke.

I decided to go a little crazy for our New Years Day afternoon tea and with four punnets at my disposal I made this fabulous strawberry tart. The curd tasted amazing, the tart shell was perfectly crisp and the fresh strawberries on top gave a burst of juice to contrast with the creamy filling.

There are three steps to this recipe: the curd, the tart shell and the assembly. If you want, buy a tart shell but don’t cut corners on the wonderful strawberry curd.


Strawberry Curd Tart


Anna’s very own recipe. Serves 8-10.

Ingredients:
250g strawberries (about 1 punnet)
1½ cups strawberry curd (see below)
1 vanilla shortcrust tart shell (see below)

Method:

1. Cut the strawberries in long thin slices.

2. Assemble the decorative pattern on a plate to ensure you have enough slices.

3. Fill the pastry shell with strawberry curd. Chill filled pastry in fridge 20 minutes if it needs to firm up.

4. Place the strawberry slices decoratively on top.

5. Eat with abandon!

Note: you can also fold ½ cup of whipped cream into the curd, spread it into the tart base and then freeze it for two hours or so to make a semifreddo style tart.


Strawberry Curd

Anna’s very own recipe. Makes 1½ cups (375ml).

Ingredients:
250g strawberries (about 1 punnet)
½ teaspoon vanilla bean paste
4 egg yolks
Juice of ½ lemon
55g (¼ cup) caster sugar
150g salted butter, coarsely chopped

Method:

1. Process strawberries and lemon juice in a food processor to make purée, then pass through a fine strainer to remove seeds. Yields about 200g purée.

2. Transfer to a heatproof bowl, add egg yolks, vanilla, sugar and butter. Whisk to combine.

3. Stir continuously over a saucepan of simmering water until thickened to custard consistency (around 15 minutes).

4. Set aside to cool, then cover and refrigerate until firm (2-3 hrs).


Vanilla Shortcrust Tart Shell

Anna’s very own recipe. Makes a 22cm circular shell.

Ingredients:
175g chilled butter, chopped into small pieces
1 cup plain flour
¾ cup wholemeal flour
4 tablespoons sugar
1 teaspoon vanilla bean paste
1 egg

Method:

1. In a small bowl, beat egg with vanilla bean paste.

2. Pulse the flour, sugar and butter in a food processor until combined (you will still see flecks of butter).

3. Turn out flour onto a clean working station and make a well.

4. Add egg knead, with hands, until only just combined.

5. Wrap in plastic and chill for 1 hour.

6. Meanwhile, preheat oven to 180’C and grease 20cm tart tin.

7. Between two sheets of baking paper, roll out pastry to fit tin.

8. Place gently into tin, pressing to fit edges and fixing cracks. Use rolling pin to trim edges making sure not to cut them too close as the pastry will shrink during cooking.

9. Fill the tart tin with baking paper and pie weights (or you can freeze the pastry in the tin for at least 30 minutes and not use pie weights).

10. Bake in oven for 20 minutes then remove baking paper and pie weights and bake another 20 minutes until golden. It’s important the pastry is gold as that’s what imparts the flavour.

11. Allow to cool for 15 minutes before removing from tin.

Tuesday, 25 December 2012

jamie oliver’s “new” mince pies


Merry Christmas!!!

Today Jonas was up early cooking a variety of Swedish delicacies for our Julbord (Christmas table):
  • vörtbröd (wort or beer bread)
  • smoked sausages
  • smoked mackerel
  • sillsallad (pickled herring with mayo, egg, herbs & potato)
  • meatballs with lingon jam
  • beetroot salad
  • bourbon-maple-mustard glazed ham
  • Janssons frestelse (potato & anchovy gratin)

My only contribution was these mince pies.


I know have slowed down my blogging lately, but I promise I have a really good excuse.

I’m not quite ready to share the reason just yet but suffice to say, if all goes according to plan, I will let you in on the secret in March. Until then, please be patient and I promise I won’t disappear completely.


I saw Jamie make these pies on a Christmas TV special and thought they looked a lot simpler and easier to make than traditional mince pies. I fancied mine up quite a bit with dried sour cherries, blueberries and dates, but you could use any dried fruits you have on hand.

They are quite sweet and intensely flavoured, so I recommend serving with sweetened crème fraîche, ice cream, custard or cream to balance it out a little.


Jamie Oliver’s “New” Mince Pies

My adaptation of Jamie Oliver's recipe. Makes 12.

Ingredients:
¼ cup dried cranberries
¼ cup dried sour cherries
¼ cup dried dates, chopped
2 tablespoons dried blueberries
½ cup brandy
400g jar high quality fruit mince
30g glace orange rind, finely chopped
100g peeled, roasted chestnuts
2 sheets puff pastry
6 sheets of filo pastry
50g butter, melted
1 teaspoon cinnamon
1 egg, beaten
¼ cup flaked almonds
Icing sugar, to dust

Method:

1. The day before, combine the dried cranberries, sour cherries, dates, blueberries and brandy in a plastic container. Mix and seal overnight.

2. Preheat the oven to 200°C/400°F/gas 6. Butter a muffin tray (for 12 muffins).

3. Spread the mincemeat over the two puff pastry sheets. Sprinkle over dried fruit mixture, glace rind and then crumble over chestnuts.

4. Tightly roll up the pastry, lengthways, like a Swiss roll, place it on a floured tray, and pop in the fridge to firm up.

5. Combine the melted butter and cinnamon.

6. On a flat surface, butter one layer of filo pastry. Top with another sheet and butter. Fold them in half to create a long thin strip then place over four holes of the muffin tray. Repeat two more times, covering all the muffin holes. Brush all with butter.

7. Take the puff pastry rolls out of the fridge and, with a sharp knife, cut each into 6 slices. Place each slice into a filo-lined hole, flat-side down so the spiral of fruit is displayed.

8. Brush with the egg and sprinkle a few flaked almonds on top of each little pie, then pop both trays in the oven for about 25 minutes, until cooked and golden brown.

9. Leave to cool, then crack the individual pies out of the trays. Dust with a little icing sugar before serving.

Note: You can freeze the cooked, cooled mince pies in their trays (just wrap the lot in cling film). Just reheat them in a hot oven straight from the freezer.


Sunday, 7 October 2012

sockerkaka - swedish sponge cake


Sockerkaka translates to “sugar cake”, but really it’s a type of sponge cake without all the fuss.

Today is my darling husband’s birthday and he requested I made him a sponge cake sandwiching strawberry jam and cream – for breakfast!

How could I say no?


Last weekend we bought almost 2kgs of strawberries for $9 and he’d asked me to turn them into jam, since strawberry is his favourite jam.

I’m glad I did, because nothing beats a sponge flavoured with homemade jam (see recipe below).

Although the recipe is very simple (and you can make it more so if you use 200ml milk and 100g butter instead of cream and buttermilk), the results are light, sweet and the perfect sponge substitute.


Sockerkaka (Swedish Sponge Cake)

Based on a recipe from www.sockerkaka.com. Serves 10-12.

Ingredients:
400ml (4dl) sugar
4 eggs
60g butter
125ml cream
125ml buttermilk
2 vanilla pods (or 2 teaspoons vanilla bean paste)
2 teaspoons lemon zest, finely grated
600ml (6dl) flour
4 teaspoons baking powder
For filling/decoration
200ml cream, whipped
60ml (¼ cup) strawberry jam, slightly warmed  (see recipe below)
Strawberries
1 tablespoon icing sugar

Method:

1. Preheat oven to 175’C. Grease and line 2 x 20cm round baking tins.

2. Scrape out seeds from vanilla pods.

3. Melt butter with buttermilk, cream, lemon zest and vanilla pods and seeds. Remove from heat once butter is melted. Set aside.

4. In a new bowl, beat eggs and sugar on high speed until light, fluffy and doubled in size (at least 5 minutes).

5. After removing vanilla pods, beat milk mixture into the egg mixture.

6. In another bowl, combine the flour and baking powder.

7. Gently fold dry ingredients into wet ingredients until just combined.

8. Divide between tins and bake in oven for 35 minutes or until an inserted skewer comes out clean.

9. Cool 5 minutes in tin, then turn out onto cooling rack. Cool completely.

10. To assemble cake, spread the strawberry jam on top of one cake, the spread over the whipped cream. Gently place the other cake on top then dust with icing sugar. Finish with strawberries.

Note: you can use 200ml milk and 100g butter if you don’t want to use cream and buttermilk. If you slightly warm the jam is goes a bit runny and soaks into the cake. But make sure it's not hot or it will melt the whipped cream.


Strawberry jam is quite difficult to get right because strawberries have little to no natural pectin and therefore making a jam that sets can be hard and takes longer than other fruits. I know I have trouble.

There are plenty of websites that offer fantastic advice on how to rescue jam that hasn’t set, even after you’ve put it in jars, so don’t let fear put you off trying. Besides, even if you end up with runny jam, it’s still going to taste amazing.


Strawberry Balsamic Jam
Anna’s very own recipe. Makes 6 x 250ml jars.

Ingredients:
1.5 kg strawberries, washed and hulled
1kg caster sugar
300g raw sugar
50g jamsetta
100ml balsamic vinegar

Method:
1. Place a small saucer in the freezer. You’ll use this to test the jam.

2. Heat strawberries in a large pot with vinegar for about 5 minutes, stirring to release juices and prevent burning.

3. Meanwhile, warm sugar on a tray in the oven for around 5 minutes, being sure not to burn or dissolve it.

4. Add warm sugar and jamsetta to fruit purée, then heat and stir until sugar fully dissolves.

5. Bring to a gentle boil for 10 to 20 minutes, stirring every now and then to prevent burning.

6. To test the set of the jam, remove the saucer from the freezer and teaspoon on a little jam. Wait 30 seconds then run your finger through. If it crinkles and leaves a path, then the jam is ready. Otherwise continue cooking.

7. When ready, remove from heat and pour hot jam into sterilised jars. Seal immediately.


Sunday, 23 September 2012

shopsin's pumpkin pancakes


These days I wake up very early and incredibly hungry. Instead of launching myself out of bed I take my trusty smart phone and flick through Facebook, Instagram and Twitter to see what I missed out on while I slept.

This morning I discovered three exciting things from Facebook:
1) one of my favourite work colleagues got engaged yesterday afternoon
2) Jonas’ beautiful cousin Camilla (also a food blogger!) married her equally wonderful boyfriend in a surprise wedding in Stockholm!!!
3) These super delicious pancakes, posted by Saveur

Since I couldn’t do much to celebrate the first two items, I decided to get up and make pancakes to celebrate all the love and happiness some of my favourite people must be feeling right now, and to spread some of that love to my husband.


I wondered whether the pancakes would be a bit gimmicky, but they were amazing. Not too sweet, full of spicy oomph and subtle pumpkin flavour, and tiny flakes of salt that hit your tongue every now and then. They were hot, fluffy little pancakes and I will definitely make these again.

After reading over the Saveur website, and the reviews by people who had made these already at home, I decided to make a cranberry and maple sauce to go alongside it. They’d even go well with maple-sweetened mascarpone or cream cheese.


Shopsin's Pumpkin Pancakes w Cranberry-Maple Syrup

Recipe by Chef Kenny Shopsin from Shopsin’s in New York City’s Essex Street Market. Makes 12 pancakes.

Ingredients:
Pumpkin Pancakes
1 cup plain flour
¾ cup wholemeal flour
3 tablespoons brown sugar
1 tablespoon ground cinnamon
2 teaspoons baking powder
1 teaspoon ground cloves
1 teaspoon ground ginger
½ teaspoon salt flakes
¼ teaspoon ground allspice
1 cup canned pumpkin purée
1 cup heavy cream
1 cup milk
2 eggs, lightly beaten
6 tablespoons canola oil, for frying
Butter, for serving
Cranberry-Maple Syrup
¼ cup dried cranberries
1 cup maple syrup

Method:

1. In a bowl, sift together flours, cinnamon, baking powder, cloves, ginger, salt, and allspice.

2. In another bowl, whisk together the pumpkin purée, brown sugar, cream, milk, and eggs.

3. Combine with flour and spice and whisk until smooth.

4. Heat 1 tablespoon oil in a non-stick skillet over medium-high heat.

5. Using a ¼ cup measuring cup, pour batter into skillet to make three 3" pancakes.

6. Cook until bubbles begin to form on the edges, 1–2 minutes. Flip and cook until done, 1–2 minutes more.

7. Repeat with remaining oil and pancake batter and keep cooked pancakes warm in the oven.

8. Meanwhile, in a small saucepan, bring maple syrup and dried cranberries to the boil until foaming, then remove from heat. The dried cranberries should plump up in the warm syrup.

9. Serve pancakes hot with butter and cranberry syrup.

Note: the original recipe uses only plain flour, regular sugar and ½ cup milk.

Wednesday, 29 August 2012

milo cupcakes w condensed milk icing


I love Raspberri Cupcakes. It’s a colourful, whimsical blog that reminds me of falling down the rabbit hole and ending up in Wonderland.

Steph, the author, is brilliant. Such a young woman so dedicated to experimenting with her favourite sweet flavours and achieving perfection. It’s beyond impressive.

I think most of her creations have made it onto my Pinterest account. And who can blame me with offerings like Pretzel and M&M Chocolate Cheesecake, Shamrock Macarons with Baileys Chocolate Ganache, Popcorn Fudge, Balsamic Toffee Strawberries and the spectacular Purple Ombre Sprinkles Cake.


One of the things I love about her blog is that she experiments with Australian candies and cookies, including my all time milk flavouring, Milo.

Milo is a malted chocolate powder and it is wonderful. Amazing. Life changing even.

This recipe of Steph’s was great. The maltiness came through in the cake and the frosting was decadently sweet and almost caramel from the addition of condensed milk. Heaven.


Milo Cupcakes w Condensed Milk Icing

Steph’s brilliant recipe. Makes 10-12 cupcakes.

Ingredients:

Cake
200g plain flour
200g caster sugar
1 tsp baking powder
1/2 tsp bicarb soda
100g Milo (add more to taste)
1 tsp vanilla extract
180g sour cream
170g unsalted butter, softened
2 large eggs

Icing
150g slightly salted butter (or unsalted + a pinch of salt), softened
300g icing sugar, sifted
5 tbsp sweetened condensed milk

Method:

1. Preheat oven to 180’C. Grease or fill cupcake tray with liners.

2. Sift flour, bicarb and baking powder in a bowl and set aside.

3. Cream butter and sugar with an electric mixer in a large mixing bowl and then beat in eggs one at a time until combine.

4. Add sour cream, vanilla and milo and beat until just combined.

5. Add flour mixture and beat on low until just combined.

6. Fill cupcake liners until 3/4 full and bake for approx 15-20 mins or a skewer inserted into the centre of a cupcake comes out clean. For the best texture, the cakes should be dark golden brown on top and firm to the touch and after cooling for 1 minute out of the oven.

7. Cool on a wire rack.

8. To make the icing, remove butter from the fridge 30 mins ahead of time.

9. Beat butter until light and fluffy and then beat in icing sugar until combined.

10. Add sweetened condensed milk and beat until combined.

11. Pipe or spoon over the top of cupcakes when they are cooled and drizzle some extra condensed milk over the top. Finish with a sprinkle of Milo.

Note: Can be stored in an airtight container in the fridge overnight.


Friday, 6 July 2012

brown sugar meringue w verjuice figs & honey-cinnamon yoghurt


These are divine. The outside are perfectly crisp and break with a pop under your fork, yet the inside is a fluffy, sticky, gooey texture almost like a melted marshmallow.

And the flavour! You can certainly taste those perfect burnt, dark toffee sugars.


I first tried brown sugar meringues at a wonderful slow food wine dinner at Mumu Grill in Crows Nest, and although I have yet to venture across the Harbour Bridge to the far northern shores of Sydney, to dine at this restaurant again, the wonderful meal is branded into my food memory, especially the “brown sugar pavlova”.

This is one of my 2012 Food Challenges, to recreate recipes I had experienced at restaurants and boy does this recipe tick all the boxes.

It was a while ago since I ate the Mumu Grill version, but accompanied with the verjuice figs and the sourness of yoghurt, I might even bravely claim that my version is better.


Brown Sugar Meringue w Verjuice Figs & Honey-Cinnamon Yoghurt

Anna’s very own recipe. Serves 6.

Ingredients:
3 egg whites, at room temperature
100g dark brown sugar
50g caster sugar
Pinch of Tahitian vanilla salt
½ cup pomegranate seeds
125ml thick low fat Greek yoghurt
1 tablespoon honey
½ teaspoon cinnamon
18 dried figs
⅓ cup verjuice
⅓ cup caster sugar, extra

Method:

1. Preheat the oven to 120°C.

2. In a mixing bowl, beat the egg whites until soft peaks form.

3. In another bowl, combine the sugars and salt and stir thoroughly.

4. Beat in the sugar mixture in 1 tablespoon batches, making sure each amount is incorporated before adding more.

5. Beat until the meringue is thick and glossy, holding its shape (peaks).

6. Spoon meringue into six small mounds, leaving space for them to spread and using spoon to create peaked tops.

7. Bake in the centre of the oven for 60 minutes, then prop open oven door slightly and leave to cool for one hour before removing. Cool one more hour before serving.

8. Meanwhile, prepare the figs by heating the verjuice and ⅓ cup caster sugar until boiling. Add figs then bring to the boil and cook for another 3 minutes. Remove from heat and allow figs to cool in syrup.

9. Make the yoghurt by mixing with the honey and cinnamon, then return it to the fridge.

10. To prepare the dish, take a meringue then dollop the honey-cinnamon yoghurt around it. Top with figs and pomegranate seeds.

Sunday, 24 June 2012

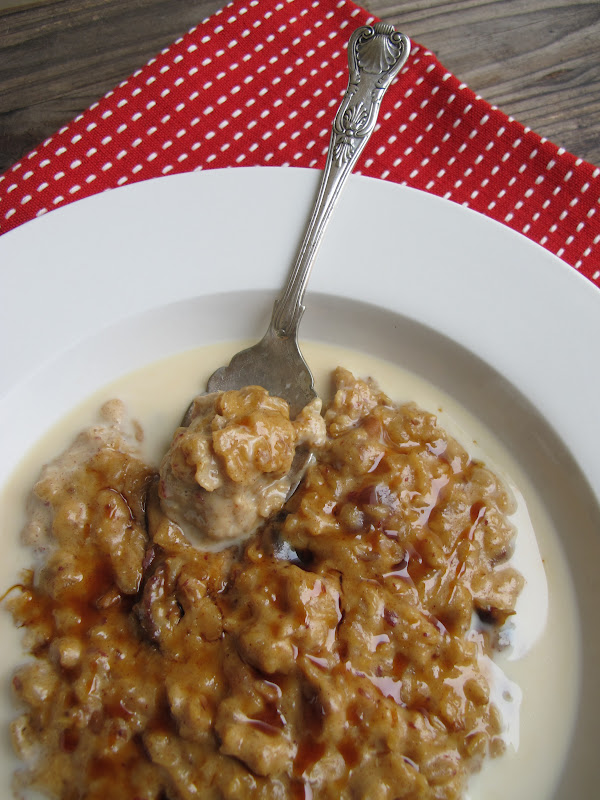
creamy date, oat & quinoa porridge


It’s a wintery Sunday morning, your breath fogging the air above the bed and frost blanketing the window panes. All you want to do is stay in bed, and so you do!

Once you’re up, attired in woolly socks and pajamas that have seen better days, you make your sleepy way into the kitchen for a warm, hearty bowl of porridge.


But why eat plain old oats when you can break your fast on an indulgent combination of cream, chopped dates, luscious date syrup and Tahitian vanilla salt. All brought together with a healthy dose of quinoa flakes.

The result is luxurious and enough to tempt you out of bed, even on the coldest mornings.


Creamy Date, Oat & Quinoa Porridge

Anna’s very own recipe. Serves 3-4.

Ingredients:
1 cup rolled oats
¼ cup quinoa flakes
2 cups milk
½ cup pouring cream
½ cup water
1 teaspoon Tahitian vanilla salt
½ teaspoon ground cinnamon
15 pitted dates, chopped
1 tablespoon date syrup (or brown sugar)
Extra date syrup, to serve (optional)
Extra warmed milk, to serve (optional)

Method:

1. Combine milk, cream, oats, dates, date syrup, cinnamon and salt in a saucepan over a medium heat.

2. Bring just to the boil, then cook, stirring continuously, until mixture is thick and creamy.

3. Drizzle with extra date syrup and top with warm milk to serve.

Tuesday, 29 May 2012

dibis w'rashi (iraqi date & tahini spread)


Breakfast time. Lunch time. Snack time.

This spread is highly addictive. Sweet and sticky from date molasses, nutty and moreish from the sesame paste.

It takes seconds to mix together and even less time to devour.

The first time I tried something like this was at Efendy, when they mixed grape molasses with tahini for one of the most wonderful sweet and nutty breakfast spreads I’ve ever had the pleasure to taste.

A friend since explained that pekmez, as it’s known in Turkey, is most commonly made with molasses from grape, carob or mulberry.

This version uses date syrup, more popular in Iraq where the date/tahini combinations is known as dibis w’rashi.

After you’ve tried this version, you might want to give the grape, carob or mulberry versions a go too. And it’s not hard to use up the excess molasses either:
- Mix through porridge or natural yoghurt
- Use as a sweetener in black tea or coffee
- Drizzle over ice cream
- Blend with ice cream into a shake
- Stir through rice pilaf with nuts and sultanas
- Substitute for sugar (weight for weight) in a cookie recipe


Dibis w'Rashi (Iraqi date syrup & tahini spread)

Anna’s very own recipe. Serves 4.

Ingredients:
5 tablespoons (100ml) date syrup
1 tablespoon (20ml) tahini
Squeeze of lemon juice (no more than a teaspoon)

Method:
Mix together until well blended.

Monday, 7 May 2012

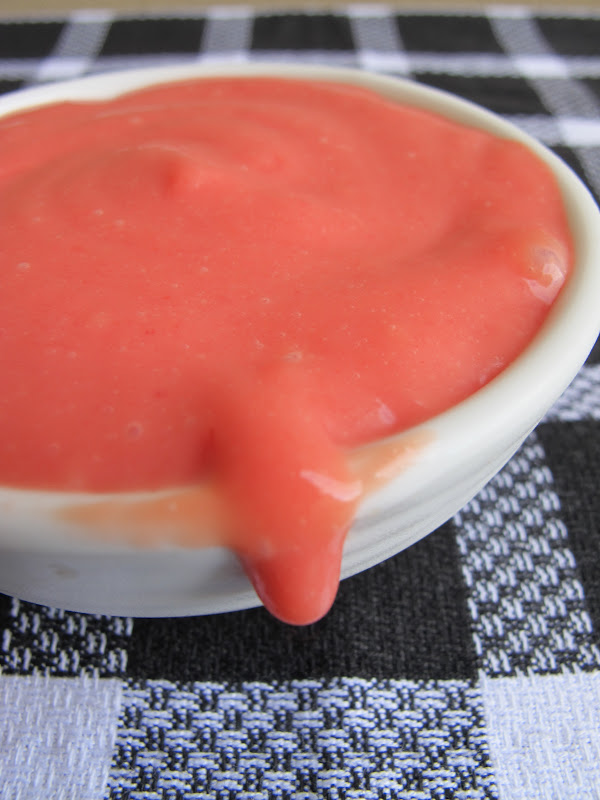
prickly pear & lime curd


from sour to sweet

Australia has a sour history with the prickly pear plant.

The very first settlers, on the First Fleet, brought it with them to establish a cochineal industry (the tiny cochineal grubs that live in the plant are squashed to produce red dye). Since Britain required a lot of red dye for their textile industry (not to mention the Red Coats of their army), they hoped an Australian colony would break the cochineal monopoly held by Spain and Portugal.

Instead, the prickly pear became one of the most invasive weeds ever introduced to Australia.

Last week I wrote about eating the prickly pear cactus paddles, but their fruits are also very popular in Mexico (where it is known as tuna) and southern Italy (where it’s called fico d'India or Indian fig). They are eaten fresh or in drinks, jams, ice creams and salsas.

There are many kinds of fruit as well, ranging from ultra sweet to tart.

1. The Juana (sometimes called roja) has large, chewy seeds and tart, crimson flesh. 2. The roja pelona, kiwilike in flavor, is free of thorns, and while the seeds of all tunas are edible, the ones in this variety are smaller than most. 3. The widely available cristalina, also known as zarca, is juicy and crisp, with a sweet flavor like that of a white peach. 4. The naranjona has a honey-sweet, subtly spicy flavor reminiscent of a ripe persimmon's. 5. The wild xoconostle has a sour and chewy, edible peel that is sometimes used in savory stews. 6. The most widely available wild variety, the cardona has soft seeds and a flavor that's both sweet and bitter, almost like a Luxardo cherry's. 7. The cuerno de venado has a floral flavor; its high water content and small seed size make it a favorite snacking tuna. 8. The yellow platanera has a tropical flavor like that of bananas, the fruit from which it takes its name. www.saveur.com

The prickly pears I was given by my colleague had vibrant red flesh, so I went for something sweet that exposed the beautiful crimson juices.

Dolloped upon perfect lime-scented meringues, this curd was a rather delectable treat.


Prickly Pear & Lime Curd

Anna’s very own recipe. Makes approx 250ml (1 cup).

Ingredients:
40ml lime juice (2 tablespoons or 1 lime)
60ml prickly pear juice (¼ cup or 1-2 prickly pears)
30g sugar
3 egg yolks
75g butter, chopped into pieces

Method:

1. To peel the prickly pears, use gloves and cut one end off, stick the top with a fork then with a very sharp knife make a cut lengthwise down the fruit to peel the outer layer off. Cut base off then discard peel.

2. Place the fruit in a food processor and puree. Strain through fine mesh using the back of a spoon to push pulp through and separate seeds.

3. Transfer to a heatproof bowl then add egg yolks, sugar and butter. Whisk to combine.

4. Stir continuously over a saucepan of simmering water until mixture has thickened and coats the back of a wooden spoon (3-5 minutes).

5. Remove from heat then set aside to thicken for an hour or two. Cover and store in refrigerator up to three days.

Note: Can also be kept for a month or two in the freezer and defrosted.


So how did it the prickly pear spread across the countryside?

In the mid-1800s, gardeners foolishly planted the cactus in paddocks and parks all along the east coast, mistakenly believing it would make great stock fodder or hedge plants. It flourished in the arid Australia climate and move from garden to paddock where it exploded across the country.

The impact was devastating and it took Special Acts of Parliament in the 1920s for coordinated and serious action to be undertaken. By that time some 60 million acres (25,000,000 hectares) of Queensland and New South Wales were overtaken and 40,000 km2 (15,000 sq mi) of farming land was rendered completely unproductive, with families unable to move between the plants and forced off their land.

The saviour in this story came in the form of the Cactoblastis cactorum, a dusty brown South American moth that, in a case often cited as one of the world’s most successful biological pest control, almost wiped out the Australian infestation of prickly pear.

But what of the cactus today?

From one of the most invasive weeds ever introduced to the country, it’s now on the supermarket shelves next to exotic pitaya, fragrant feijoa and vibrant rambutans. Curious customers are oblivious to its history as a noxious weed.

This is my contribution to Weekend Herb Blogging, hosted this week by Cinzia from Cindystar.

Wednesday, 18 April 2012

passionfruit slice


This recipe made me swoon.

I had never made passionfruit slice before, but it’s an Aussie favourite. Rightly so, given all the backyard passionfruit vines. Passionfruit will grow out of control if you don’t keep a close eye on it, but I couldn’t care less given the amazing fruits it yields.
My favourite types of passionfruits are panamas. They are much bigger, yield more pulp which is a vibrant golden hue and ultra fragrant, and they also seem to contain less white fibres to battle with when extracting the pulp.

Purple passionfruits are prettier though, and still damn tasty. These are the ones I ate the most growing up, as two different homes I lived in had purple vines in the back yard. In fact at one house the vine was right next to the pool so all you had to do was hop out of the water, rip one off the vine, jam your stubby finger inside and suck out the pulp as you jumped back into the pool. Kids, eh.


These Aussie childhood memories are fitting for the recipe I made after receiving a basket of passionfruits from the Passionfruit Industry of Australia.

Passionfruit slice: a simple biscuit base smothered in a tangy, fudgy topping.

The base is pretty standard in every recipe you'll come across, but I decided to add a little vanilla to enhance the flavours. And for the topping, I doubled the usual passionfruit quantities to ensure you’re hit with the intense flavours you’d expect from any passionfruit dessert.

Jonas thinks it’s one of the best cakes he’s ever eaten. Even better than my Easter egg friands, which he loved.

SK from my office told me it was one of the best cakes she’d eaten in a very long time, and when my colleagues swooped back for seconds it confirmed the ooohhs and aaaaahs were not just politeness.

If Jonas has his way, I’ll be making this recipe again and again and again and again.

And again and again.


Passionfruit Slice

Anna’s version of an Aussie classic. Makes approx 30 squares.

Ingredients:
100g (½ cup) caster sugar
85g (1 cup) desiccated coconut
150g (1 cup) self-raising flour
125g melted butter
¼ teaspoon vanilla bean paste
395g can sweetened condensed milk
250g passionfruit pulp (about 12 passionfruit)*
62ml (¼ cup) fresh lemon juice (1 lemon)

Method:

1. Preheat oven to 180’C / 350’F (or 160’C / 320’F fan forced). Grease a slice tin and line with baking paper.

2. *First prepare the passionfruit by scooping out the pulp of all but one passionfruit. Blitz in a food processor or blender to release the pulp from seeds, then strain through a fine strainer to yield juice. Mix in the pulp and seeds of the last remaining passionfruit (now weigh it to see you’ve got around 200-250g).

3. In a bowl, mix together the sugar, flour, coconut, vanilla bean paste and melted butter to form a dough.

4. Press mixture firmly into the prepared slice tin, to create a “cookie” base.

5. Bake for 10-15 minutes, until lightly golden on edges. Allow to cool.

6. In another bowl, mix together the passionfruit pulp, vanilla essence, lemon juice and condensed milk, as well as the additional passionfruit pulp.

7. Pour over cooled base then bake for another 10-15 minutes, or until just firm.

8. Bring to room temperature, then cover and refrigerate until completely set.

9. Cut into squares for serving. Store in an airtight container in the fridge.


Sunday, 8 April 2012

chocolate “easter egg” friands


HAPPY EASTER!

Easter is a time to eat lots of chocolate. For non-religious folk like me, it’s a holiday for relaxing around the house and catching up with friends.

Our Grandpa Hipster pal, Fabio, recently moved into an apartment with his girlfriend. One might say it was love at first sight as their eyes met across the party, and within minutes of introduction they were already in a passionate embrace.


So now that they’re living together, I invited Jonas and myself over for Easter Sunday lunch. Fabio relented to my bossy imposition, but he neglected to tell me that their apartment doesn’t have a kitchen.

IT DOESN’T HAVE A KITCHEN. How is that even possible?

After going into convulsive shock, I pulled myself together and set about baking these little chocolate friands to share with the happy couple.

Part housewarming gift, part Easter gift, part pity-the-fools-that-don’t-have-a-kitchen gift.

Apart from being made with intense dark chocolate (70% cocoa), I hid a little Easter egg in the centre before baking. In this case I used two types of “cream filled” eggs, mint and strawberry, which worked as decent substitutes to the caramel eggs I would have preferred but failed to find.


Chocolate “Easter Egg” Friands

Based on a recipe by Jeremy and Jane Strode. Makes 12 friands.

Ingredients:
175g butter
200g dark chocolate, chopped
6 egg whites
125g almond meal
250g icing sugar, sifted
30g cocoa, sifted
80g wholemeal flour
12 filled mini Easter eggs

Method:

1. Preheat oven to 190C. Grease 12 friand moulds.

2. Melt butter and chocolate.

3. Lightly whisk egg whites.

4. Add melted chocolate and butter and stir.

5. Add almond meal and icing sugar and combine.

6. Add flour and cocoa and mix well.

7. Spoon half the mixture into moulds, add an chocolate Easter egg then top with remaining mixture.

8. Bake for 25 minutes or until cooked through.

9. Rest for five minutes before turning onto a cooling rack.

Related Posts with Thumbnails