Showing posts with label cookies/slices. Show all posts
Wednesday, 18 April 2012
passionfruit slice
This recipe made me swoon.
I had never made passionfruit slice before, but it’s an Aussie favourite. Rightly so, given all the backyard passionfruit vines. Passionfruit will grow out of control if you don’t keep a close eye on it, but I couldn’t care less given the amazing fruits it yields.
My favourite types of passionfruits are panamas. They are much bigger, yield more pulp which is a vibrant golden hue and ultra fragrant, and they also seem to contain less white fibres to battle with when extracting the pulp.
Purple passionfruits are prettier though, and still damn tasty. These are the ones I ate the most growing up, as two different homes I lived in had purple vines in the back yard. In fact at one house the vine was right next to the pool so all you had to do was hop out of the water, rip one off the vine, jam your stubby finger inside and suck out the pulp as you jumped back into the pool. Kids, eh.
These Aussie childhood memories are fitting for the recipe I made after receiving a basket of passionfruits from the Passionfruit Industry of Australia.
Passionfruit slice: a simple biscuit base smothered in a tangy, fudgy topping.
The base is pretty standard in every recipe you'll come across, but I decided to add a little vanilla to enhance the flavours. And for the topping, I doubled the usual passionfruit quantities to ensure you’re hit with the intense flavours you’d expect from any passionfruit dessert.
Jonas thinks it’s one of the best cakes he’s ever eaten. Even better than my Easter egg friands, which he loved.
SK from my office told me it was one of the best cakes she’d eaten in a very long time, and when my colleagues swooped back for seconds it confirmed the ooohhs and aaaaahs were not just politeness.
If Jonas has his way, I’ll be making this recipe again and again and again and again.
And again and again.
Passionfruit Slice
Anna’s version of an Aussie classic. Makes approx 30 squares.
Ingredients:
100g (½ cup) caster sugar
85g (1 cup) desiccated coconut
150g (1 cup) self-raising flour
125g melted butter
¼ teaspoon vanilla bean paste
395g can sweetened condensed milk
250g passionfruit pulp (about 12 passionfruit)*
62ml (¼ cup) fresh lemon juice (1 lemon)
Method:
1. Preheat oven to 180’C / 350’F (or 160’C / 320’F fan forced). Grease a slice tin and line with baking paper.
2. *First prepare the passionfruit by scooping out the pulp of all but one passionfruit. Blitz in a food processor or blender to release the pulp from seeds, then strain through a fine strainer to yield juice. Mix in the pulp and seeds of the last remaining passionfruit (now weigh it to see you’ve got around 200-250g).
3. In a bowl, mix together the sugar, flour, coconut, vanilla bean paste and melted butter to form a dough.
4. Press mixture firmly into the prepared slice tin, to create a “cookie” base.
5. Bake for 10-15 minutes, until lightly golden on edges. Allow to cool.
6. In another bowl, mix together the passionfruit pulp, vanilla essence, lemon juice and condensed milk, as well as the additional passionfruit pulp.
7. Pour over cooled base then bake for another 10-15 minutes, or until just firm.
8. Bring to room temperature, then cover and refrigerate until completely set.
9. Cut into squares for serving. Store in an airtight container in the fridge.
Saturday, 7 January 2012
chocolate prune brownies
I have decided to get cracking on my 2012 Food Challenges, given last year I didn’t manage to complete many of them.
So on the very first day of the year, I ticked off my very first food challenge: cooking from the Bourke Street Bakery cookbook.
I had recently opened a packet of prunes to wizz up a Prune & Vanilla Smoothie, so I was very happy when I saw this recipe and realised I could finish the pack AND devour some luscious, alcohol-laden baked goods.
To avoid eating the entire slab of brownies all on my own, I took the fresh treats to friends who were visiting from Switzerland.
This presented its own unique challenge because the Swiss are renown chocolate connoisseurs. To make them feel right at home, I used Switzerland's very own Lindt brand to ensure the brownies were incredibly decadent.
Voila! Perfect, fudgy, prune-studded brownies.
I was almost sad to leave them behind at the end of the day, but my tummy tyres were proud of me.
Chocolate Prune Brownies
Recipe from Bourke Street Bakery cook book. Makes 32.
Ingredients:
300g pitted prunes, halved
200ml brandy, cognac or hot black tea
55g plain flour
40g unsweetened cocoa powder
1/4 teaspoon salt
2 teaspoons baking powder
300g good-quality dark chocolate (55% cocoa)
80g unsalted butter
300g caster (superfine) sugar
4 eggs
100g sour cream
145g dark chocolate melts (buttons) (55% cocoa)
Method:
1. Place the prunes in a bowl and pour over the brandy, cognac or tea. Cover and set aside to soak for 3 days.
2. Preheat the oven to 170’C (325F/Gas 3). Grease a 20 x 30 x 4cm rectangular cake tin and line the base and sides with baking paper.
3. Put the chocolate, butter and sugar into a stainless steel bowl and sit over a saucepan of simmering water - making sure the base of the bowl does not touch the water. Stir for 10 minutes, or until the chocolate has melted. Allow to cool.
4. Sift the flour, cocoa, salt and baking powder into a separate bowl.
5. Transfer chocolate mixture to the bowl of an electric mixer fitted with a paddle attachment. Mix on medium speed and add the eggs, one at a time, beating well after each addition.
6. Add the flour mixture, mix to combine, then add the sour cream, chocolate melts and prunes with the remaining soaking liquid and mix until just combined.
7. Spoon the mixture into the prepared tin and bake in the oven for 1 hour, or until just set. Place your hand on top of the brownie in the centre and wobble to feel if it is set.
8. Allow to cool completely before turning out of the tin. Use a hot knife to cut into squares.
Note: The brownies can be wrapped in plastic wrap and stored for up to 4 days at room temperature.
Labels:
chocolate,
cookies/slices,
food challenges,
fruit
Sunday, 13 September 2009
lemon slice
Lemon Slice is one of Australia's traditional treats.
It's very sweet and very tangy and reminds me of Sunday afternoons climbing the Jacaranda tree in my yard as my sisters road their bikes up and down the street (I couldn't ride a bike, but I could climb highest in the tree!).
Lemon Slice
Recipe from taste.com.au Makes 12 pieces.
Ingredients:½ cup sweetened condensed milk
100g butter
200g plain biscuits
1 cup desiccated coconut
1 lemon, rind finely grated
Lemon icing
2 cups icing sugar mixture
40g butter, softened
1 lemon, juiced
Method:
1. Grease and line a 3cm-deep, 15.5cm x 25cm rectangular pan.
2. Place condensed milk and butter in a small saucepan over medium heat. Cook, stirring, for 4 to 5 minutes or until butter melts.
3. Place biscuits in a food processor and process to fine crumbs.
4. Combine crumbs, coconut and 2 teaspoons lemon rind in a bowl.
5. Add hot butter mixture. Stir until well combined.
6. Press biscuit mixture into prepared pan. Refrigerate for 1½ hours or until firm.
7. To make lemon icing, place icing sugar mixture, butter and 2½ tablespoons of lemon juice in a bowl. Beat with a wooden spoon until smooth.
8. Spread icing over slice. Refrigerate for a further 30 minutes or until icing has set.
9. Cut into pieces. Serve.
Labels:
citrus,
cookies/slices,
oceania/australasia,
something sweet
Sunday, 12 April 2009
chocolate & pumpkin seed biscuits
These biscuits are what my North American friends would call cookies, so don't get them mixed up with scones, which Americans call biscuits.
Wow. Don't you think it's all very weird how one language can be so confusing?
Regardless of what you call these, you will definately think they're good. So on the chocolate theme: Happy Easter!
Chocolate & Pumpkin Seed Biscuits
Recipe by Stephanie Alexander. Makes 15.
Ingredients:
125g unsalted butter
25g castor sugar
60g soft brown sugar
100g self-raising flour
100g rolled oats
75g dark chocolate (preferably 70%), roughly chopped
50g pepitas (green pumpkin seed kernels)
Method:
1. Preheat oven to 170C. Line a baking tray with baking paper.
2. Cream butter and sugars until light and fluffy. Stir in flour, oats, chocolate and seeds.
3. Place spoonfuls on the baking tray and flatten slightly with the back of a spoon. Leave room for the biscuits to spread. Bake for 15-20 minutes until golden-brown.
4. Cool completely on a rack. Store in an airtight container.
Anna's other chocolate recipes:Drinks
Boozy Hot Chocolate
Spicy Hot Chocolate
Custards & MousseChocolate Chestnut Cake
Chocolate Ricotta Mousse
Muhallabiah Mousse (Iranian white choc & almond pudding)
Strawberry, White Chocolate & Almond Cannoli
Cookies & Slices
Chocolate Coconut Slice
Double Chocolate Cookies
Triple-Choc Brownies
Ice Creams & Candies
Cassata Gelata
Chocolate Raspberry Truffles
Filo Baked Mars Bar
Cakes & Tarts
Apricot & Chocolate Tart
Chocolate Bread & Butter Pudding
Chocolate Chestnut Cake
Fig, Hazelnut & Chocolate Fudge Cake
Fondant au Chocolat Framboise
Ginger Cake w Chocolate Sauce
Glacé Apricot, Chocolate & Poppy Seed Cupcakes
Ludo's Chocolate Truffle Tart
Ricotta, Strawberry & Choc-Chip Muffins
Schwarzwälderkirschtorte (black forest cake)
Friday, 23 January 2009
chocolate coconut slice
This month’s theme for Sugar High Friday, hosted by Rachel from Vampituity, is “childhood delights” and requires participants to cook desserts from their youth.
Chocolate Coconut Slice features firmly in my mind and reminds me of two people: my highschool friend Gemma, who used to make it and bring it to school to share, and my mother who made it at home and taught me how to do it too.
It’s a perfect recipe to whip up if you have impromptu guests or a late-night craving for something sweet. I usually have all the ingredients in the pantry.
It’s also great to make with kids because there are quite a few non-heat related stages where they can safely assist you - the way I used to help out my mum.
Most of all, it’s really delicious and somehow has a salty-sweet edge from the chewy coconut. Best served cut into small squares, I defy you to eat only one.
Chocolate Coconut Slice
Kay's very own recipe. Makes approx. 12 squares.
Ingredients:
Slice1 cup plain flour
½ cup sugar
1 cup desiccated coconut
1 tablespoon cocoa
200g dark chocolate, melted
185g butter, melted
½ teaspoon vanilla essence
1 egg, beaten
Icing1 cup icing sugar
3 tablespoons cocoa
30g butter, melted
1½ tablespoons hot water
Method:
1. Preheat oven to 180’C. Lightly grease lamington tin (28cm x 18cm).
2. To make the slice, sift the flour, sugar and cocoa into bowl.
3. Stir through the coconut.
4. Add melted butter, melted chocolate, vanilla essence and egg and mix well.
5. Press mixture over base of tin. Bake for 20 minutes. Cool in tin.
6. To make icing, sift icing sugar and cocoa into a small bowl, add melted butter and water and mix until smooth and glossy.
7. When cool, ice while still in tin and allow icing to set. Cut into squares.
Saturday, 19 April 2008
rosemary & cheese biscuits
It was funny to serve these biscuits again, a few weeks ago, to some of the same friends who scoffed at them the first time. Perhaps they tried them with more mature concepts of food (or palates), but this time they declared them a success.
Jonas and I smiled at each other. It only took them seven years!
These are a type of savoury shortbread, heady with the aromas of rosemary. They are a wonderful contribution to any selection of snacks and appestisers and are perfect picnic food too.
They are easy to make and very addictive.
Cocktails and Finger Food by Murdoch Books. Makes 50.
Ingredients:
1 cup plain flour
100g chilled butter, chopped
1 tablespoon sour cream
60g cheddar cheese
60g parmesan cheese
¼ teaspoon salt
3 teaspoons fresh rosemary, chopped
3 teaspoons fresh chives, chopped
½ teaspoon black pepper
Method:
1. Preheat oven to 180’C. Line two baking trays with baking paper.
2. Sift flour into mixing bowl. Using fingertips rub butter into flour until the mixture is fine and crumbly. Do not overmix.
3. Add remaining ingredients, mix well with a knife. Press mixture together into a ball, wrap in plastic and refrigerate 10-15 minutes.
4. Roll teaspoons of mixture into balls and place on baking trays, allowing space for spreading. Flatten slightly with fork.
5. Bake 10-15 minutes or until lightly golden. Cool on wire rack
Variation: instead of mixing the salt through the recipe, sprinkle crushed rock salt over the biscuits just before baking.
Note: cookies can be stored in airtight container for 1 week or dough can be stored in the fridge for 2 days before cooking.
Rosemary (Rosmarinus officinalis) is a woody, perennial herb which is native to the Mediterranean region, which is still the main source of commercial dried rosemary today.Despite the many connotations to Christian beliefs and Jesus’ mother Mary, the word rosemary derives from Latin rosmarinus, which translates to “dew of the sea” and was probably named because it grew in arid, coastal areas. It was also closely linked to Aphrodite, the Greek goddess of love who rose from the sea.
There was an ancient belief that rosemary stimulated and strengthened the memory. Ancient Greek students would bring rosemary to their exams and in European cultures the herb has always symbolised remembrance.
Rosemary has been used as a medicinal treatment for thousands of years. External applications of rosemary oils and spirits can relieve muscular and arthritic pain, rheumatic conditions, bruises, and circulatory problems, stimulate the hair-bulbs to prevent premature baldness and prevent/treat headlice.
Internal ingestion shows rosemary is a good source of the minerals iron, calcium, manganese, Vitamin B6 as well as dietary fibre. Due to its levels quinones, which inhibit carcinogens, it is high on the list of anti-cancer herbs and is said to protect from free radicals, lowering the risk of strokes and neurodegenerative diseases.
As an antiseptic it is used to treat flu, viruses and colds and infused in warm water is a good gargle for mouth ulcers and canker sores, and as a mouth wash for halitosis.
Consuming a lot of rosemary, however, can lead to spasm, vomiting and fluid in the lungs, which can be fatal! It can also cause autoimmune diseases.
Health professionals warn pregnant women against eating too much rosemary, even if they are just breastfeeding.
Epileptics are also warned against medicinal rosemary, which can aggravate seizures.
Fresh rosemary should be stored in the refrigerator wrapped in a slightly damp paper towel, while dried rosemary will keep fresh for about six months if stored in a tightly sealed container. Fresh rosemary sprigs can be frozen with water in ice cube trays then added to soups and stews.
This week the WHB host is Susan from The Well-Seasoned Cook. Be sure to visit her blog to read over the recap!
One last thing - I scoured the web for other interesting rosemary recipes, and this is what I found:
Breads & Snacks
Rosemary Popcorn
Rosemary & Lemon White Bean Dip
Rosemary Provencal Almonds
Pinenut Rosemary Shortbread
Rosemary & Polenta Breadsticks
Rosemary Feta Beer Bread
Rosemary & Ham Scones
Rosemary Jelly
Sides & Soups
Potatoes Boulangeres w Rosemary
Rosemary Polenta
Walnut Rosemary Quinoa
Lamb Stew w Rosemary Dumplings
Chicken Soup w Rosemary Matzo Balls
Mains
Lamb & Rosemary Pies
Potato & Rosemary Tart w Onion Jam
Rosemary & Smoked Paprika Chicken
Braised Lamb Shanks w Rosemary
Pork w Rosemary & White Wine
Diver Scallops on Grilled Rosemary
Rosemary-Anchovy Lamb
Rosemary Duck w Apricots
Turkey on Rosemary Skewers
Grilled Rosemary Trout w Lemon Butter
Pork Belly w Honey & Rosemary
Rosemary-Lemon Lamb Rack
Spinach, Garlic & Rosemary Griddlecakes
Desserts
Rosemary Scented Chocolate Truffles
Rosemary Loaf Cake
Castagnaccio (Chestnut & Rosemary Cake)
Grilled Pineapple w Lime, Chilli & Rosemary Syrup
Rosemary Honey Ice Cream
Lemon & Rosemary Popsicles
Pear Rosemary Crème Brûlée
Drinks
Rosemary Liqueur
Rosemary Schnapps
Peach & Rosemary Lemonade
http://www.whfoods.com/genpage.php?tname=foodspice&dbid=75Rosemary http://health.learninginfo.org/herbs/rosemary.htm
http://www.anzacday.org.au/education/tff/rosemary.html
http://www.botanical.com/botanical/mgmh/r/rosema17.html
http://en.wikipedia.org/wiki/Rosemary
http://homecooking.about.com/library/weekly/aa063097.htm
Tags: morsels and musings food blog food and drink australia recipes weekend herb blogging whb rosemary and cheese biscuits crackers snacks biscuits cookies rosemary cheese cracker recipes snack recipes rosemary recipes cheese recipes biscuit recipes cookie recipes
Saturday, 15 March 2008
double chocolate cookies
JenJen always make me crave cakes and cookies and her recipes have never let me down yet.
JenJen does tell us to use Dutch-process cocoa, but you can see from the colour of my cookies (compared to JenJen's) that I used regular cocoa. I would have used Dutch-process but I forgot to buy some and had to resort to the general store near my house which only stocks regular cocoa.
The cookies turned out beautifully. Chewy-soft and salty-sweet. Perfect!
You can store them for a day or two, but they are best a few hours after baking.
JenJen’s recipe adapted from Martha Stewart’s. Makes about 36.
Ingredients:
1 cup all-purpose flour
½ cup unsweetened Dutch-process cocoa powder
½ tsp baking (bicarb) soda
½ tsp coarse salt
110g bittersweet chocolate (60-70% cacao)
110g milk chocolate, coarsely chopped
110g cup unsalted butter
1½ cups sugar
2 large eggs
1 tsp pure vanilla extract
Method:
1. Preheat oven to 180°C degrees.
2. Whisk together flour, cocoa powder, baking soda, and salt; set aside.
3. Melt bittersweet chocolate with the butter in a small heatproof bowl set over a pan of simmering water; let cool slightly.
4. Put chocolate mixture, sugar, eggs, and vanilla in the bowl and mix until combined.
5. Gradually fold in the flour in two batches until just incorporated.
6. Fold in chocolate chunks.
7. Using a 1½-inch ice cream scoop, drop dough onto parchment-lined baking sheets, spacing 2 inches apart.
8. Bake until cookies are flat and surfaces crack, about 15 minutes (cookies should be soft).
9. Let cool on parchment on wire racks.
Note: If needed, cookies can be stored between layers of parchment in airtight containers at room temperature for up to 3 days.
Monday, 18 February 2008
strawberry & almond cannoli
I recently served these as part of a trio of strawberry desserts which included a shot glass of finely chopped macerated strawberries and an alcoholic strawberry spider.
They’re great little dessert canapés and would easily suit a picnic, buffet or large family meal.
But best of all they taste good.
Anna’s very own recipe. Makes 16.
Ingredients:
450g ricotta
100g mascarpone
250g strawberries, halved
½ cup icing sugar
½ teaspoon orange rind
1 tablespoon orange juice
¼ cup flaked almonds, toasted and chopped
50g white chocolate, grated
16 cannoli shells
Method:
1. Separate one fourth of the strawberries and cut them into small pieces. Reserve.
2. Heat the remaining strawberries, sugar and orange rind with orange juice until the sugar melts and strawberries soften. Cook until syrup thickens a little.
3. Put the cooked strawberries into a blender and puree.
4. Strain strawberries with a fine sieve to remove excess liquid.
4. In a bowl, beat together the ricotta and mascarpone.
5. Fold in strawberry purée. Taste mixture. If needed add some sifted icing sugar or strawberry juice to sweeten. Be careful not to make the mixture too runny.
6. When you have reached the desired flavour, carefully fold through the strawberry pieces, grated chocolate and flaked almonds.
7. Put mixture in a bowl, cover with plastic wrap and refrigerate for one hour.
8. Spoon ricotta filling into a fluted piping bag and pipe into cannoli shells. Dust with icing sugar and serve immediately.
Note: You can turn the leftover strawberry juice into syrup by cooking it a little longer. Pour over ice cream or use as a cordial.
Tags: morsels and musings food blog food and drink australia recipes dessert cannoli ricotta strawberriesstrawberry recipes dessert recipes ricotta recipes cannoli recipes italian recipes italian food italian cuisine
Wednesday, 6 February 2008
shortbread
Every now and then my sister, Joanne (aka Shamu), entices us with these wonderful shortbread. I think they’re probably Jonas’ favourite cookies.
I have to admit they are ridiculously good. Every time I eat them I can’t believe how good they are.
Shamu got the recipe from her mother, Lynn, and Lynn can’t remember where she found it. Nonetheless, it’s simple and damn tasty.
Here’s the recipe in Shamu’s own words:
Shortbread
Recipe by Joanne & Lynn. Makes many.
Ingredients:
115g (4oz) caster sugar
250g (9oz) butter
350g (12oz) plain flour
Method:
1. Preheat oven to 150’C (300'F) and lightly grease a baking tray.
2. Soften butter by either leaving it on the bench for a few hours or carefully microwave it so that it is soft but NOT melted.
3. Combine sugar and flour in a bowl.
4. Use your fingers to rub butter into dry ingredients to form a dough. The end product is much nicer if you use your fingers rather than a blender.
5. Use a floured rolling pin to roll out small amounts of the dough & cut out shapes using cookie-cutter.
5. Bake at just less than 150’C (very slow oven) until the cookies barely start to change colour (not sure how long - probably at least 15-20 mins).
6. Enjoy!
Tags: morsels and musings food blog food and drink australia recipes dessert biscuit shortbread cookie biscuit recipes shortbread recipes cookie recipes
Wednesday, 22 August 2007
cinnamon twists
Imagine you're hard at work, your fingers are cold from too much typing and your feet have been stationery so you developed pins and needles. Imagine you’re tired and sleepy but you have to get the report done for tomorrow.Then imagine that the second you hit save, and congratulate yourself for finishing your work, you hear your husband calling from the kitchen to tell you that he’s made you an evening snack.
~~~
I came out from the study to discover this yummy little cinnamon twists and a big cup of Mexican-style hot chocolate waiting for me.
He’d just whipped it all up from ingredients we had on hand!
Cinnamon TwistsJonas’ very own recipe. Makes 6-8.
Ingredients:
1 sheet frozen puff pastry, softened
1 tablespoon sugar
1 teaspoon cinnamon
Milk, for wash
Method:
1. Preheat oven to temperature recommended by pastry manufacturer.
2. Combine sugar and cinnamon in a bowl then sprinkle over pastry.
3. Slice the pastry sheet so that you cut rough pie slice shapes.
4. Roll the wide ends in so that the twist finishes in a point that can be folded decoratively on top.
5. Brush with milk to encourage a glossy finish.
6. Bake in the oven until puffy and slightly browned (around 15-20 minutes). Eat while still warm.
Note: you could do any number of different flavours: nutella, jam, fruit, cheese, tomato and garlic – the possibilities are endless.
What a dreamy hubby :)
Tags: morsels and musings food blog food and drink australia recipes dessert cookie snack snack recipes cookie recipes dessert recipes
Wednesday, 3 January 2007
pista burfi
I have become a bit of an Indian dessert addict.
Ever since I discovered Maya Sweets in Surry Hills I have developed a taste for jamun, burfi and ladoo. Not to mention jalebi and some of those delicious kheer flavoured with cardamom and rosewater.
One of my favourites is a type of shortbread/fudge called Pista Burfi. It's made from spiced milk that's boiled down to a thickened fudge then mixed with pistachio nuts. You can even decorate the burfi with edible silver foil.
This is a recipe from Australian Hare Krishna, Kurma Dasa, who specialises in Indian vegetarian and vegan food.
Pista Burfi
Recipe by Kurma Dasa. Makes 36 small pieces.
Ingredients:
2 litres fresh whole milk
1¼ cup sugar
1 teaspoon ghee or unsalted butter
½ teaspoon powdered cardamom seeds
1 cup raw blanched pistachio nuts, chopped finely
Method:
1. Combine milk, sugar, ghee and cardamom in a 5-litre saucepan, preferably non-stick. Bring the milk to a rolling boil over moderate heat and continue to cook it, stirring occasionally with a wooden spoon for about 45 minutes, or until the milk has reduced to a thick bubbling creamy mass, about half its original volume.
2. Continue to reduce the fudge, stirring continuously with gently rhythmic strokes for a further 10 minutes, or until the mixture resembles a thick paste.
3. Add the pistachio nuts, reduce the heat to medium low, and cook the fudge, stirring and scraping with the wooden spoon for further 20 minutes or until the mixture becomes a thick dry lump.
4. Remove the pan from the heat and allow the mixture to cool for one minute. You should have about 2½ cups fudge.
5. Transfer the fudge to a shallow, buttered tray. As the mixture cools a little more, use a buttered spatula to shape it into a smooth, flat cake, about 15cm square. Allow the fudge to cool for a further one hour.
6. Cut the fudge into 36 pieces with a sharp, buttered knife. You may need to wipe the knife clean after each cut. Alternatively, divide the still-warm fudge into 36 pieces and press into decorative molds.
7. Serve, or store in airtight containers for up to 2 weeks.
Note: Kurma also recommends decorating the burfi with edible silver or gold.
Tags: morsels and musings food blog food and drink australia recipes pista burfi pista burfi pistachio fudge biscuit cookie snack dessert indian indian recipes indian food indian dessert kurma dasa
Labels:
cookies/slices,
kurma dasa,
something sweet,
south asia
Saturday, 23 December 2006
chocolate raspberry truffles
There has been a lot of truffle activity on the gastronomic blogosphere with the recent truffle themed Sugar High Friday, so I decided to do my bit and whip up some of my own.
Dark chocolate and raspberries are one of my favourite pairings, their only real competition being dark chocolate and orange. But when raspberries came down from AUD$7.99 for 150g to AUD$3.99, I immediately pounced upon the opportunity and bought myself a punnet.
Jonas simply cannot believe the price of raspberries and blueberries in Australia. In Sweden they grow as weeds on the side of the road but here, in this warm country, berries are astronomically expensive and raspberries, currants and blackberries are probably among the most prized.
With a pretty punnet of dusty red raspberries, I set about making some truffles for petit fours and as a birthday gift for a friend.
Chocolate Raspberry Truffles
Recipe from Gourmet Traveller ‘December 2006’ issue. Makes 60.
Ingredients:
300g raspberries
200ml pouring cream
50ml Framboise
600g dark chocolate (57% cocoa solids)
Method:
1. Chop or shave chocolate into very fine pieces.
2. Combine cream, Framboise and 200g of raspberries in a saucepan and bring to the boil over a medium-high heat. Process in a food processor then pass through a fine sieve into a clean saucepan.
3. Clean food processor and add chocolate.
4. Bring raspberry mixture to the boil and, with food processor motor running, pour over chocolate. Process until smooth.
5. Pour half the chocolate mixture into a paper lined baking tray (20cm x 30cm). Scatter with remaining 100g of raspberries and top with remaining chocolate mixture. Smooth top and refrigerate for 6 hours or overnight until set.
6. Using a warm, sharp knife, cut truffles into cubes and dust with cocoa.
Note: They can keep in the fridge (in an airtight container) for up to 1 month.
Anna’s Variation: I used chocolate with 70% cocoa solid so it took on a rich bitterness. Jonas told me the recipe wasn’t as sweet as he prefers. If you prefer sweeter chocolate treats use lower level cocoa solids or dissolve in some super fine sugar when you melt the chocolate.
Tags: morsels and musings food blog food and drink australia recipes truffles chocolate truffles raspberry raspberries chocolate chocolate recipes dessert candy sweets petit fours
Friday, 1 December 2006
svensk fest
Today is the first day of Advent, which Jonas explained to me is the first of the twenty-four days leading up to Christmas.I must have known this once upon a time because I remember my mum buying me an advent calendar and every day I’d open the little paper windows to take a chocolate and look at the new picture.
Tonight is not only festive fare but it’s a festive feast!!! Jonas made a Swedish dinner for Tim Y and Karen.
On the menu was:
- Gravlax (cured salmon)
- Eggs & caviar
- Rödbetssallad
- New potatoes w sour cream & dill
- Swedish meatballs with lingonsylt
- Mulled Riesling
- Pepparkakor & Glacé Fruit Ice Cream Sandwiches
Most of the things we bought and didn’t make from scratch, but the Beetroot Salad is a family recipe, put together by Jonas’ sister, Helena, with the measurements tweaked a little to suit our tastes.
Helena made this for us one New Year’s Eve when she and her man, Christian, were spending a few years in Australia. Jonas and I adored the salad instantly and we’ve made it a part of all our festive buffets ever since.
The ice cream sandwich was also my own little invention this afternoon. Jonas forgot to buy dessert but had picked up some pepparkakor (Swedish style ginger biscuits: very spicy, very strong). I mixed these with glacé fruits to make a very Christmas flavoured dessert.
So for my final recipes I give you a salad and a dessert but will write about the mulled Riesling here.Helena’s recipe. Serves 10 as part of a buffet.
Ingredients:
850g whole baby beets (canned)
2 x red apples
¼ red onion, diced very finely
125g mayonnaise
125g crème fraîche
1 tablespoon Dijon mustard
Method:
1. Dice beetroot and apple into similar size cubes.
2. Mix mayonnaise, mustard and crème fraîche.
3. Combine beetroot, onion and apple in bowl. Mix.
4. Pour in dressing and mix very well.
5. Transfer to serving bowl. Eat.
Pepparkakor & Glacé Fruit Ice Cream SandwichesAnna’s very own recipe. Serves 4.
Ingredients:
12 pepparkakor (wafer thin & spicy ginger biscuits)
1½ cups softened vanilla ice cream (good quality)
¼ generous cup glacé fruits, chopped finely (I used pear, apricot & fig)
½ teaspoon cinnamon
Method:
1. Stir the glacé fruit and cinnamon into the ice cream. Return to freezer for a few hours to harden.
2. Place a smear of ice cream on four plates to hold the biscuits, then place a biscuit on each plate.
3. Next place a dessert spoon of ice cream on biscuits and top with another biscuit.
4. Repeat with more ice cream and another biscuit then serve.
Tags: morsels and musings food blog food and drink australia recipes recipe festive food fair salad dessert ice cream beetroot ginger biscuits glace fruit apple christmas christmas recipe christmas recipes swedish swedish food swedish cuisine swedish recipes
Friday, 10 November 2006
recipe road test: filo baked mars bar
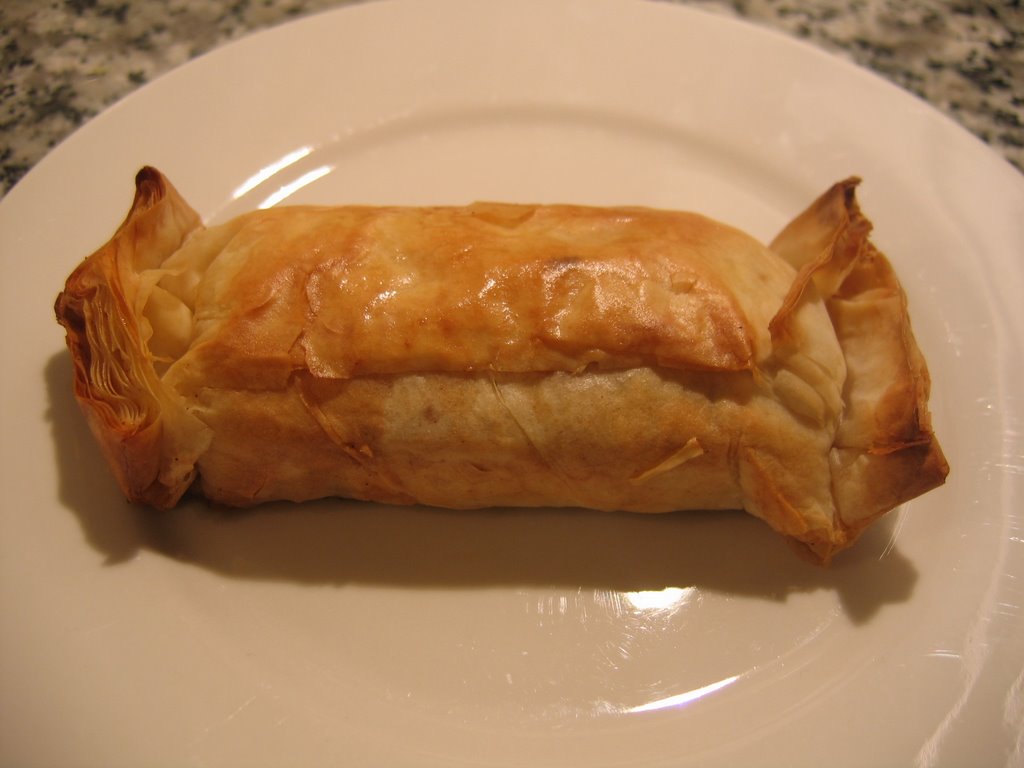
I am guilty of some pretty serious gluttony.I recently stumbled across the Sydney Food Diary and Sean's recipe for Filo Wrapped Mars Bar. Intrigued, I simply had to replicate the experiment in my own kitchen.
It turned out nicely: the Mars Bar melts just enough to go all gooey and soft. A very indulgent and cheeky little dessert.
I'm pretty keen to try other candy bars now, for instance a flat pastry base with slices of Fry's Turkish Delight in an open tart. Hmmm!
Filo Baked Mars BarRecipe by Sean. Makes 1.
Ingredients:
Four sheets of thawed filo pastry
Honey
Melted butter
Cinnamon
Vanilla dusting sugar
Sesame seeds
Method:
1. Preheat oven to 200'C.
2. First lay down one layer of filo and brush it with melted butter and dust with cinnamon. Layer all sheets on top of each other after brushing each with melted butter, honey and cinnamon.
3. Place the Mars bar at one end of the sheet and roll the filo into a parcel. Trim the ends to fit.
4. Brush the entire outside of the parcel with butter. Sprinkle with sesame seeds.
5. Bake until golden and crispy. Dust with vanilla dusting sugar and a touch of cinnamon.
Anna's Variation
1. Used maple syrup instead of honey.
2. Didn't dust with sugar or sesame seeds.
Tags: morsels and musings food blog food and drink australia recipes mars bar snack crispy dessert chocolate filo filo pastry
Friday, 3 November 2006
breakfast crumble

I just wanted to share this fabulous breakfast treat that I get from Seed, the café near my office.
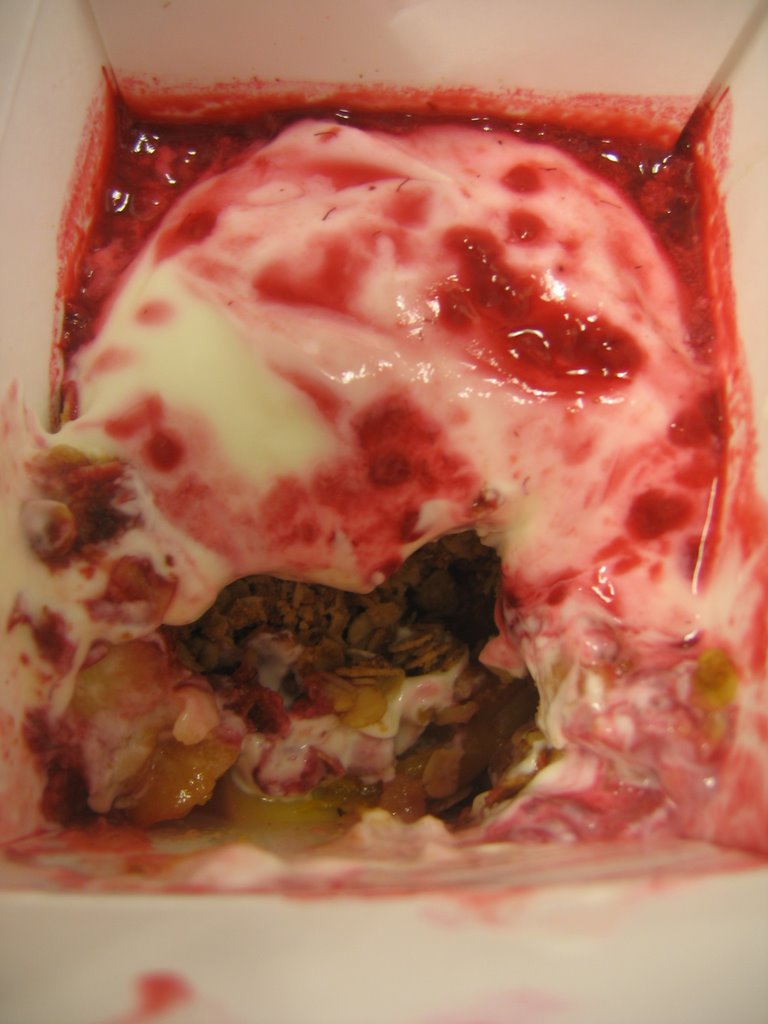
A little Breakfast Crumble comes in a Chinese takeaway box. It's simple and genius and would be so easy to replicate at home.
You could use fresh fruit when they're in season, or canned all year round.
Breakfast Crumble
Anna's version of Seed's recipe. Serves 2.
Ingredients
Fruit Base
200g can of apricots or peaches (or plums or nectarines)
1 apple, peeled, cored and slices into small wedges
3 tablespoons apple juice
3 tablespoons sugar
½ teaspoon cinnamon
Crumble
1 cup oats
1 teaspoon vegetable oil
1 tablespoon honey, warmed and melted
Topping
Unsweetened yoghurt
½ cup raspberries
Icing sugar to taste
Method:
1. For crumble, preheat oven to 180'C. Combine honey, oil and oats. Bake until golden and crunchy. Set aside to cool.
2. For topping, mash raspberries. Add icing sugar to taste to ensure raspberries aren't overly tart. Refrigerate until needed.
3. For the fruit base, throw everything into a pot and cook until the sugar dissolves and the apples soften. Add more sugar if needed.
4. Now you are ready to assemble everything. Divide the fruit between the bowls. Next divide the crumble and sprinkle over fruit. Top crumble with yoghurt and then raspberry puree.
This is so yummy!!!
For those in Sydney's CBD, Seed Café is on the Lower Ground Floor of Hunter Street Connection near Wynyard Station.
UPDATE:
Unfortunately Seed was sold and the Breakfast Crumble is no more.
But it's easy to make and you could use almost any fruit. Here is a photo of quince breakfast crumbles I made for a breakfast brunch that I had for my friends. They were a hit!
Sunday, 6 August 2006
rhubarb crumble cake for poppa
Yesterday my Poppa passed away. It wasn’t unexpected, but it’s always sad.The biggest comfort was that he lived a long life, survived two open heart surgeries, asbestosis and emphysema and finally passed away from a long case of pneumonia. For someone who smoked almost all his life, he had a brilliant run.
Darcy Frederick Miller was born 1 March 1922 and died 5 August 2006, aged 84. His grandfather had been part of the Danish nobility yet Poppa grew up a total Aussie and even got teased by his grandfather “I used to play with princes in palaces, you play in the dirt!”
The early childhood dirt might have turned out to be a blessing because he grew up to be an excellent gardener and most of the food he and Nan ate came from their well-tended backyard. Beans, spinach, carrots, tomatoes and more – it was delicious and always appreciated by my mum who used to happily take home a green grocer’s load every time she’d visit.
He also used to grow rhubarb and so this Weekend Herb Blogging will be my own little tribute.
This recipe was devised after phone-administered cooking guidance from Sandra (who incidently makes the world's best rhubarb and apple crumble).
For all the other recipes from around the globe, check out Christa's recap at Calendula & Concrete.
Rhubarb Crumble CakeAnna’s very own recipe. Serves 8.
Ingredients
Stewed Rhubarb
1 bunch of rhubarb (1.5 kg.)
¼ cup castor sugar
1 tablespoon orange juice
1 teaspoon orange zest
1 teaspoon ground cinnamon
Crumble
250g plain flour
280g unsalted butter cut into cubes and chilled
160g dark brown sugar
2 teaspoons ground cinnamon
Method:
1. Preheat oven 180’C. Grease springform cake tin and line with baking paper.
2. Clean and trim rhubarb. String if necessary. Cut into chunks then place in saucepan with castor sugar, orange juice, orange zest and 1 teaspoon cinnamon. Stew until rhubarb is soft and beginning to break down.
3. Take crumble ingredients and, using fingertips, mix together until a breadcrumb consistency is formed.
4. Press half of the crumble mixture into the base of the baking tin. Bake for 10-15 minutes.
5. Top with stewed rhubarb mixture and more crumble mixture and then bake for another 15-20 minutes, until crumble has a crispy, brown top. Be careful not to burn.
6. Cool and serve with vanilla ice cream or cream.

I got some great facts on rhubarb from the Rhubarb Compendium.
The first record of rhubarb cultivation was in China in 2700 BC where it was used for medicinal purposes. Marco Polo was so enamoured with rhubarb that he waxed lyrical at every opportunity and this led to Chinese rhubarb becoming widely used in European medicine, although the first recorded planting was noted in 1608. Europeans loved the stuff but in 1759 the Qianlong emperor of China forbade any export of tea or rhubarb to the West after border conflicts with Russia. In 1778, rhubarb was first recorded as a food plant in Europe where it was a filling for tarts and pies. Sometime between 1790 and 1800 an unidentified Maine farmer brought rhubarb seed to America and by 1822 it was for sale in Massachusetts produce markets.
Rhubarb is a tart plant and needs sweeteners to be added. It can be stored in sealed plastic bags in the fridge for two to three weeks. It’s easy to grow and is a wonderful harvest for hungry grandkids.
Take care Poppa. We’ll miss you.
Subscribe to:
Posts (Atom)