Saturday, 28 March 2009

earth hour: low-carbon cooking

This is my entry into my own food blogging event celebrating Earth Hour 2009 by cooking recipes with low-carbon footprints that can be enjoyed by candle light.

With full disclosure, I am heavily involved in organising Earth Hour in Australia and now that the day has arrived I am more than a little nervous as to whether the lights will go off across the country tonight. I just hope everyone remembers to switch off at 8:30pm!

Being so involved in Earth Hour inspired me to bring it to my food blogging pals, hence my invitaton to this blogger event.

But the challenge I set my fellow bloggers was a really difficult exercise.

It made me realise that every country is so interdependent on each other for food and products. I went through my cupboard and found that my rice came from Thailand, crushed tomatoes from Italy, dried fruits from Turkey, pepper from India and salt from Australia.

Think of all the processing, packaging and transport they each took to get from its natural state to its final product in my pantry. It’s mind boggling.

So what could I make that reduced packaging and transport? Something fresh, in season and very local. Living in the inner city, that becomes quite difficult. And even if I did purchase fresh vegetables at a farmers’ market, I needed to mix them with something (packaging/transport) or cook them (energy consumption).

For those that want to be sustainable, this puts us in a bind. No one wants to live in the dark ages, munching raw vegetables we pulled from the earth so how can we find a balance?

Other bloggers have found their balance by using ingredients from farmers’ markets or growing vegetables in their own gardens. I decided to show another way we can all reduce our carbon footprint: using leftovers.

I took leftovers from multiple meals to make one mighty delicious dinner and reduced the waste and landfill of my home. It’s a simple option that so often people neglect.

When food is plentiful, people are often extravagantly wasteful. I think I’m worse than most due to my craving for new flavour sensations and my disdain for reheated food. Since I started working for a conservation organisation and had a lot less personal time I have become quite adept at turning leftovers into a meal in their own right.

In this case I took:
- avocado and a tomato halves remaining from making sandwiches
- some cherry tomatoes leftover from a salad
- potato and feta mash leftover from a previous dinner
- half a zucchini remaining from making a pasta sauce
- a few olives from an antipasto platter
- basil grown in my garden

And I turned it into Potato & Feta Cakes with two toppings of Caponata and Tomato & Avocado.

Potato & Feta Cakes w Two Toppings
Anna’s very own recipe. Serves 1.
Ingredients:
Cake
1 cup potato & feta mash
1 egg, whisked
Olive oil, for frying
Avocado Topping
Tomato half, cubed
Avocado half, cubed
½ teaspoon white wine vinegar
1 tablespoon shredded basil
Caponata Topping
1 garlic clove, crushed
½ zucchini, finely sliced
4 cherry tomatoes, halved
4 black olives, chopped
1 tablespoon capers
1 tablespoon shredded basil
Method:
1. To make the potato cakes, combine the egg and potato & feta mash and mix well. Form into two patties. Refrigerate while you prepare the toppings.
2. In a bowl add avocado and tomato cubes, the remaining basil and season with salt and pepper. Dress with a little olive oil and white wine vinegar and toss to combine. Set aside at room temperature.
3. In a frying pan, heat olive oil. Fry the garlic and zucchini until softened.
4. Add the cherry tomato halves and squash. Add olives and capers and fry until tomatoes are soft also.
5. Remove from heat, add 1 tablespoon basil and season with salt and pepper. Set aside at room temperature.
6. In a frying pan, heat olive oil. Fry the potato patties until crispy on the outside.
7. Plate patties and spoon the toppings onto each patty. Serve immediately.

For those who want to do more to improve their carbon footprint in the kitchen, although I do not profess to be an expert, here are some sustainable tips:
* Reduce your consumption of meat and fish and choose animal products from local, ethical and sustainably-focused farmers.
* Educate yourself about aquaculture and learn which fish are endangered. Try to buy fish from plentiful stocks caught with sustainable methods.
* Shopping at farmers markets, butchers or a green grocer (rather than the supermarket) means you can ask questions about the produce and know where it came from and how it was grown. Prices are higher but the quality usually is higher too.
* When buying fruit and vegetables, use your sense of smell. Large, scentless produce is usually mass and often unsustainably produced. Smaller, less perfect specimens with fragrance are often the result of smaller scale farming techniques.
* Better still, grow your own food. Everyone has space for a pot of their own herbs, chilli plants and perhaps a citrus or tomato plant.
* Wash vegetables in a sink, not under running water.
* Cook with your leftovers. Turn baked potatoes into a frittata, leftover takeaway rice into fried rice or roast chicken bones and scraps into soup.
* Compost bins or worm farms are perfect for kitchen scraps, makes good fertiliser and reduces landfill. Just make sure there’s proper aeration or your compost may produce methane and undo your good work.

WWF has a great carbon footprint calculator. I took the test and came out at 3 planets - thanks to my vegetarian husband and not having a car - but even that is still too high. Take the test and see where you can cut down your emissions!

I hope to see many more of you participating in this event. For details click here.

And if you don't have time to join the food blogging event, please join Earth Hour: turn off your lights at 8:30pm (your own time zone) on Sat 28 March and cast your vote for the future of our planet. Register online to be counted!

Monday, 23 March 2009

blackberry breakfast cake


My grandfather is a first generation American son of two very tough Eastern European migrants who would thriftily harvest the wild fruits and berries of Pennsylvania.

I remember my grandfather telling me stories of his youth spent picking berries in the field opposite his home.

It all sounded so romantic until he smiled and said “I hated picking those blackberries. The darn thorns would stick into my fingers and I’d go home all cut up. Since there were no girls in the family and I was the eldest of my mother’s children, I was stuck picking berries with all the other town’s women when my brothers were off having a good time.”


I still can’t help imagining my grandfather returning with buckets of blackberries and his mother, Anna, turning these into jam, pies and cakes for her brood of six boys. Seems so quaint but I suppose the reality was never as charming.

It’s also sad to think that after Uncle Andy died a month ago, my grandfather and his youngest brother, Uncle Ed, are all that is left of that large, vibrant family. It made me realise that we’re about to lose that generation and with them all the stories that they hold.

While introducing this recipe to you, I want to emphasis that it’s not outrageous to eat cake for breakfast!

What do you think a muffin is? Oh yes, we pretend cakes and muffins are quite separate but we know in our heart of hearts they are really just the same thing dressed up in different outfits.

And this cake is just like a muffin, only baked in a flat tin rather than cupcake tins.

The moist interior is alive with warm spices and luscious blackberries while the top is crunchy with toasted oatmeal and macadamia nuts.

The original recipe calls for cashews, and I just adored the results of macadamias, but I suppose you could just use whichever nuts are cheapest or on hand. Walnuts, hazelnuts or almonds would work just as well.


Blackberry & Oatmeal Breakfast Cake
Recipe by Food Blogga. Serves 6-8.

Ingredients:

½ cup whole wheat flour
½ cup all-purpose flour
1 ½ teaspoon baking powder
½ teaspoon baking soda
½ teaspoon salt
½ teaspoon ground cinnamon
¼ teaspoon ground nutmeg
½ cup brown sugar
½ cup granulated sugar
2 eggs
1 ½ teaspoons pure vanilla extract
1 cup buttermilk
3 tablespoons canola oil
1 cup rolled oats
¾ cup fresh blackberries (cut in half if very large)
¼ cup chopped macadamia nuts
3 tablespoons chopped macadamia nuts, for topping
3 tablespoon rolled oats, for topping

Method:


1. Place rack in centre of oven and preheat to 180’C.

2. Grease an 8 inch square pan.

3. In a medium bowl, sift the flours.

4. Add baking powder, baking soda, salt, cinnamon and nutmeg.

5. In a separate large bowl, beat the sugars and eggs at medium speed until light.

6. Beat in the vanilla, buttermilk and oil.

7. Reduce speed to low and add dry ingredients, including the oats.

8. Beat until just incorporated and the flour is combined.

9. Using a rubber spatula, fold in the blackberries and cashews until well blended.

10. Pour the batter into the pan and gently shake it to even it out.

11. Sprinkle the chopped cashews and oats evenly over the top of the cake and lightly coat with cooking spray.

12. Bake for 45 - 55 minutes, or until the cake is golden brown and a cake tester inserted deep into the centre comes out clean.

13. Transfer the cake to a rack and cool for 10 minutes.

14. Unmold the cake and place on a rack and allow to set for at least 15 minutes before slicing. Serve with double cream.


Blackberries are part of the bramble family, meaning that they are the thorny members of the genus Rubus in the rose family Rosaceae.

There are several hundred species of blackberries, all native to temperate climes and seemingly the Northern Hemisphere. In Australia, introduced blackberries have become an extremely invasive weed and I have seen many gardeners hastily uproot bushes when they spot them sprouting in their gardens

Interestingly, an Iron Age body found preserved in a bog in Denmark (Haraldskær Woman) showed evidence that the woman had been eating blackberries 2,500 years ago so scientists believe humans have been eating blackberries for quite some time. I guess it goes without saying that when you find a good thing, you stick with it.

Blackberries yield high levels of nectar, allowing bees to make a fruity honey.

According to Wikipedia, blackberries are “high in dietary fibre, vitamin C, vitamin K, folic acid and manganese” as well as antioxidants.

Their root is sometimes used for dysentery and the leaves make blackberry tea for treating diarrhoea and sore throats.

This is my contribution to Weekend Herb Blogging hosted by Anna from Anna’s Cool Finds (that gal’s got an awesome name!).

Be sure to check out her recap, but also remember to take part in the Earth Hour Food Blogging Event ending next weekend and hosted by moi!

References & Photo:
http://en.wikipedia.org/wiki/Blackberry
http://www.whole-food-supplements-guide.com/blackberry-fruit.html
http://www.oregonberry.com/images/BLACKBERRIES/Blackberry_Cluster.jpg

Thursday, 5 March 2009

moroccan chicken tagine


I requested a tagine for Christmas and my parents kindly obliged. I have made two of the Moroccan casseroles since then, the chicken and olive version I'm posting here and a vegetarian version that I'll share soon.

Both were delicious.

Tagines are rich with spices and flavoured with preserved lemon, my Weekend Herb Blogging theme ingredient for the week.

Making a tagine was one of my 2009 food challenges, so I’m felling pretty positive about moving through my goals of the year too.

Tagines are so easy to make and you don’t really need the specially shaped conical pot. A good casserole dish will suffice, and may even be necessary for cooking large portions when juices may slosh out of a shallow tagine base.


Djej Emshmel (Moroccan Chicken Tagine w Lemon & Olives)

Anna’s adaptation of
Elise’s recipe
. Serves 4 - 6.
Ingredients:

2 teaspoons paprika
2 teaspoons ground ginger
2 teaspoons turmeric
2 teaspoons cinnamon
2 teaspoons ground coriander
1 teaspoon cumin seeds
¼ teaspoon freshly ground pepper
1.5kg chicken thighs and drumsticks
3 cloves garlic, minced
1 onion, chopped
2 zucchini, sliced
2 potatoes, sliced
1 preserved lemon (see recipe below)
1 cup green olives, pitted
2 cups chicken stock
½ cup raisins
¼ cup chopped fresh coriander
¼ cup chopped fresh flat-leaf parsley
Salt, for seasoning
Olive oil, for frying

Method:


1. Rinse preserved lemon in cold water. Discard pulp then cut peel into thin strips.

2. Combine all the spices in a large bowl.

3. Pat dry the chicken pieces and put in the bowl, coat well with the spice mixture. In a tagine (or heavy bottomed skillet), heat the olive oil on medium high heat.

4. Add the chicken pieces and brown for five minutes.

5. Remove chicken, lower the heat to medium-low, add the garlic and onions and any spices left in the bowl. Fry until soft.

6. Add potato. Fry for 5 minutes.

7. Add zucchini. Fry for 3 minutes.

8. Add the preserved lemon, olives, raisins and stock.

9. Bring to a simmer then add chicken. Cover and let cook for 10 minutes.

10. Turn chicken pieces over. Cook another 10 minutes (without lid if you need to reduce liquid). 11. Adjust seasonings to taste then mix in fresh parsley and coriander just before serving. Serve with couscous or rice.


My focus for WHB this week is preserved lemons.

I wrote a previous post about lemons, but now specifically I’m drawing your attention to Morocco’s preserved lemons.

They are central to North African and Middle Eastern cuisines and are actually a pickle, since the lemons are preserved in brine (salty liquid).

The flesh can be used, although the rind is preferable. To use, simply wash to remove excess salt and chop. The lemons add an extremely citrus flavour to stews, soups, salad dressings, slow braising casseroles and even as a cocktail garnish.


Hamad Muraqqad (Moroccan Preserved Lemons)

Recipe by Maggie Beer.


Ingredients:

Thick-skinned lemons
Salt: 1 dessertspoon per lemon + one extra for the jar
Freshly squeezed lemon juice
Preserving jars

Method:


1. Cut lemons into quarters. Place the lemons, flesh side down, in the jar, sprinkling each quarter with salt as you add it to the jar.

2. For every lemon use a good dessertspoon of salt, and one for the jar.

3. When the jar is full, press right down on the lemons to squeeze as much juice out, filling the jar with more slices, again squeezing right down. Pack them in very tightly as they will shrink.

4. Immerse all the lemons by topping up the jar with fresh lemon juice.

5. Put a lid on the jar and 6-8 weeks later they will be ready to use.

Note:
To hold the lemon quarters under the lemon juice, use the little plastic devices found in takeaway pizza boxes that stop the topping from sticking to the cardboard lid.

To read the WHB round-up for this week, visit Haalo's Cook (almost) Anything At Least Once.

And for more preserved lemon recipes . . . .
Algerian-Style Duck w Preserved Lemon & Olives
Baby Cos Hearts & Asparagus w Preserved Lemon Dressing
Chicken, Haloumi & Preserved Lemon Skewers
Chorizo & Preserved Lemon Turkey Roll
Cumin-Spiced Snapper w Preserved Lemon Moghrabieh
Fennel & Preserved Lemon Salad
Feta & Preserved Lemon Salad
Fettuccine w Preserved Lemon & Roasted Garlic
Fried Artichokes w Preserved Lemon Dressing
Grilled Striped Bass w Preserved Lemon Rub
Kumera & Preserved Lemon Skewers
Marinated Yellow-Tail w Preserved Lemon
Moorish Lamb Cutlets w Preserved Lemon Yoghurt
Preserved Lemon & Goats Cheese Croutes
Split Pea, Sausage & Preserved Lemon Soup
Swiss Chard, Potato & Preserved Lemon Pot Pie
Tuna Tartare w Preserved Lemons


References:
http://en.wikipedia.org/wiki/Preserved_Lemon
http://www.wisegeek.com/what-are-moroccan-preserved-lemons.htm
http://encyclopedia.kids.net.au/page/pr/Preserved_Lemon
http://en.wikipedia.org/wiki/File:Preserved_Lemons.jpg

Tags:

Tuesday, 3 March 2009

second wedding anniversary


I can't believe it's been two years today since Jonas and I got married.

And exactly nine years since that first kiss in LouLou's Winnie the Pooh room.

We're both older, certainly chubbier, and still very, very happy.

Sunday, 1 March 2009

earth hour 2009: blogging event


At 8:30pm on Saturday 28 March millions of people around the world will unite and switch off their lights for one hour, Earth Hour.

This event is a global public awareness campaign about the effects of climate change and I am personally involved in the project in Australia.

In 2009, Earth Hour will take place in more than 80 countries around the world, proving that climate change really is a global threat and that it will take all of us to work together to solve it. We are hoping that Earth Hour reaches one billion people.

In light of this (yes, twas a pun), I would like to throw a challenge out to all bloggers to take part in an Earth Hour food blogging event and cook a recipe that you can enjoy by candle light and that has a low carbon footprint (ie made from locally sourced ingredients and minimal packaging).

Blog your recipe from now until 8:29pm on Saturday 28 March (in your time zone), then at 8:30pm switch off your lights, your computer, your non-essential appliances, take everything off standby and join the world in one hour of beautiful candle light for Earth Hour.

Rules:
* Post any recipe with a low carbon footprint that can be enjoyed by candle light
* Recipe must be posted before 8:29pm on Saturday 28 March (in your time zone) and cannot be submitted to any other event.
* Include a link back to this post: http://morselsandmusings.blogspot.com/2009/03/earth-hour-2009-blogging-event.html so others can find the round-up
* Email the following to morselsandmusingsATyahooDOTcomDOTau
- Name
- Location
- Recipe
- One sentence on what makes the recipe have a low carbon footprint
- Permalink
- Blog Name

Since I am heavily involved in Earth Hour in Australia, I might be a tad busy in the week post-Earth Hour but I’ll aim to have the round-up ready on Friday 3 April.

Other ways you can support Earth Hour:
- Turn off your lights and non-essential appliances at 8:30pm on Saturday 28 March
- Sign up online at http://www.earthhour.org/
- Encourage friends, family and colleagues to participate and sign-up
- Host a Earth Hour logo and hyperlink on your blog
- Check out the downloads from your country’s Earth Hour website and learn about other ways you can get involved

Saturday, 28 February 2009

mastic ice cream


Lovely Ivy from Greece’s Kopiaste is hosting this month’s Think Spice event, with the theme mastic.

In 2008, I set a food challenge to use mastic but I never managed to do it so it rolled over into my 2009 challenges. With that weighing heavily on my mind, Ivy announced her theme ingredient and I just knew it was time to cook with mastic.

Having eaten a mastic pannacotta in the past, I knew it worked well with cream so I decided to use Tessa Kiros’ mastic ice cream as inspiration.

In Falling Cloudberries, Tessa doesn’t use egg yolks, nor whip the cream, but I find this makes for a softer, fluffier ice cream and so I created my own version entirely.


The results had very mixed reviews.

I adored the vibrant, pine flavours and found the sweet ice cream strange and yet moreish.

And yet both Jonas and our friend, Bicky, took one bite and couldn’t continue.

Bicky had been walking toward the table with her bowl when she snuck a taste. She froze in her tracks and her face look alarmed. Then she kept smiling and politely repeating that it was a “special” flavour, too “special” for her.

Jonas on the other hand took a little lick, wrinkled his nose and pushed the bowl away from him declaring “there’s no way I’m eating that”. Ahh, what are husbands for?

Instead of being offended, I found the whole situation slightly amusing, because for once I knew it wasn’t my cooking skills but the mastic itself that they were reacting to.

The mastic did produce an almost chemical pine flavour, but since I enjoyed it I was secretly pleased that I had the whole litre of ice cream all to myself.

Mastic is certainly an acquired taste but, for those who love it, it is heavenly.


Mastic Ice Cream
Anna’s very own recipe. Makes 1 litre.

Ingredients:
½ teaspoon mastic granules
100g sugar
300ml full cream milk
300ml single cream
3 egg yolks, beaten

Method:

1. In a spice grinder, pulverise the sugar and mastic into a fine powder.

2. Combine the milk and sugar mixture in a saucepan and cook over a medium-low heat until sugar has dissolved and milk is almost boiling.

3. Put the beaten egg yolks in a bowl, then add the hot milk in a thin stream, whisking the entire time to avoid scrambling the eggs.

4. When completely combined, return the mixture to the saucepan and cook gently over a low heat until mixture thickens slightly. Set custard aside.

5. In another bowl, beat cream with electric beaters until soft peaks form.

6. Combine custard and whipped cream, beating with electric beaters to smooth mixture.

7. Cool before churning in an ice cream machine, as per the manufacturer’s instructions.

Note:
the flavour is very special, so if you’re nervous about it being too strong you might consider using ¼ teaspoon mastic granules instead.

Variations:
Mastic & Orchid (add 3 teaspoons of sahlep powder to milk mixture);
Mastic & Rosewater (½ teaspoon rosewater to milk mixture);
Mastic & Orange Flower (½ teaspoon orange flower water to milk mixture).


Mastic is resin from the Pistacia lentiscus, a shrub found all over the Mediterranean and the Middle East. For some mysterious reason, only the trees in the south of the tiny Greek island of Chios can produce this special flavoured resin.

The shrubs can reach over 100 years and 3 metres high. The sap leaks from wounds in the bark of the shrubs and is then sun-dried into tear-like granules.

Mastic is used in drinks, as a gum and for flavouring spirits, liquors, sauces, cheese, cakes and desserts. It is also used as a substitute for vanilla.

Ancient Egyptian writings advised adding mastic to bad-tasting water and incense, the Koran encouraged Muslims to add mastic to their bread and ancient Jewish halachic sources even permitted chewing mastic on Shabbat to combat bad breath.

Mastic was the first chewing gum ever known, as the sun-dried resin granules soften when chewed. In fact the word mastic originates from the Greek verb “to chew”, as does the similar English word “masticate”.

In ancient times, mastic was used medicinally for intestinal disorders, dental and mouth diseases, diabetes and bronchitis. In the Middle Ages, it was used for cholesterol, blood pressure, burns, eczema, frost-bite and cholera. Today it’s believed to be a treatment for ulcers and have antimicrobial effects, which is why it’s used in toothpaste, mouthwash, and dental fillings.

Interesting it’s used to manufacture self-absorbing surgical threads and sticking septic bandages on surgical wounds.

Anyway, this is my entry to Think Spice, Think Mastic. Please visit Kopiaste to read Ivy's round-up.

Other mastic recipes:
Mastic Pudding - Cafe Fernando
Mastic Lor Cookies - Yogurtland
Mastic Frozen Yoghurt - Kopiaste
Mastic Gum Preserve - Rustic
Tsoureki (Greek Easter Bread) - Kalofagas


References:http://www.greektravel.com/greekislands/chios/mastica.htm
http://www.springboard4health.com/store/more_mastica.html
http://en.wikipedia.org/wiki/Mastika
http://en.wikipedia.org/wiki/Mastic
http://en.wikipedia.org/wiki/File:Nomos_Chiou.png

Wednesday, 18 February 2009

eggplant parmigiana


Eggplant is my secret love. I sneak it in whenever I can.

Jonas, the vegetarian, despises eggplant. He abhors the texture and protests at the taste.

Imagine being a vegetarian and not liking eggplant? It's a disability. Truly.

Usually, when Jonas isn't home, I take the opportunity to cook fish or meat but one night I seized the chance to use eggplant. And the best eggplant dish of all has got to be eggplant parmigiana.

Nonna would make the most delectable melazane all parmigiana and we'd all fight over it. Except for Ludo, whose gluten intolerance meant Nonna used rice flour and made Ludo her own sacred batch.

Inspired by memories of Nonna's melanzane, I decided to make my own eggplant and cheese bake. The results were magnificent and I ate 3 servings! Jonas found some leftovers when he came home and ate them, declaring it was so good he could forget that it was eggplant.

High praise indeed.


Melanzane alla Parmigiana

Anna’s very own recipe. Serves 2 as a side dish or 1 as an indulgent dinner.

Ingredients:

1 medium eggplant
1 egg, whisked
½ cup fine breadcrumbs
½ cup shredded mozzarella
½ cup grated parmigiano
Seasoned flour, for dusting
Oil, for frying
Salt
Sauce:
300ml passata (tomato sauce)
1 dried small red chilli, sliced finely
2 garlic cloves, crushed
¼ cup white wine
1 teaspoon dried oregano
Olive oil
Pinch each of salt, pepper and sugar

Method:

1. Preheat oven to 180’C

2. Slice eggplant into 1.5cm rounds. Dust with salt and sandwich between two paper towels and cutting boards weighed down with cans. This will draw out some of the extra moisture in the eggplant.

3. Meanwhile make the sauce. In a pan with a lid, heat the olive oil and fry the garlic and chilli until softened.

4. Add the white wine and bring to the boil. Evaporate the alcohol for 2 minutes then return to a low heat.

5. Add the oregano, passata, salt, pepper and sugar then simmer gently with the lid on.

6. Start heating oil to shallow fry eggplant.

7. Remove the eggplant, wash off the salt and pat dry with paper towels.

8. Dust eggplant slices with seasoned flour, then dip in egg and coat with breadcrumbs. Drop into the oil and cook until golden brown on both sides (3-4 minutes). Don’t over crowd the frying pan and be sure to drain finished slices on paper towels.

9. In a baking dish, coat the base with a little tomato sauce. Layer eggplant in a single layer, slightly overlapping each other.

10. Cover with mozzarella and then parmigiano and bake in the oven for 15-20 minutes or until cheese has melted and is starting to brown on the edges. Serve with crusty bread and a good glass of wine.


Eggplant are part of the Solanaceae, or nightshade, family that includes tomatoes, bell peppers and potatoes.

They grow hanging from vines and have a bitter taste and spongy texture. Originally they were used as a decorative plant because the bitterness of the original cultivars made people believe that eating them would cause insanity, leprosy and cancer.

Once cultivars lost their bitter taste, in the 18th century, they soon became very popular.

Eggplants are native to India but it’s believed they were first cultivated in China (5th century B.C.E.) where the first written record was recorded in an ancient agricultural treatise.

Given the numerous Arabic names for eggplant, but the few Greek and Latin names, it is believed that eggplant was introduced to Europe, during the Middle Ages, through North Africa then the Mediterranean.

Even in the English speaking world the name of this vegetable is debated. In the UK it’s known as aubergine, in the US, Canada, Australia and New Zealand we call it eggplant and in South Africa they call it by its Indian name brinjal.

Eggplants contain phytonutrients, many of which have antioxidant activity. For instance nasunin, which is found in eggplant skin, is believed to be a potent antioxidant and free radical scavenger that protects cell membranes. Chlorogenic acid, also found in eggplant, has anti-cancer, antimicrobial, anti-cholesterol and antiviral properties.

Wikipedia says wggplants are a high source of “dietary fibre, potassium, manganese, copper and thiamin (vitamin B1). It is also a good source of vitamin B6, folate, magnesium and niacin.” Yep, I believe it.

On the negative side, eggplant is among the few foods that contain measurable amounts of oxalates, meaning people with kidney or gallbladder problems should avoid eating eggplants, which may cause stones.

Eggplant also contains more nicotine than any other edible plant, however you’d need to eat 9kgs (20lbs) to get the same levels as one cigarette.

Eggplants come in a variety of colours, shapes and sizes. When purchasing, choose onbe that is firm and heavy for the size, has smooth and shiny skin with vivid colouring.

According to Wikipedia, today the top producers are, in order: China, India, Egypt, Turkey, Indonesia, Iraq, Japan, Italy, Sudan and the United Kingdom.


This is my contribution to Weekend Herb Blogging, hosted by Susan from the Well Seasoned Cook.


Other Morsels & Musings eggplant recipes:
Aubergine & Ricotta Rolls
Bouranee Baunjan (Afghani-style eggplant w yoghurt)
Caponata (Italian anchovy & roasted vegetable salsa)
Grilled Eggplant w Tahini-Yoghurt Dressing
Melanzane al Forno (Italian baked eggplant)
Sambal Tuwung (Indonesian eggplant salad)
Vegetarian Lasagna

Other blogger's eggplant recipes:
Aloo Baingan (potato & eggplant curry) - Delectable Vegetarian Recipes
Baba Ghanouj (Lebanese smoky eggplant dip) - Simply Recipes
Eggplant Clafoutis - Mediterranean Cooking in Alaska
Eggplant Ricotta Timbales - Christine Cooks
Etsiz Patlican Güveç (Turkish eggplant stew) - Almost Turkish
Fried Eggplant w Walnut & Mint Sauce - What Did You Eat?
Grilled Eggplants w Korean BBQ Sauce - Fat Free Vegan Kitchen
Honey Garlic Grilled Eggplant - Beyond Salmon
Indonesian-style Eggplant w Spicy Peanut Sauce - Love and Olive Oil
Mediterranean Eggplant & Barley Salad - Smitten Kitchen
Moussaka - Je Mange la Ville
Quail Eggs stuffed w Cashew & Eggplant Puree - La Tartine Gourmande
Sabich (Iraqi-Jewish eggplant salad) - Herbivoracious
Sichuan Eggplant - Fearless Kitchen
Tunisian Eggplant Salad - Cook (almost) Anything At Least Once
Yakinasu (Japanese-style grilled eggplant) - Apple Pie, Patis & Pâté

References & Photo:
http://en.wikipedia.org/wiki/Eggplant
http://www.whfoods.com/genpage.php?tname=foodspice&dbid=22
http://en.wikipedia.org/wiki/File:Aubergines.jpg

Tags:

Monday, 16 February 2009

peach & ginger punch


Inspired by the current economic crisis, the theme for Mixology Monday this month is Hard Drinks for Hard Times, hosted by Matthew of Rowley's Whiskey Forge. Not only will the round-up provide many ideas for debauchery on the cheap, but the writing is tres witty.

For my own entry, I chose this Peach & Ginger Punch because it makes me think of old ladies on a porch during the Depression (the first one), drinking the juice from the peaches in their gardens.

Most of the mixers are cheap and easy to come by, rum is hardly the most expensive of spirits and since it’s summer in Australia peaches are a plenty. And because you can serve a lot of people with hardly any alcohol, it’s very economical. All contributing to the theme.

But best of all, it’s very tasty and is one of those drinks that makes you smile as you lean back and watch the world go by.


Peach & Ginger Punch

Recipe by Michele Cranston. Serves 8.

Ingredients:

1 litre ginger beer
500ml cups peach nectar
250ml dark rum
75ml ginger syrup or ginger wine
65ml lime juice
4 white peaches, peeled and finely sliced
Fresh lime slices, for garnish
Torn mint leaves, for garnish

Method:

1. Chill the ginger beer and peach nectar.
2. Combine the ginger syrup, rum and lime juice in a non-reactive container. Add peaches and chill for 2 hours.
3. When everything is cold, combine ingredients in a punch bowl and serve with garnish.


Tags:

Friday, 13 February 2009

scallops w lemongrass & kaffir vermicelli


It might not look very nice, but this noodle dish is quite delicious.

It’s not quite as delicious as the version I tasted in Ubud (Bali, Indonesia) at the Casa Luna restaurant, but then getting my hands on the tiny kaffir limes and other native ingredients isn’t as easy in Sydney. It’s as close as I’m going to get.

This is my contribution to the 100th episode of Presto Pasta Nights, hosted by the founder Ruth from Once Upon A Feast.

If you’re interested in more Balinese posts (photos and all!), I’ll add the links below the recipe.


Scallops w Lemongrass & Kaffir Vermicelli

Anna’s version of a meal eaten at Casa Luna. Serves 2.


Ingredients:

125g vermicelli
12 scallops
100ml coconut milk
3 young lemongrass stalks
4 kaffir leaves, very finely sliced
Juice of 1 lime
Pinch of long pepper
Pinch of salt
1 small red chilli, thinly sliced for garnish
2 tablespoons baby mint leaves

Method:


1. Remove the tough outer leaves of the lemongrass stalks until you come to the tender, pale leaves underneath.

2. Mince the stalks very, very finely although stop when you reach the higher, woodier part of the stalk. You only want the soft, moist end near the bulb.

3. In a pan, heat the coconut milk with a little salt and long pepper as well as the lemongrass and kaffir. Bring almost to the boil the reduce heat and simmer for 10 minutes. Remove from heat.

4. In the meantime, soak the vermicelli in a bowl of freshly boiled water until soft (about 5 minutes).

5. In the meantime, season the scallops with salt and long pepper, then pan fry for max 60 seconds on each side.

6. Drain the vermicelli and divide between two bowls. Divide the lime juice and sprinkle over the noodles.

7. Divide the coconut sauce into the bowls until there’s just enough to dress the vermicelli. Toss well.

8. Garnish noodles with chilli and mint then top with scallops. Can be served warm or room temperature.


Bali, Indonesia (July 2007)
Balinese cooking class
Dining out in Bali
Balinese countryside
Sirsak - soursop fruit
Salak - snakefruit


Tags:

Wednesday, 11 February 2009

creole-spiced chicken


This is the first Creole/Cajun recipe I've made for my 2009 Food Challenges. The flavours worked well and made chicken breasts, something I'm not a huge fan of, taste very good.

Creole-Spiced Chicken
Anna’s very own recipe. Serves 4.


Ingredients:

4 chicken breasts
1 batch Creole spice mix (see below)
¼ cup lime juice
1 teaspoon liquid smoke

Method:

1. Combine spice mix with lime juice and liquid smoke.

2. Marinate chicken breasts overnight.

3. Barbeque chicken over charcoal for 10 minutes.

I served my spiced chicken with grilled zucchini & chimichurri sauce and arroz congrí (tomato and black bean rice).

Creole Spice Mix
1 teaspoon sweet paprika
1 teaspoon garlic powder
1 teaspoon cayenne pepper
1 teaspoon dried oregano
1 teaspoon coriander powder
½ teaspoon dried chilli flakes
½ teaspoon freshly ground black pepper
½ teaspoon dried marjoram
¼ teaspoon ginger powder
¼ teaspoon filé powder
Pinch of nutmeg

Tags:

Monday, 9 February 2009

esquite: mexican corn snack


Elote is a typical Mexican dish, served by street vendors around the country. It consists of grilled corn served with accompaniments like lime, salt, chilli, mayonnaise, sour cream, cheese and even shredded chicken.

I prefer esquite, which is identical to elote only the corn kernels are sliced from the cob into a glass and the accompaniments piled on top so you can eat it more easily with a spoon.

Now I have never been to Mexico, so my experiences of elote and esquite come purely from my dinners at the home of Mexican amigos Vicky & Roberto.

We're hoping to make it to Mexico in January 2010, as part of a huge around-the-world journey, but since it's a very ambitious holiday plan it might not happen. Fingers crossed.


In anticipation, I made Mexican food a focus cuisine for my 2009 Food Challenges and have made quite a few things already. This being another one!

We usually eat our elote and esquite sprinkled with tajin, but since this Mexican seasoning of powdered chilli, salt and dehydrated lime juice isn’t readily available all over the world I’ve provided an alternative recipe.


Esquite

Vicky & Roberto's recipe. Serves 2.


Ingredients:

2 corn on the cob
4 tablespoons mayonnaise
2 tablespoons grated parmesan
1 lime, cut into quarters
Pinch of cayenne pepper
Pinch of salt
Olive oil

Method:

1. Heat your BBQ.
2. Brush the corn with the olive oil then grill until cooked through.
3. Slice the kernels from the cobs, into a bowl, and squeeze out corn milk from the cob.
4. Toss the corn with salt and cayenne then divide between bowls.
5. Allow people to top their corn with mayonnaise and cheese to their taste, then provide lime quarters for squeezing.

Variation:
¼ teaspoon tajin instead of cayenne pepper.


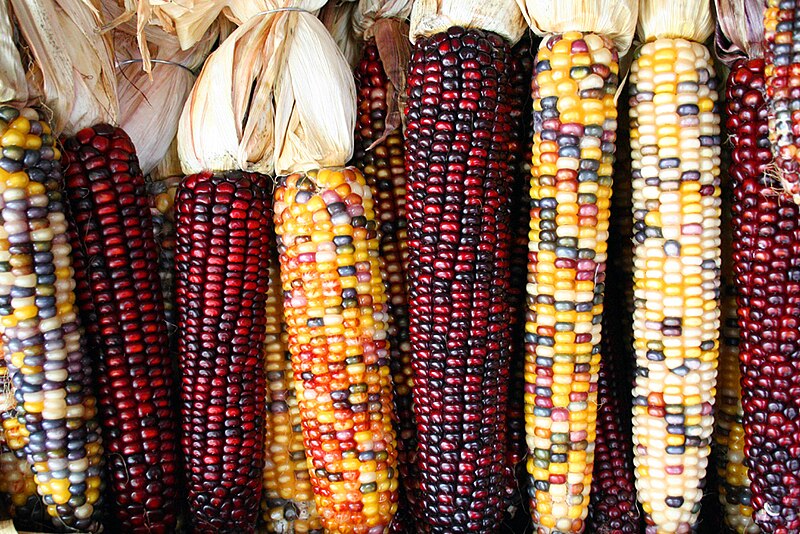
Corn, also known as maize, is one of the many wonderful and delicious food sources to come from the Americas.

Corn originated in Mesoamerica then spread across the American continent. Once the Europeans began to colonise the Americas, corn spread all over the world.

The word maize comes from the indigenous Taino through Spanish while the word corn used to be applied to any kind of cereal.

It’s believed that corn was first domesticated in Mexico more than 9,000 years ago. By 1500BCE it started to spread all over the Americas and became the staple food for pre-Columbian North American, Mesoamerican, South American, and Caribbean cultures.

When corn cultivation spread to the US Southwest (1st millennium CE) and US Northeast and south-eastern Canada (2nd millennium CE) it created new landscapes as Native Americans cleared forest and grassland for their crops.

Corn is the most widely grown crop in the Americas and the US produced 332 million tonnes annually on its own. It’s therefore not surprising that five of the world’s top ten corn producers are located in the Americas. The top producers are, in order, the US, China, Brazil, Mexico, Argentina, India, France, Indonesia, Canada and Italy.

Corn contains and an indigestible protein which can cause an allergic reaction leading to rashes, swelling, itching, diarrhoea, vomiting, asthma and even anaphylactic shock. What’s even stranger is that people with corn allergies almost always have peach allergies too.

Check out the Weekend Herb Blogging round-up over at Cheryl's Gluten Free Goodness.


Reference:
http://en.wikipedia.org/wiki/Maize
http://en.wikipedia.org/wiki/File:Corncobs.jpg

Tags
:

Saturday, 7 February 2009

warm roasted vegetable salad


Families come in all shapes and sizes.

Until I was 7 I grew up with a mother, a father and two brothers. Then my parents divorced and I suddenly had two extra sisters, a step father and an extra mum and two wonderful extra grandparents.

Not to mention my stepsisters' mother and her new husband and his kids. And my mother's two close female friends their children. Whoa!

You get the picture. It's a mega tribe that was not without its fights and frictions but now that we're all adults the bad egg was weeded out and the true, loving family members remain.

I'm reflective of all of this because one of my closest friends just had a baby. She had planned, so hopefully, to have a home birth but her son showed his first streak of parental rebellion. He refused to come out and too late grew too big for my friend’s tiny frame and she ended up having to have a caesarean.

I felt bad for her because she's wanted that home birth so much, but then I also felt so happy for her that she was able to make all the right choices throughout her 9 months that led to a beautiful, healthy boy - at 9.1 pounds no less (4.1kg)!!!

She is only my second friend to have a child so it's all very new (and frightening!) to me. It makes me think about my own family and when Jonas and I will decide to have kids.

To be honest, I'd rather someone just hand me a 2yr old and say "it's yours!" because babies and pregnancy do not interest me in the slightest. But I highly doubt some tired mother would hand over her toddler in the supermarket and let me keep it, so it looks like I'll just have to grow my own.

I am so jealous of men’s roles in the baby-making process. As a woman I feel utterly ripped off.


Somehow, this little whinge leads into the February Monthly Mingle theme of "healthy family dinners". The host is Michelle from What’s Cooking Blog.

Although most people think “kids” when they think “family” not everyone has kids and so my contribution to this healthy family dinner theme is a recipe for my own little family of two: Jonas and me.

Since he is a vegetarian, my recipe contains no meat. And since it’s winter in the northern hemisphere, where most of my blogging pals and readers reside, I decided to go with a recipe we cooked last winter.

Enjoy!


Warm Roasted Vegetable Salad

Jonas’ very own recipe. Makes ½ cup.

Ingredients:

250g cherry tomatoes
6 potatoes, chopped into chunks
¼ butternut pumpkin, chopped into chunks
1 parsnip, chopped into chunks
150g baby spinach
3 garlic cloves, crushed
1 teaspoon sumac
Olive oil

Method:


1. Preheat oven to 180’C.

2. In a baking tray, toss root vegetables with olive oil and crushed garlic.

3. Bake for 20 minutes. Then add another baking tray holding cherry tomatoes tossed with sumac and olive oil.

4. Bake for another 20 minutes until tomatoes are soft and starting to wrinkle and burst.

5. Check the root vegetables and remove when they are tender.

6. Drain the excess olive oil from the tomatoes and vegetables to use in sauce.

7. Toss the warm vegetables with the baby spinach and herb and mustard sauce (recipe below). Serve warm.

Note:
cheese in this salad would taste very good too.


Herb & Mustard Sauce
Jonas’ very own recipe. Makes ½ cup.


Ingredients:

3 tablespoons fresh chopped chives
2 tablespoons fresh chopped parsley
1 tablespoon fresh chopped dill
2 tablespoons wholegrain mustard
1½ tablespoons white wine vinegar
5 tablespoons olive oil (use oil from roasting vegetables)
Freshly milled salt and pepper, to taste

Method:

1. In a food processor or blender, combine the herbs, mustard and vinegar until pureed. Add salt and pepper.

2. With the motor running, slowly add the olive oil until it emulsifies with the sauce. Taste to ensure acidity is balanced and adjust as needed.

Note:
Use as much of the olive you can salvage from the roasted tomatoes and vegetables but ensure at least 5 tablespoons are added to the sauce.

Tags:
Related Posts with Thumbnails